So when it comes to roofing you have a few choices.
The two main types of covering materials to choose from are tin or tile. Both have strengths and weaknesses as well as design and cost considerations. There are also a few “add-ons” that don’t seem to get much publicity but are definitely worth considering before its too late (and your roof is on). So, in the spirit of orderly banter, I shall first discuss the humble tile roof.

1. The Sex Appeal
Tiled roofs are traditional in Australian construction. The main reason for this would be cost and market-driven demand. Whilst there are many different profiles and materials that can be used in roof tiles, the traditional profile featured below still seems to be the favourite.
It’s obvious that whilst there is a large range of roof profiles and materials you “can” select from most people consider the roof not to be a feature of the home only that it represents a contrasting colour to the remainder of the external facades. Obvious exceptions to my generalisation of roof colour selection consideration are architectural homes or custom, not project or volume homes (the market that I have been weaned on).
So, why are tiles sexy? Good question. Tiles are sexy because they are thick, heavy any strong. I’ve also heard that after a few drinks they have quite the sense of humour too.
2. They Are Heavy!
I mean really, I know I shouldn’t have to mention that concrete is heavier than tin. Consider for a moment that the design load per m2 for a tile roof is around 40-50kg (even more when they are wet (when it rains). Compare this to a tin roof that is 3-4kg/m2. Due to the sheer weight of a tiled roof covering, the truss system must be more solidly designed and manufactured to support the additional weight. Trusses for a tiled roof will be installed at 600mm centres. For a tin roof it’s possible to install the trusses at 1200mm centres using ICJ (intermediate ceiling joists) at 600mm centres (and hanging beams to support ceiling lining weights). I’m not saying this is ideal for straight ceiling lines but it does mean less framing is used in the roof farming (material cost) & also less labour to install.
It would be easy to surmise from my last statement that tin roofs are natural cheaper than tile, but, this is not the case. I’ll explain this in more detail in another post.

3. Tie down
There are two primary wind categories that we build for in South East Queensland, N2 & N3. As an aside, if you construct a house using tin roofing material the tie down is automatically N3 the higher of the two tie down classifications. The wind category effects a tile roof only in terms of how many tiles are clipped to the timber batten (tied down to the roof batten). The roof batten is nailed to the roof truss completing the bracing to your home as well as forming the base for the tile to be laid on. In an N2 classification, every second tile is clipped to the roof batten. In N3 classification, every tile is clipped.
In the picture below the small metal bracket with the “dog leg” that is sticking out from the valley and clipping around the tile? That’s the tile clip I’m referring to.

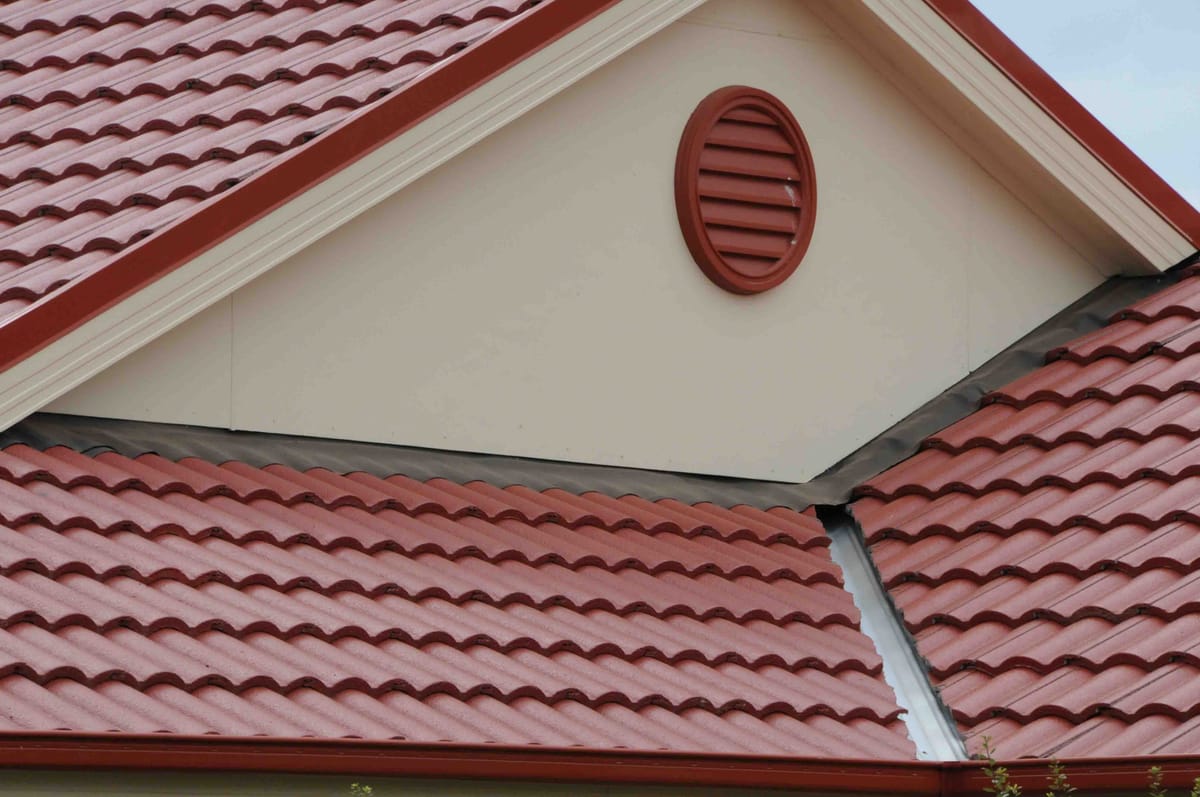
4. Valley Tiles - Cut Tiles
The valley is a unique area of the roof for a few reasons. One reason is that there are more clips per roof tile in this location than others. Additional clips are used in this area because small sized, cut “valley tiles”, are prone to dislodging, falling into the valley or not sitting as they should. Additional clips are installed here to prevent this from happening.
Another reason is that it’s only in this area of the roof that half the tile may be sitting on the timber batten and part of the tile may be held up only by the tile before it, the tile overlap.
Often clients ask me if I can flatten the last one or two cut tiles in the valley, so they sit “flat”. What causes the valley tiles to kick upwards is that part of the cut tile is sitting on the valley iron (the bit that the water runs down and to the guttering system). The tin valley iron has an upturn on both edges to stop water from “blowback” during wet weather, from entering into the roof cavity. If we were to flatten out the valley iron, to rectify a few “slightly raised” roof tiles we could potentially be creating another larger water ingress issue.
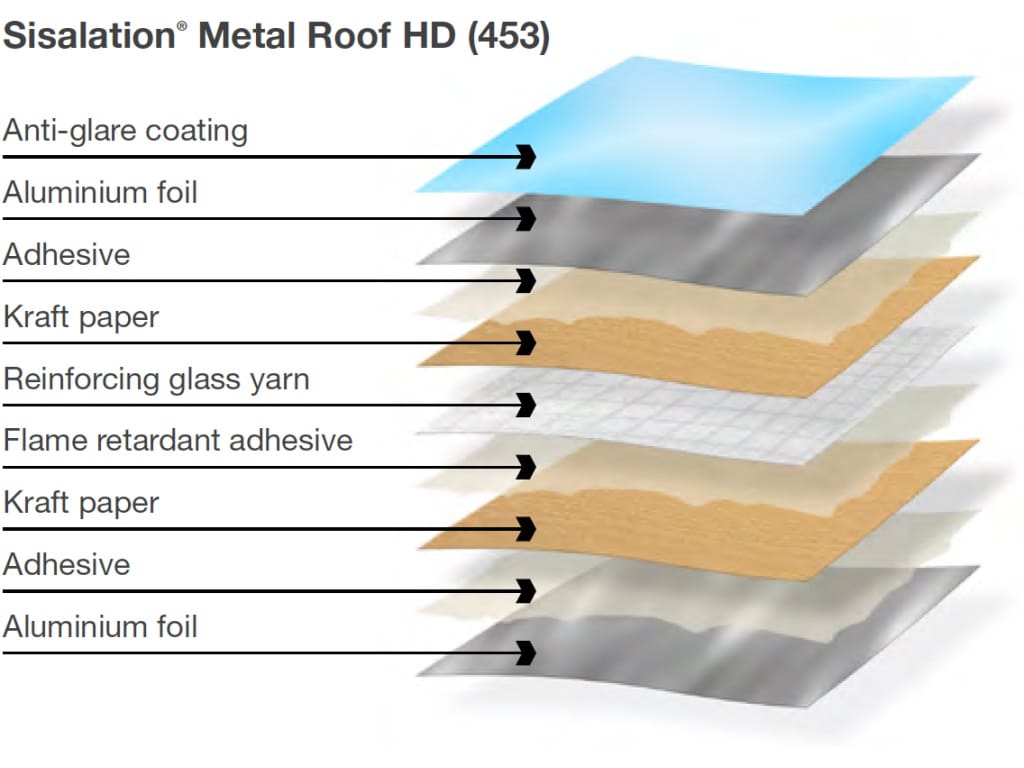
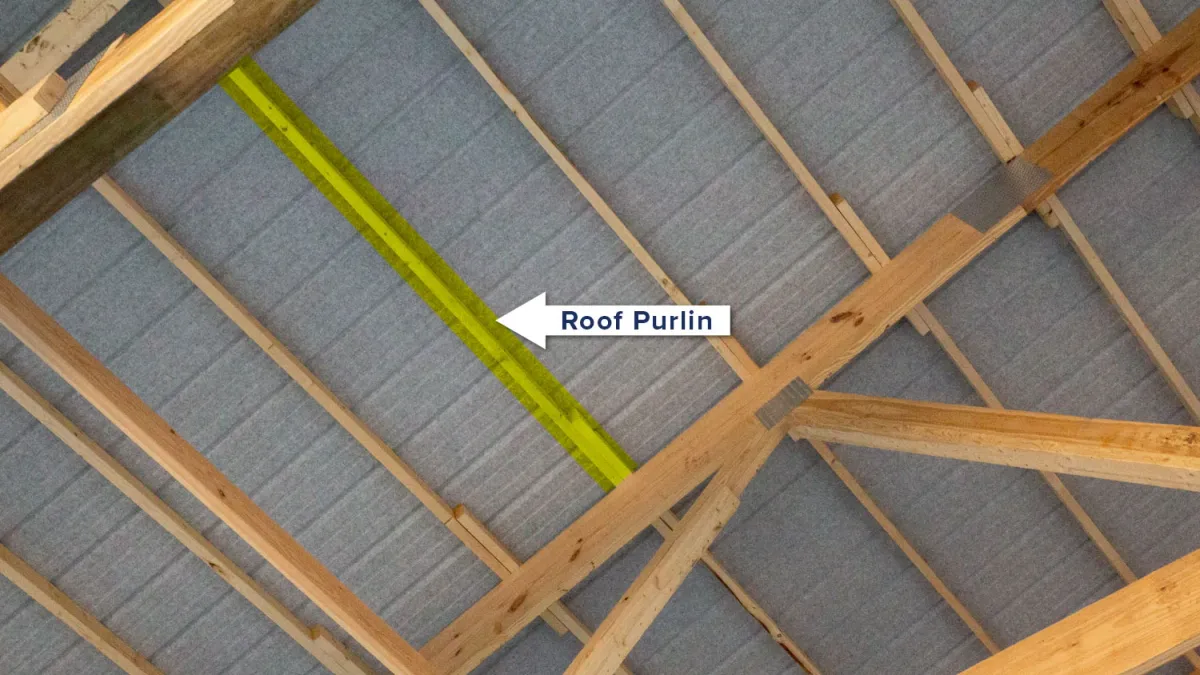
5. Sarking
The green paper like product you see sitting under the timber roof battens, that the tiles are sitting on top of, is what is called sarking.

Roof sarking will protect the frame of your house from the weather during construction. When your home is completed, sarking will protect your roof cavity from storm-driven rain and dust, improve the thermal performance, help it resist bush fire ember attack and reduce the risk of harmful condensation - Courtesy: CSR Bradford
For the additional cost to install sarking I believe it’s definitely worth it.
This great little image shows you some of the benefits of installing sarking on your home.

6. Valley seal (dry valleys) & Storm seal (wet valleys)
Valley Seal is an upgraded product from dry valleys (no bedding and pointing) or wet valleys (bed and pointed) and can be installed on either. Valley seal is a foam product layered in bitumen to repeal water, eliminate pests entering roof cavity areas and to stop leaves from building up. The image below shows valley seal in position.

Stormseal is a term use to describe valleys that have been bed and pointed under the gap between the cut alley tile and the valley iron. The benefit of using this method is that valleys are sealed completely meaning there is no possibility that wind-driven water, rain, debris or embers can get into the roof cavity. This is especially useful on roof valleys that face the prevailing weather conditions or in bushfire hazard areas.
Most clients I have mentioned storm seal to are completely un aware that this can even be done to their roof system. Its another service I highly recommend you ask for if you have concerns about your house orientation to the prevailing weather or have bushfire requirements for construction.
7. Gutter Guard
Is a great product (shown below fixed to the valley and gutters on a tin roof home) to use when you have trees around your home. Instead of tree debris, leaves and window blown junk getting caught in your gutters the material falls to the ground where it can be easily cleaned and disposed of. No more gutter cleaning and no more working from a ladder at heights. This can be an expensive product should you do your entire home. It’s entirely possible that you only install gutter guard in the areas of your home that are affected by the surrounding trees.