Take The Quiz On This Post
Read the post, then take the quiz—test your knowledge and see what you’ve learned!
1. Introduction
If you’ve ever wandered through a tile showroom or spent a late night pinning your dream bathroom, you know there’s more to tiling than meets the eye. From choosing the style to making sure your floor is properly levelled, has the right falls and waterproofed,it can feel like a lot to take in and know.
That’s where AS3958.1:2007 Ceramic Tiles—Guide to the Installation of Ceramic Tiles comes in. It explains the minimum requirements for, you guessed it, the installation of floor and wall tiles.
AS3958.1:2007 is structured around sections that set out best practices, minimum tolerances, and detailed requirements fro installing ceramic tiles (as the name of the standard says 😄).
The standard includes guidelines on substrate preparation (Section 4), adhesive coverage and application (Section 5.6), and strict tolerances for lippage (Section 5.4.6). Its important to know the contents of the standard, yourself and your contractor to ensure a compliant installation, one that lasts.
In this post we'll give you an overview of AS3958.1:2007 Ceramic Tiles standard and what you need to know.
2. Understanding What it is And Why it Exists
2.1. Overview
So, what exactly does AS3958.1:2007 do, and why should you care?
Picture it as a comprehensive guide that tells tilers, builders, and even DIYers how to properly install ceramic (and sometimes porcelain) tiles. This standard covers:
- Which materials to use and why (e.g., picking the right adhesive).
- How to handle different surfaces (like concrete floors or timber framed walls and floors).
- Ensuring consistent grout lines, good tile alignment, and minimal “lippage” (the annoying height differences between tiles that every home owner will notice).
2.2. Technical Perspective
From a professional standpoint, Section 1 of AS3958.1:2007 explains that the standard applies to the installation of ceramic tiles in both residential and commercial applications. It covers:
- Floors and walls, whether they’re indoors or outdoors.
- Adhesive-based installation methods (as opposed to, say, mortar-bed methods, which might be referenced elsewhere).
- Acceptable tolerances, detailing how much variation is allowed in levelness, tile spacing, and overall finish.
It’s important to note that AS3958.1:2007 doesn’t function by itself. For example, bathrooms or other wet areas also must comply with AS3740 (Waterproofing of Domestic Wet Areas). Likewise, if you’re tiling commercial kitchens, there may be additional health and safety regulations to follow.
2.3. Why It Matters
- By understanding what’s in scope (tile materials, installation techniques, etc.), you’ll be able to spot check whether your tiles are being installed “by the book.”
- Knowing what's in the standard ensures all parties (builders tilers, supervisors) work to the same guidelines. This consistency reduces disputes if problems arise later, because AS3958.1:2007 is the reference document to define installation quality.
AS3958.1:2007 is the standard that defines tiling installation standards and tolerances.
This standard outlines a common framework for materials, methods, and tolerances, which means everyone knows the benchmark for acceptable tiling installation and quality assurance.
3. Key Definitions & Terminology
3.1. Overview
When you first dive into any tiling project, you’ll come across a handful of terms—like “substrate,” “adhesive,” and “movement joint”—that can make your head spin if you’re not familiar with them.
Understanding these terms makes it so much easier to communicate with your tiler or builder and to spot whether things are going smoothly during installation. Here are some core terms you’ll see again and again:
- Ceramic Tiles: A broad category, sometimes used loosely to include porcelain. These are made from clay and other materials, fired in a kiln.
- Substrate: Essentially the surface you’re tiling onto—like a concrete slab or a timber floor. If the substrate isn’t prepared correctly, even the highest-quality tiles won’t stay put.
- Adhesive: A glue-like substance (often cement polymer modified based) that secures the tile to the substrate. Different adhesives suit different tile types and environments (e.g., indoor vs. outdoor).
- Grout: This fills the gaps between tiles, providing both a finished look and preventing dirt or moisture from sneaking underneath.
- Movement Joint: A deliberate gap filled with flexible material (like silicone) that allows the tiled surface to “breathe” when the building expands or contracts.
3.2. Technical Perspective
Section 1.3 of AS3958.1:2007 covers definitions that ensure everyone—from homeowners to professional tilers—is speaking the same language. Here’s a more technical breakdown:
- Ceramic vs. Porcelain: While porcelain is a type of ceramic, it’s denser and has a lower water absorption rate (<0.5%).
- Substrate: The standard defines acceptable substrate materials (concrete, render, plasterboard, timber) and spells out how each should be structurally sound, free of contamination, and meeting certain flatness tolerances.
- Adhesive Classes: AS3958.1:2007 often references different adhesive classifications (e.g., C1, C2 for cementitious adhesives), specifying minimum bond strength or flexibility requirements.
- Grout Types: Cementitious, polymer-modified, or epoxy. Each has specific properties—like chemical resistance or shrinkage rates—important for commercial or high-moisture settings.
- Movement Joints: Sometimes called “control joints,” they’re essential where large expanses of tile can crack if the surface can’t move slightly. Section 3 clarifies that these joints must be distinct from grout lines, using a flexible sealant or dedicated expansion strip.
3.3. Why This Matters
- Understanding these definitions empowers you to ask better questions (“Are we using the right adhesive for these large porcelain tiles?”) and catch potential red flags early.
- For Professionals: Proper definitions reduce misunderstandings on-site. Everyone knows the exact meaning of “adequate substrate prep” or “full adhesive coverage,” which leads to fewer disputes and better end results.
Knowledge is power in construction. Understanding core tiling terms goes a long way to ensuring clear communication, maintaining best practices, and avoid costly mistakes stemming from misinterpretation. Yes, this is your builders responsibility, but having an understanding helps you help them.
4. Substrate Preparation & Requirements
4.1. Overview
If you’re picturing your dream tile design, you might assume the magic all happens when the tiles themselves go down. But ask any credible tiler, and they’ll tell you the real magic starts underneath.
Your substrate—be it a concrete slab, a timber floor, or a concrete/masonry wall—has to be flat, stable, and free of contaminants before you even think about adhesive and grout.
Why? Because if the base is out of level or constantly flexing, tiles won’t stay put for long, and you’ll be dealing with drummy tiles, cracked grout or uneven/lippy tile edges.
Here’s what you need to know:
- Flatness matters: Even a few millimetres of difference can cause “lippage” (where one tile sits higher than another). Think of a small ridge in your living room floor—no one wants to feel that underfoot (especially after a heavy rum night).
- Clean and dry: Dust, oil, leftover paint, or old adhesives can prevent the new adhesive from bonding properly. The substrate should also have the right moisture content.
- Fix issues early: If your substrate is noticeably uneven or damaged, you can use levelling compounds, floor grinding or even a new screed to smooth things out.
- It’s more work upfront but worth every penny if it keeps your tiled surface looking pristine for years.
4.2. What does the standard say?
From the viewpoint of AS3958.1:2007, Sections 4 & 5 spell out the condition and preparation of substrates in detail:
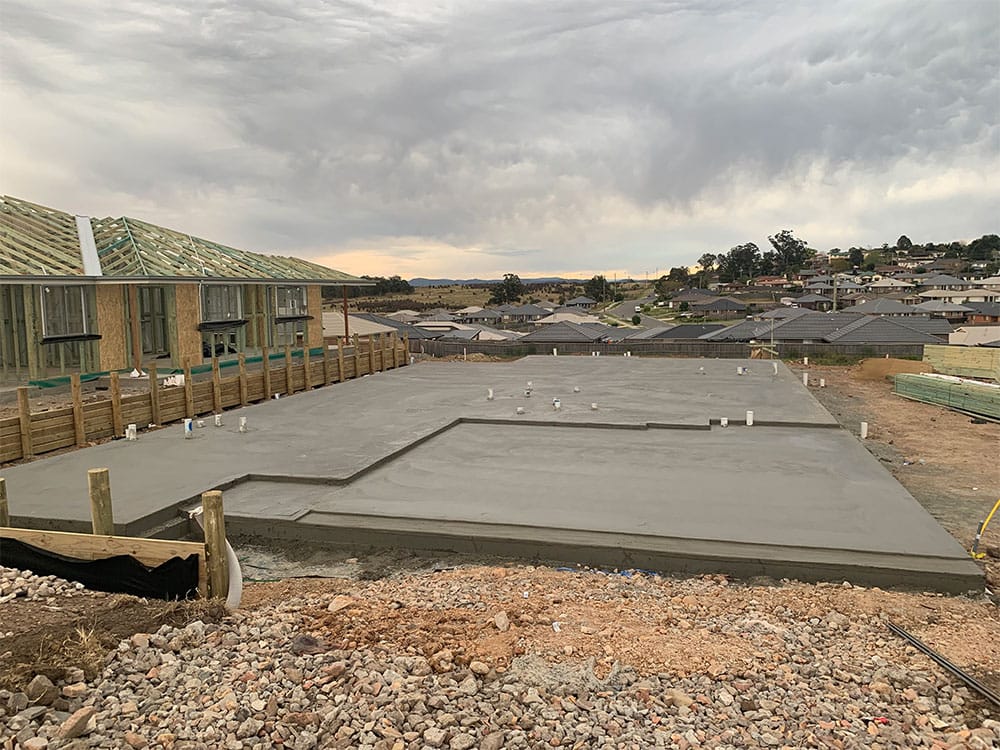
- Acceptable Substrate Types
- Concrete: Should be fully cured (often 28 days), with no excessive cracks or “laitance” (a weak, powdery surface layer). See Appendix B and clause 4.5.4.2(d) for more on this.
- Timber or Particleboard: Requires adequate stiffness and often a suitable underlay (like fibre cement sheeting) to reduce deflection.
- Render or Plasterboard: Must be sound, not drummy or peeling, and typically free from residual paint or contaminants.
- Tolerances for Flatness/Levelness
- The standard might specify that the deviation under a 2 m straightedge should not exceed about 3–4 mm (though specifics can vary with tile size).
- If the substrate fails this test, screeding or self-levelling compounds are recommended.
- Moisture Content
- If your substrate is too damp (like a newly poured concrete slab), it can interfere with adhesive curing or lead to efflorescence (white salt deposits).
- AS3958.1 references moisture testing, especially for timber or other sensitive materials specifically in clause 5.2.2.2 and Appendix A8, also C2.2 Efflorescence, Table E1 (swimming pools).
- Surface Contaminants
- Section 4.5.3.2(d) and Appendix B underscores removing oil, grease, dust, old adhesives, or any substance that could compromise the new adhesive bond.
- Primers
- Sometimes recommended for highly porous substrates, ensuring the adhesive doesn’t dry out too quickly and lose its bonding strength. All product manufacturers detail if and when primers are required as part of their adhesive system. Always check the PDS and TDS prior to application to ensure the correct compatibility chain of products is used (maintain warranty).
4.3. Why It Matters
- An uneven or poorly prepared substrate is the number one culprit for tile failures. Ensuring your tiler takes this step seriously will save you time, money, and headaches down the line.
- Correct substrate prep is non-negotiable. Failing to meet Section A6, Section 4.4.42 flatness and all cleanliness requirements (oil, grease, wax, coatings, inclusions, dust) can expose you to warranty disputes and costly call-backs in the event of adhesion failures.
Spending the extra effort on substrate preparation is like building a house on a solid foundation. No matter how gorgeous your tiles are, they’re only as good as the surface they’re installed on.
5. Selecting the Right Tile for Your Project
5.1. Overview
Tiles come in all shapes, sizes, and finishes. Walk into a tile shop, and you’ll be blown away by glossy marbles, rustic ceramics, sleek porcelains, and everything in between. While it’s exciting to choose a look you love, functionality should also guide your selection. Here’s what homeowners generally consider:
- Room Type
- Wet Areas (bathrooms, laundries): Slip-resistant or textured tiles can save you from slippery floors. Also be mindful of how they will be cleaned (mop, scourer, broom, squeegee?)
- High-Traffic Zones (hallways, kitchens): Consider durable porcelain or high-quality ceramics that stand up to foot traffic and the occasional dropped object.
- Tile Size & Layout
- Large-Format Tiles create fewer grout lines (a plus for easier cleaning) but demand a flatter substrate and are more expensive to lay.
- Smaller Tiles or Mosaics can add visual interest, especially as accents or feature walls. Make sure if you select glass mosaics you understand that often they must be cut with specialist tools, not all trades own them, to ensure a clean and straight cut edge. Discuss this with your builder in advance of installation to avoid time or cost issues.
- Finish & Style
- Glossy: Reflects light and can make a small space feel bigger, but can be slippery when wet.
- Matte/Textured: Hides dirt and footprints better, and generally safer underfoot in moist areas.
- Budget & Maintenance
- Natural stone (marble, travertine) can be pricier and needs regular sealing.
- Ceramic and porcelain often require less upkeep.
5.2. Technical Perspective
While AS3958.1:2007 mainly discusses installation of tiles, it does reference tile classifications that can help you make choices:
- Water Absorption Classes
- Impervious Tiles (e.g., porcelain) have very low water absorption (<0.5%), making them ideal for bathrooms, pools, or exteriors.
- Vitreous or Semi-Vitreous ceramics might absorb a bit more moisture but are still suitable for many indoor applications.
- Wear (PEI) Ratings for Glazed Tiles
- Rated from Class 1 (light residential) to Class 5 (heavy commercial). If you’re tiling a busy entryway or commercial kitchen, opt for a higher PEI rating.
- Slip Resistance
- Building codes may reference slip resistance standards (like AS4586 or AS4663) for floors exposed to water, especially in public or commercial settings.
- AS3958.1 points out that tiles must be “fit for purpose,” so your choice of tile surface finish is part of compliance.
- Tile Format Tolerances
- AS3958.1 acknowledges that larger tiles (e.g., 600×600 mm or bigger) can accentuate substrate imperfections, so careful substrate preparation and flatness is required.
- Rectified tiles (mechanically cut edges) allow narrower grout lines but demand the most amount of care to install (flatness and surface preparation, installation care).
- Want to not go "A over T" due to poor tile choices?
- Learn about shade, slip and wear resistance of tiles with our flashcards and quiz below and keep your feet in traction on external tiled surfaces, ramps and walkways.
5.3. Why It Matters
- Tile selection isn’t just about prettiness—it’s about longevity, safety, and ease of maintenance. Picking the right tile can mean the difference between a floor that holds up for decades vs. one that chips or stains easily.
- Matching tile type to the environment (moisture levels, traffic, substrate) is required for meeting the standard’s performance expectations. Inappropriate tile choice is a leading factor in failures or client dissatisfaction.
Choosing the right tile for each space safeguards your investment: you get better performance, fewer repairs, and a smoother installation process.
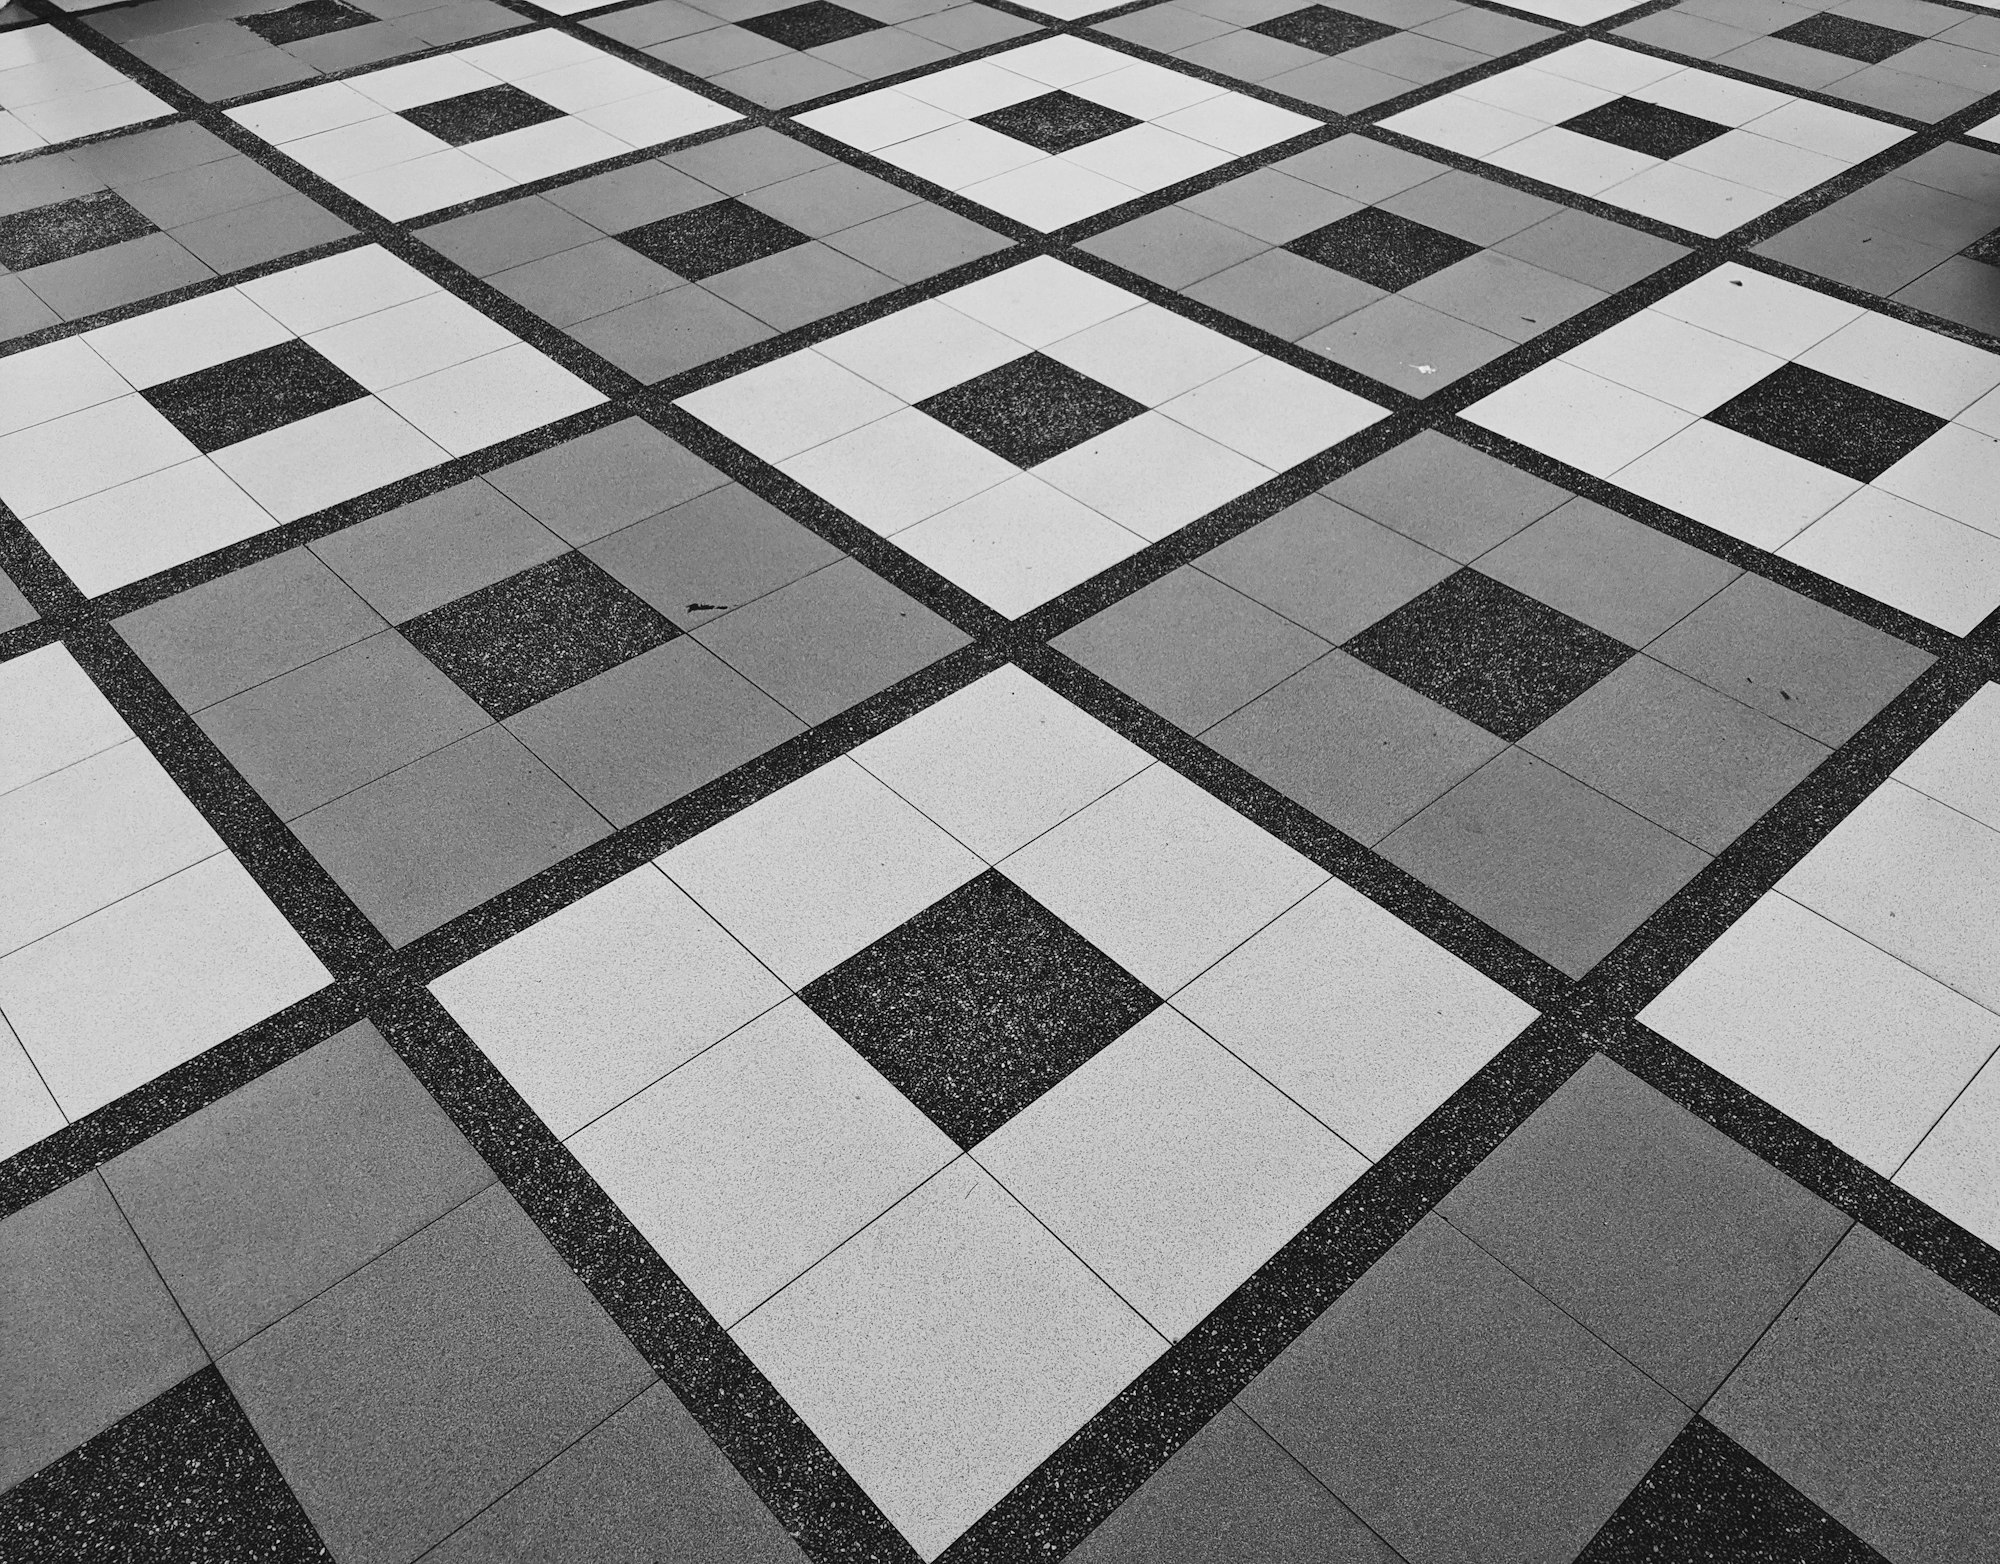
6. Layout and Aesthetic Considerations
6.1. Overview
So, you’ve chosen your tiles—congratulations! Now comes the fun part: figuring out how to arrange them in a way that’s both practical and visually striking. Your layout decisions can dramatically affect how a space feels:
- Choosing a Pattern
- Straight (Grid) Layout: Creates a clean, modern vibe; typically easier to align.
- Brick (Offset) Pattern: Adds a bit of texture and visual interest (like brick walls).
- Diagonal or Herringbone: A nice choice that can make a small space look bigger but requires more cutting and additional costs to lay.
- Focal Points and Symmetry
- Try centring your layout on a feature wall or a main entry point.
- Avoid ending with tiny “sliver” cuts at doorways or corners—plan so tiles at edges are reasonably sized.
- Transitions Between Rooms
- Where tile meets carpet or timber, consider using transition strips or trim pieces to avoid trip hazards or ragged edges.
- Aesthetics vs. Practicality
- Bold patterns might look stunning, but keep in mind installation complexity and the potential for more tile cuts (which can raise labour costs).
6.2. Technical Perspective
From an AS3958.1:2007 standpoint, Section 5.4 (General Criteria For Installation) partly covers setting out—the process of marking reference lines and planning tile placement so that:
- Chalk Lines and Reference Points
- Installers often create a grid using chalk or a laser level to ensure tiles line up consistently. This becomes more critical with larger or rectified tiles, where even a few millimetres off can ruin the alignment.
- Even Joint Spacing
- While the standard may not dictate your exact pattern, it stresses consistent grout widths. If you’re opting for a minimal 2 mm joint, it must remain 2 mm across the entire floor, not 2 mm here and 3 mm there.
- Visual Continuity
- AS3958.1 highlights that layout planning should account for openings, corners, and edges to minimise awkward tile cuts. This not only looks better but also distributes stress points more evenly.
- Minimising Lippage
- Certain layouts (like brick-bond with large-format tiles) can heighten the risk of lippage where tile corners meet the middle of another tile. The standard might suggest offsetting by no more than 30% rather than 50%, depending on tile curvature.
6.3. Why It Matters
- For Homeowners: A thoughtfully planned layout is the difference between a floor that’s merely “nice” vs. one that truly wows. Proper planning also saves you grief down the line, like discovering awkward 1 cm tile slivers behind your door.
- For Professionals: Precise layout following the standard means fewer callbacks. Clients appreciate the visual harmony of well-planned tiles and the lack of lippage or uneven joints.
Tile layout is as much about function as it is about form. By combining AS3958.1:2007’s guidelines on consistent spacing and reference lines with a bit of design flair, you’ll get a result that’s both stunning and structurally sound.
7. Adhesives and Bonding
7.1. Overview
Let’s talk about the “glue” that holds everything together—literally. Your adhesive choice determines whether your tiles stay firmly in place or start popping off a few months down the line.
Here are some practical points homeowners should keep in mind:
- Type of Tile and Location
- Ceramic or Porcelain? Large format or small mosaic? Indoor or outdoor? Different adhesives are required in different scenarios.
- For outdoor tiling (like a patio), you need an adhesive that can handle temperature swings and moisture.
- Pools require specific adhesives to suit water submerged installation.
- Application Technique
- Proper trowel notch size ensures the right coverage. The larger the tile, the bigger the notch you’ll typically need.
- Back-buttering (applying adhesive to the back of the tile as well as the substrate) ensures better contact, especially for large-format tiles.
- The Tarver method this is the process of laying the tile onto the adhesive then sliding it up by by about 10-15mm then back into its final position. This "knocks down" or collapses adhesive ridges, removing spaces and providing adhesive coverage. Check out the video below demonstrating this technique and showing you why this is important.
- Setting and Curing Times
- Don’t rush! If you walk on tiles or grout them too soon, you risk weakening the bond. A little patience goes a long way.
7.2. Technical Perspective
From AS3958.1:2007, Section 5.5 an 5.6 (and Appendix E) outline adhesive specifications, including coverage, bed thickness, and bond strength:
- Adhesive Classifications
- Cementitious (C1, C2 ratings): Usually a powder mixed with water. C2 indicates higher bond strength or performance modifiers.
- Polymer-Modified: These include latex or other polymers, offering flexibility—ideal for substrates prone to minor movement (like timber) or for large-format porcelain tiles.
- Epoxy Adhesives: Extremely strong, chemical-resistant, and often used in commercial or high-moisture settings.
- Coverage and Bedding Depth
- The standard stresses achieving full bedding under tiles, especially in wet areas or outdoors (aiming for close to 100% coverage).
- Minimum bed thickness might be around 3 mm for many floor applications, but can vary with tile size and manufacturer’s instructions.
- Environmental Factors
- Temperature and humidity can speed up or slow down open time (the period during which your adhesive remains workable).
- AS3958.1 advises caution in extreme conditions—too hot, and adhesive skins over prematurely; too cold, and curing may be incomplete.
- Back-Buttering
- Though not always explicitly mandated, it’s strongly recommended for large-format or textured-backed tiles to ensure minimal voids and a robust bond.
7.3. Why This Matters
- Using the wrong adhesive or rushing the cure can lead to popped tiles, cracked grout, or water seepage issues—potentially costly to fix.
- Section/Clause-compliant adhesives and proper coverage not only align with the standard but cut down on call-backs and warranty disputes.
The integrity of your tile job hinges on using the right adhesive and applying it correctly. Proper coverage, suitable flexibility, and respectful cure times ensure a solid, long-lasting bond.
8. Grouting and Joint Widths
8.1. Overview
Grout is the chefs kiss that can make or break the look of your tiled surface. Here’s what you should know:
- Grout Widths
- Narrow Joints (1.5–3 mm): Popular with rectified (precision-cut) tiles for a sleek, modern look, but requires very careful alignment.
- Standard Widths (3–5 mm): More forgiving of slight tile variations and can blend with many décor styles.
- Wider Joints (5 mm+): Might be necessary for rustic or handmade tiles that vary in size, or to match a specific aesthetic.
- Grout Types
- Cement-Based: The most common and budget-friendly. Typically needs sealing to prevent stains.
- Polymer-Modified: More flexible and often more water-resistant. Most often specified and used.
- Epoxy Grout: Extremely durable and stain-resistant, but more challenging and expensive to apply.
- Application Tips
- Use a rubber float to press grout firmly between tiles.
- Clean off excess grout quickly to prevent haze.
- Follow curing times before exposing the surface to water or heavy foot traffic.
8.2. Technical Perspective
Within AS3958.1:2007, Section 5.4 and Section 5.7 (Joints and Grouting) provides specific guidelines:
- Joint Width Tolerances
- The standard usually suggests a consistent joint width throughout the installation.
- Rectified tiles might be laid with a 3 mm joint (Section 5.4.6), but this requires close attention to substrate flatness (preparation) and tile alignment.
- Grout Classification
- Cementitious (CG1, CG2) vs. Epoxy (RG) or Furan Grout (often used in heavy-duty industrial settings). Each type has different performance in terms of water absorption, chemical resistance, and shrinkage.
- Polymer additives can improve flexibility and reduce the risk of cracks.
- Coverage and Cleaning
- AS3958.1 stresses filling joints completely, leaving no air pockets. Incomplete filling can lead to grout cracking or moisture penetration.
- Excessive haze left on tile surfaces can be difficult to remove, and Appendix C (Finishing) typically notes that acid-based cleaners must be used carefully to avoid damaging grout or tile glazes.
- Movement Joints vs. Grout Joints
- It’s critical not to confuse movement (control) joints with standard grout joints. Movement joints need flexible sealants (like silicone), not rigid grout.
8.3. Why This Matters
- Grout affects both appearance and durability. Cracked or porous grout can let water seep under tiles, causing potential damage to the substrate or structure.
- Proper grout selection and application help meet the standard’s guidelines for a trouble-free finish.
9. Movement Joints and Expansion Gaps
9.1. Overview
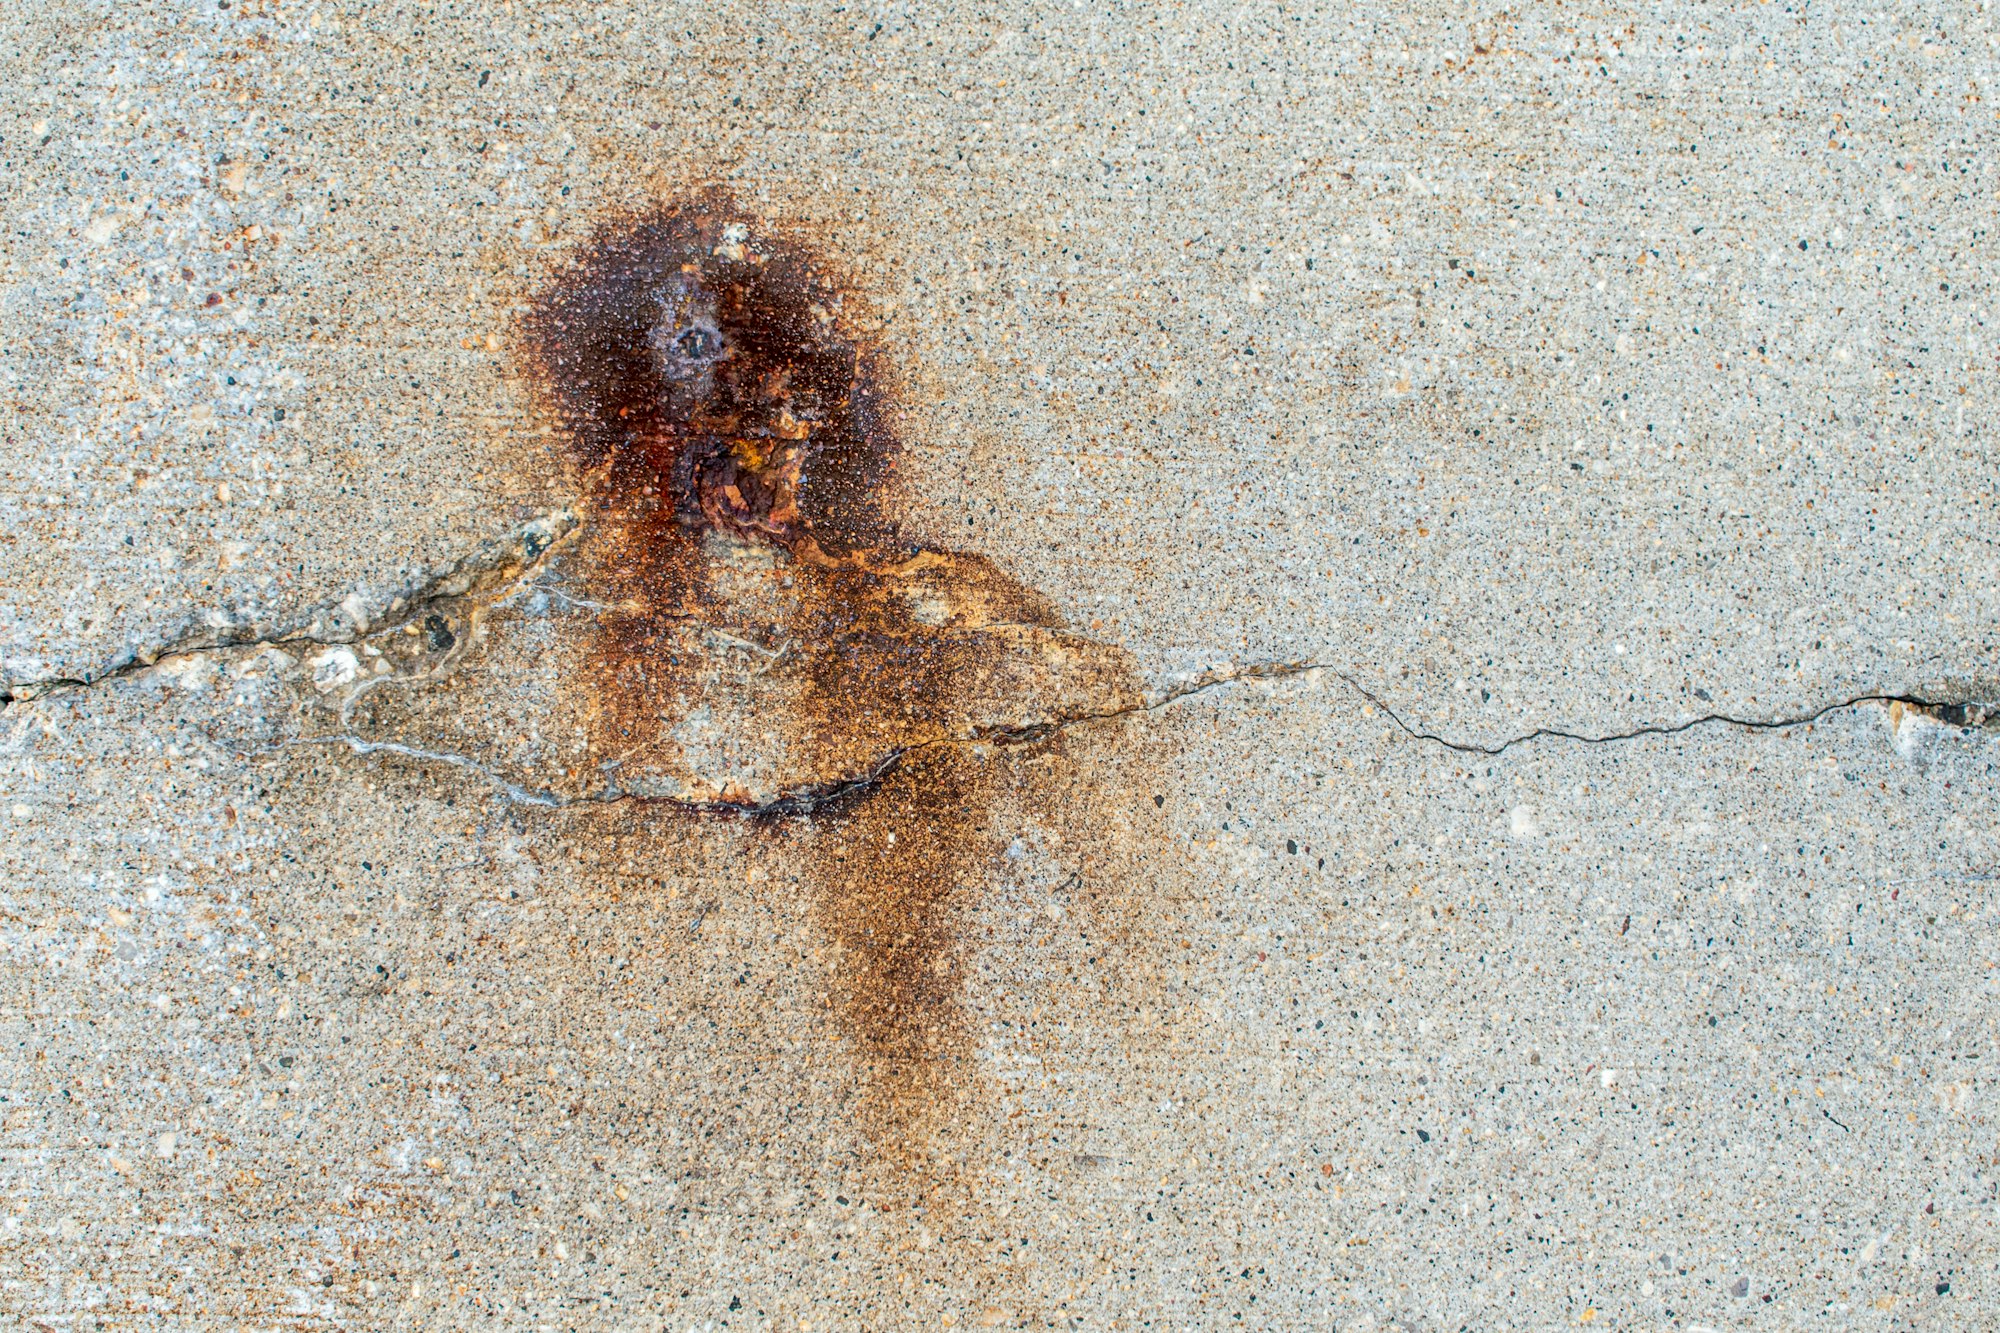
Even though your tiled floor might feel rock-solid, every home shifts and moves over time. Temperature changes, settling foundations, and humidity can all make floors and walls expand or contract—just a little. Think of concrete drying out like a baked cake does, as it dries out on the surface, cracks can appear depending on the drying conditions, concrete mix, reinforcement, placement and other present environmental factors and/or construction details added or omitted.
If there’s no room for that movement, tiles can crack or “tent,” leading to frustrating (and often expensive) repairs. Movement joints are basically built-in “shock absorbers” for your tiled surface:
- Where You’ll See Them
- Perimeters: Around the edges where tile meets walls or fixed fixtures.
- Large Areas: In bigger rooms, you might see them spaced at certain intervals (like every 5 to 6 metres).
- In tiled rooms exposed to direct sunlight.
- Changes in substrate/material: Where a concrete slab meets a timber subfloor, for instance.
- Materials
- Flexible Sealants: Silicone or polyurethane that can compress or expand.
- Expansion Strips: Pre-made profiles with a flexible core.
- Why They're Important
- Preventing cracks and popped tiles.
- Allowing natural building movement without damaging the tile.
9.2. Technical Perspective
AS3958.1:2007, specifically Section 5.4, discusses movement (control) joints. Key points include:
- Spacing and Placement
- Usually required at perimeters, around columns or penetrations, and at regular intervals for large expanses of tile (commonly every 5–6 metres, though site conditions can vary).
- The standard can differ for exterior vs. interior installations, accounting for higher thermal expansion outdoors.
- Materials for Movement Joints
- The standard emphasises using flexible sealants or special joint profiles rather than grout.
- Silicones or polyurethanes are typically recommended, but they must be compatible with the tile and substrate.
- Design Considerations
- Movement joints are sometimes concealed under skirting boards or along doorway thresholds.
- Section 5.4.5 underscores that these joints cannot be filled with rigid materials—doing so defeats their very purpose.
- Consequences of Non-Compliance
- Without proper expansion gaps, tiles can buckle or form “tents” (a dramatic lifting of the tile surface).
- Cracked grout lines often signal that movement is happening with no designated joints to absorb it.
9.3. Why This Matters
- Movement joints might not be the most glamorous part of your tile design, but they’re essential for avoiding costly damage. Plus, they can often be placed discreetly, so they don’t disrupt the look of your floor.
- Skipping or misplacing control joints is a major cause of tile failures. Following Section 4.3 and Appendix A7 to the letter helps ensure your project meets the durability and safety requirements set by AS3958.1:2007.
Movement joints are the often-overlooked heroes that let your tiled surfaces “breathe” and adapt to real-world conditions. Ensures you place them where needed, correct spacings and use flexible materials, safeguarding your tiles against cracks, tenting, and premature failure.
10. Installation in Wet Areas
10.1. Overview
Bathrooms, laundries, and other wet areas can be some of the hardest spots to tile. Beyond the usual concerns—like picking a slip-resistant surface—you also have to consider waterproofing.
Why? Because if moisture seeps into the substrate, it can trigger mould, rot, or even structural damage over time. Here’s what to keep in mind:
- Waterproof Membranes
- A waterproof membrane is often applied to shower floors, walls, or anywhere that sees frequent water exposure.
- Overlooking proper waterproofing is a recipe for hidden water damage that can be expensive to fix down the road.
- Drainage and Falls
- Wet-area floors, especially in showers, need a slight slope or fall so water runs into the drain rather than pooling in corners.
- Poor drainage = slippery surfaces, mould and potential seepage into adjacent rooms.
- Slip Resistance
- Look for tiles with a mild texture or a slip-resistance rating, especially in shower stalls or around bathtubs.
- Be mindful that glossy tiles, while stylish, can become quite slippery when wet.
- This becomes especially important when considering SDA design guidelines.
- Silicone Sealing
- Edges and corners (think where walls meet floors, or around shower niches) are sealed with flexible sealants to keep water from sneaking behind the tiles.
10.2. Technical Perspective
While AS3958.1:2007 provides guidelines for ceramic tile installation, wet areas also fall under AS3740 (Waterproofing of Domestic Wet Areas).
Here’s how these standards interconnect:
- Waterproofing Requirements
- References in AS3958.1 point to AS3740 for detailed moisture control practices, including membrane types, minimum overlap heights, and curing times.
- A common best practice is applying a liquid-applied or sheet membrane with extra care around penetrations like drains or tap fittings.
- Substrate Preparation
- The substrate must be sound, smooth, dust free and dry before applying any membrane.
- Timber floors, for instance, may need a cement sheet underlay and primer to create a suitable base for waterproofing.
- The gap between compressed fibre-cement sheets and concrete kerbs or floors
to be sealed with water-resistant flexible sealant. This is mostly done with a neutral cure silicon bond breaker detailed and tooled in accordance with the membrane class (Class 1,2,3).
- Minimum Falls
- Floors in showers need a 1:60 (16.7mm drop over 1m) to 1:80 fall (around 12.5 mm drop per metre) to direct water to the drain. Exact requirements can vary, so refer to local codes and Appendix D (Falls in Floor Finishes) in AS3958.1 for falls guidelines.
- External balconies or wet-area floors might require a slightly different pitch (often 1:80 to 1:100), ensuring water doesn’t pool. AS3740 details requirements for balconies and overflows.
- Movement Joints in Wet Areas
- Wet areas are prone to humidity and temperature changes, increasing the likelihood of expansion and contraction.
- Section 2.7 & 5.4.5 in AS3958.1 reiterates the need for movement joints, especially around perimeter edges, corners, and large areas.
- Drainage Detailing
- Whether you’re using a point drain in the centre or a linear (channel) drain along one edge, AS3958.1 (in tandem with AS3740) highlights that tile edges must be carefully sealed and sloped to prevent water infiltration beneath the membrane.
10.3. Why This Matters
- Poorly waterproofed wet areas are a nightmare—from black mould to costly structural repairs if leaks go undetected. Insisting on compliance with AS3958.1:2007 and AS3740 ensures a safe, durable and healthy wet area.
- Substandard waterproofing or incorrect falls can lead to legal disputes, insurance claims, and costly bathroom repairs.
- Following the standards and using ITPs, demonstrating how you discharge your obligations, record keeping (including temperature, humidity testing records) reduces risk significantly. The Trotec kit below has moisture and temperature readers for a very affordable price.
- All tilers and builders should own a kit like this, use them and keep records of testing on each site. If you don't do this, you will be held liable in the event of an issue. I can assure you the adhesive manufacturer will be all over testing if you ask them to come along to your party and declare "I do things properly every time, it must be the glue."

When it comes to wet areas, AS3958.1:2007 and AS3740 go hand in hand. Proper falls, waterproofing membranes, and carefully placed movement joints keep moisture from wreaking havoc. Cutting corners on waterproofing is simply not an option if you want a long-lasting, leak-free installation.
11. Post-Installation Best Practices
11.1. Overview
Congrats! Your tiles are down, and the grout’s in place. Now it’s time to ensure everything sets, cures, and stays looking great for the long haul. Here’s what that means:
- Initial Cleaning
- A thin layer of grout haze may appear on the tile surface. Wiping gently with a damp sponge a short while after grouting usually handles it. If there’s still residue, a specialised grout-haze remover may help—just follow the label!
- Curing Period
- Avoid stepping on newly laid tiles for at least 24 hours, or as recommended by the adhesive manufacturer.
- Let grout set according to the package instructions (often 24–48 hours) before you start mopping or subjecting the tiles to water.
- Sealing
- Grout Sealer: Some cement-based grouts are porous, benefiting from a sealant to keep water and stains at bay.
- Stone Tiles: If you used natural stone, it may also require sealing to prevent staining or moisture damage.
- Ventilation
- In wet areas or humid climates, good airflow helps grout and adhesives dry properly. Turn on exhaust fans or open windows if possible.
11.2. Technical Perspective
Under AS3958.1:2007, particularly in Clause 5.8 + 5.8 + Appendix C (most detailed) (Cleaning & Maintenance) and Clauses dealing with installation timelines:
- Adhesive and Grout Curing
- The standard often references manufacturer guidelines. A “rapid-set” adhesive may allow foot traffic in a few hours, but normal adhesives need 24 hours or more.
- Grout typically needs to set fully (sometimes 7 days for complete cure) before heavy water exposure or sealing.
- Haze Removal and Acid Cleaning
- Mild, pH-neutral cleaners are recommended to remove any lingering grout haze.
- If stronger acid-based products are needed, AS3958.1 advises caution to avoid damaging grout joints or the tile glaze.
- Checking for Hollow Spots
- Some installers tap tiles lightly to detect voids (a hollow sound may indicate poor adhesive coverage). AS3958.1 highlights that prompt re-bonding or replacement can prevent more significant issues later.
- Movement Joint Inspection
- Flexible sealants in movement joints may need periodic checks. If they show signs of splitting or detachment, reapplying sealant maintains the joint’s integrity.
- Documentation and Record-Keeping
- For most projects, maintaining a record of adhesive types, batch numbers, and site conditions for warranty or dispute resolution.
11.3. Why This Matters
- Proper post-installation care ensures all that effort and expense isn’t undone by walking on the floor too soon or ignoring tiny cracks that appear in the first weeks.
- For Professionals: Providing homeowners with clear aftercare instructions aligns with the standard’s emphasis on quality. It also reduces callback rates since clients will know exactly how to treat their new floors or walls.
12. Common Issues and How to Avoid Them
12.1. Overview
Tiling projects can go wrong for a variety of reasons—often due to skipping steps or cutting corners. Here are some all-too-common mistakes:
- Rushing Substrate Prep
- Trying to tile over an out of level floors or a dusty, non porous and un-primed surfaces leads to loose, cracked tiles down the line.
- Avoid the “it’ll be fine” mentality; proper surface preparation, levelling, filling and grinding will be worth every minute.
- Ignoring Movement Joints
- “We don’t need that gap” might sound like a time-saver, but without movement joints, tiles can tent or crack as the house settles or expands.
- A small, neatly finished control joint installed now saves a huge headache later.
- Wrong Adhesive or Grout
- Cement adhesives (non-polymer modified) for large-format porcelain? Not always a good match.
- Using wall grout on the floors (does happen from time to time) and can lead to rapid staining or water infiltration creating waterproofing or water movement issues.
- Hasty Grout Application
- If you grout too soon or skip cleaning the excess, you’ll end up with uneven joints or stubborn grout haze.
- Skipping the Curing Time
- Walking on tiles prematurely can break the adhesive bond.
- Give grout the recommended curing period before exposing it to water or heavy foot traffic.
12.2. Technical Perspective
From AS3958.1:2007 and related sections, these pitfalls often boil down to non-compliance with key requirements:
- Section 5 Non-Compliance (Substrate)
- 5.4.6 Not meeting flatness tolerances (e.g., >4 mm deviation over 2 m) or failing to remove contaminants violates the standard’s core substrate prep guidelines.
- Section 5.4.5 Oversight (Movement Joints)
- Omitting control joints or filling them with rigid grout contradicts the movement provisions and can result in tile delamination.
- Materials Mismatch (Table 4.5)
- Using an adhesive not suited for the tile size or substrate environment. AS3958.1 advises ensuring the adhesive’s classification (C1, C2, etc.) matches the job specs.
- Section 5.7: Improper Finishing
- Residual grout haze or damage from harsh acidic cleaners is a direct sign of ignoring the finishing recommendations.
- Inadequate Curing
- The standard references manufacturer data for open times and cure times—if not followed, bond strength may be insufficient.
Most tiling disasters are preventable by following AS3958.1:2007 , having a quality management plan in place, using ITP, ITC and ITR —especially around substrate prep, movement joints, and material selection. A bit of planning and preliminary work along with reading and record keeping prevents a world of trouble down the road.
Conclusion
If you've made it this far, well done. AS3958.1 is one of the shorter standards coming in at just on 111 pages. There's a bit of detail to go though but we also find it to be one of the easier standards to read and understand.
Here’s a quick recap of what we've covered in this post:
- Start Right: Substrate Matters
- Don’t underestimate how crucial a stable, flat surface is. If the base is flawed, the best tiles in the world won’t hold up.
- Match Materials to the Job
- Choose adhesives, grout, and tile types that suit the environment (moisture levels, traffic, temperature). In short: get the right product for the right place.
- Respect Movement (see video below)
- Build in movement joints where needed—your house (and tiles) need to “move” and relieve surface tension and pressure by following control joints through subtrates. Skipping this is a surefire way to get cracks and popped tiles.
- Finish and Cure Properly
- Patience pays. Give adhesives and grout time to set, clean off haze promptly, and consider sealing if you’re in a high-moisture area.
- Ask Questions
- If something seems off—like uneven floors, incorrect adhesives, or missing sealants—speak up early. It’s far easier (and cheaper) to fix potential issues before the entire surface is laid.
Following the standard isn’t about making life harder for everyone. It ensures a uniform, standard of quality, a baseline that everyone can work to. If a dispute arises later (about tile evenness, for example), referencing the standard’s tolerances offers a clear resolution path.
Some homeowners enjoy the challenge of tiling on their own. Just be sure you understand the standard’s guidelines and don’t rush substrate prep or product selection.
For larger or more complex projects (like heavily trafficked floors, balconies, or intricate layouts), a qualified tiler or builder familiar with AS3958.1:2007 can help you sidestep issues and deliver a result you’ll love.
Its all about respecting the movement - make sure to add control joints in your tile installation.
Frequently Asked Questions (FAQs)
FAQ 1: “Do I really need a movement joint if my tiled area is under 5 m in length?”
Answer: Even smaller rooms can benefit from perimeter joints, which allow your floor to expand/contract without pushing against the walls. If your room is larger, intermediate joints as well—especially if there’s a chance of structural or thermal movement. You can also consider highlighting the joints, making a feature of them, a design feature instead of avoiding them. For example check out the Latham strips below.
FAQ 2: “How do I know my substrate is flat enough?”
Answer: A quick test is to place a 2 m straightedge across different parts of the floor or wall. If the gap between the substrate and the straightedge exceeds 3–4 mm, you likely need to level it.
FAQ 3: “Which grout width should I choose for my tiles?”
Answer: It depends on factors like tile size, tile edge type (rectified vs. non-rectified), and personal preference. Narrow joints (around 2 mm) give a contemporary look but demand near-perfect alignment. Wider joints (3–5 mm) can hide slight tile or substrate irregularities.
FAQ 4: “Can I tile over existing tiles?”
Answer: It’s possible but not always recommended. The existing tile surface must be securely bonded, abraded (roughed up/ground to improve adhesion), clean, and free of cracks. You also need to consider the added height. AS3958.1:2007 emphasises proper substrate adhesion—so, if the old tiles are loose or the substrate is unsound, removal is best.
FAQ 5: “Why is my grout cracking in just a few spots?”
Answer: Minor cracks can occur if the grout shrinks or if there’s slight movement in the substrate. However, if cracking is widespread or persistent, it may indicate insufficient substrate prep, missing or inadequate movement joints, or using the wrong grout type for your environment.
FAQ 6: “Is epoxy grout worth the extra expense?”
Answer: Epoxy is highly stain-resistant, waterproof, and durable—great for areas like commercial kitchens or showers prone to heavy moisture. However, it’s harder to apply and costs more. For a standard residential floor with low moisture exposure, a high-quality cement-based or polymer-modified grout may suffice.
FAQ 7: “How soon can I walk on or clean my newly tiled floor?”
Answer: A common guideline is 24 hours before light foot traffic, but always check the adhesive manufacturer’s instructions. Grout typically needs up to 48 hours to cure before heavy cleaning or exposure to water.
FAQ 8: “Should I seal my tile or grout?”
Answer: Many cement-based grouts benefit from sealing. Natural stone or certain porcelain tiles may also require sealing to prevent stains. Always follow the tile/grout manufacturer’s recommendations—sealing can significantly prolong the life and appearance of your installation.
Further Reading