Termites (white ants) are one of the few things that can quietly eat the structure of a new home while you're inside watching TV. They come up from the soil, travel in mud tubes where you can't see them, and by the time you notice the damage it's usually expensive. Most home insurance policies won't cover it either.
The good news is that a properly installed termite barrier, plus regular inspections, does the job. The bad news is that "properly installed" is where it usually goes wrong. Here's how the common systems work, what I look for on site, and what you need to do once you move in.
What a termite barrier actually does
No barrier "kills all termites forever". Subterranean termites can't be kept out of your yard. The aim of a termite management system is to stop them getting into the building without being seen. A barrier either blocks them physically, kills or repels them chemically, or forces them out into the open where an inspector will spot their mud tubes.
That's why inspections are part of every system. A barrier with no inspections is half a system.
What the rules say
In termite-prone areas, the National Construction Code (NCC) requires a termite management system to protect primary building elements that termites can damage, such as timber wall frames and roof framing. AS 3660.1 (termite management for new building work) is the usual way to comply. AS 3660.2 covers existing buildings.
Things you're entitled to as an owner:
- A durable notice fixed in a prominent spot, usually the meter box, stating the system used, the date it was installed and the recommended inspection schedule.
- Product and installer details, including any installation certificate and the manufacturer's warranty conditions.
- Inspection zones kept clear, such as the exposed slab edge, so termite activity can be seen.
Keep all of this with your handover documents. Many product warranties are void if you can't show the inspections were done.
The main barrier systems
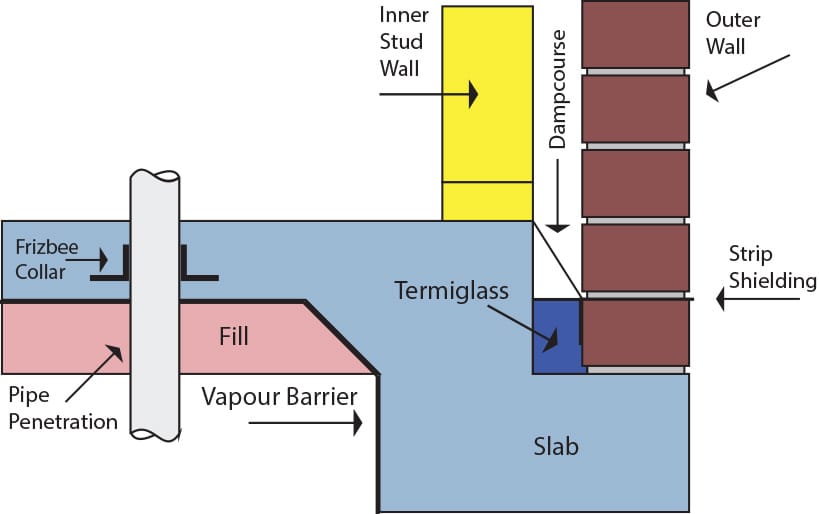
Most new slab-on-ground homes use a combination: the slab itself as the main barrier, plus a product at the perimeter (edge beam or cavity) and around every pipe that comes up through the slab. The penetrations and the perimeter are where termites get in.
Stainless steel mesh
A fine marine-grade stainless mesh with holes too small for termites. It's fitted around pipe penetrations, against the edge beam, and in cavities.
- Good: very long life, no chemicals, no recharging.
- Not so good: dearer to install, needs a trained installer, and the cut edges are razor sharp.
- On site: corners and overlaps are hard to get neat. A sloppy installer leaves something that looks like a steel taco, and folds or gaps in it are what matter.
Graded stone or crushed glass particles
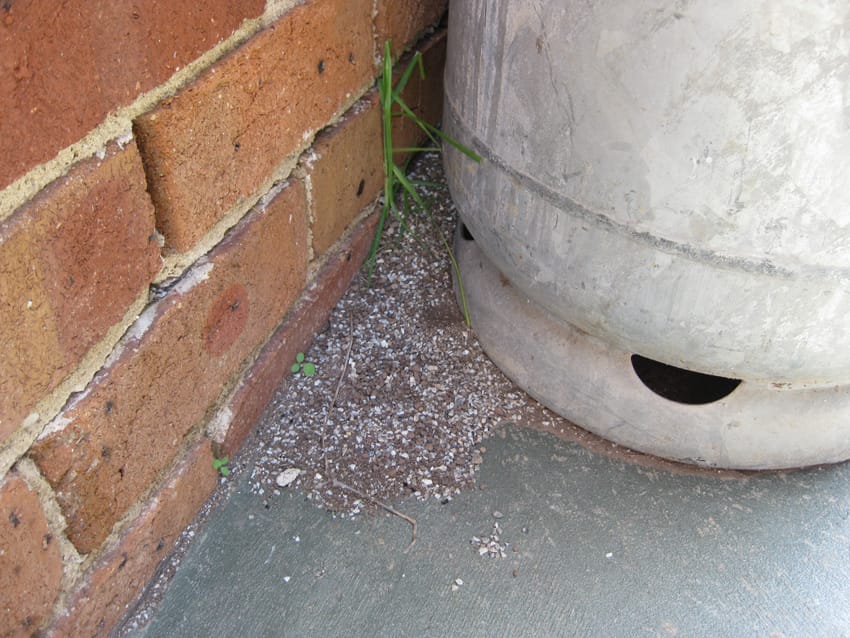
Particles graded so they're too heavy for termites to carry and the gaps are too small to crawl through. Usually poured into the wall cavity at the slab edge or packed around penetrations. Crushed glass products work the same way.
- Good: no chemicals, generally cheaper than mesh, long life if left undisturbed.
- Not so good: must be the right grading and placed to the right depth. It can be disturbed by later work.
- On site: black ants love the stuff. I've seen them carry it out of the cavity through the weep holes, which leaves a gap for termites. If you see little piles of granules outside your weep holes, call your pest inspector.
Chemical-impregnated sheets and collars
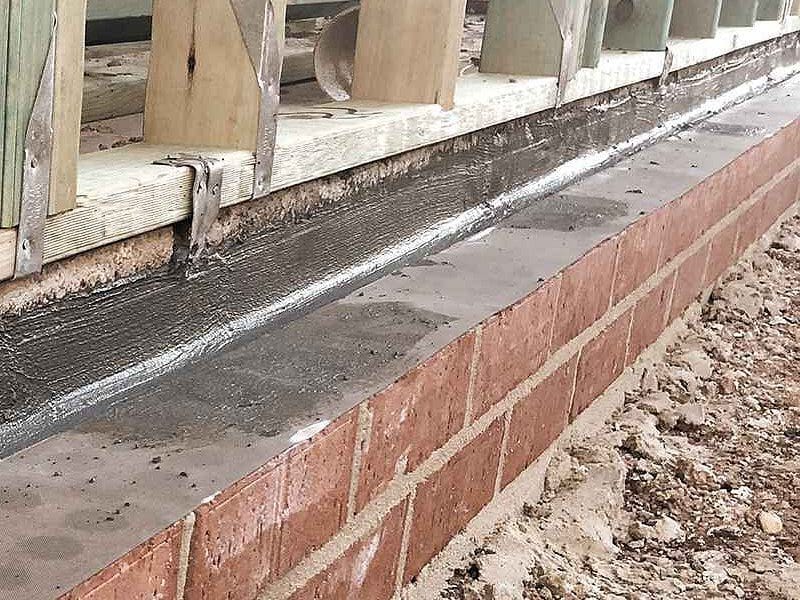
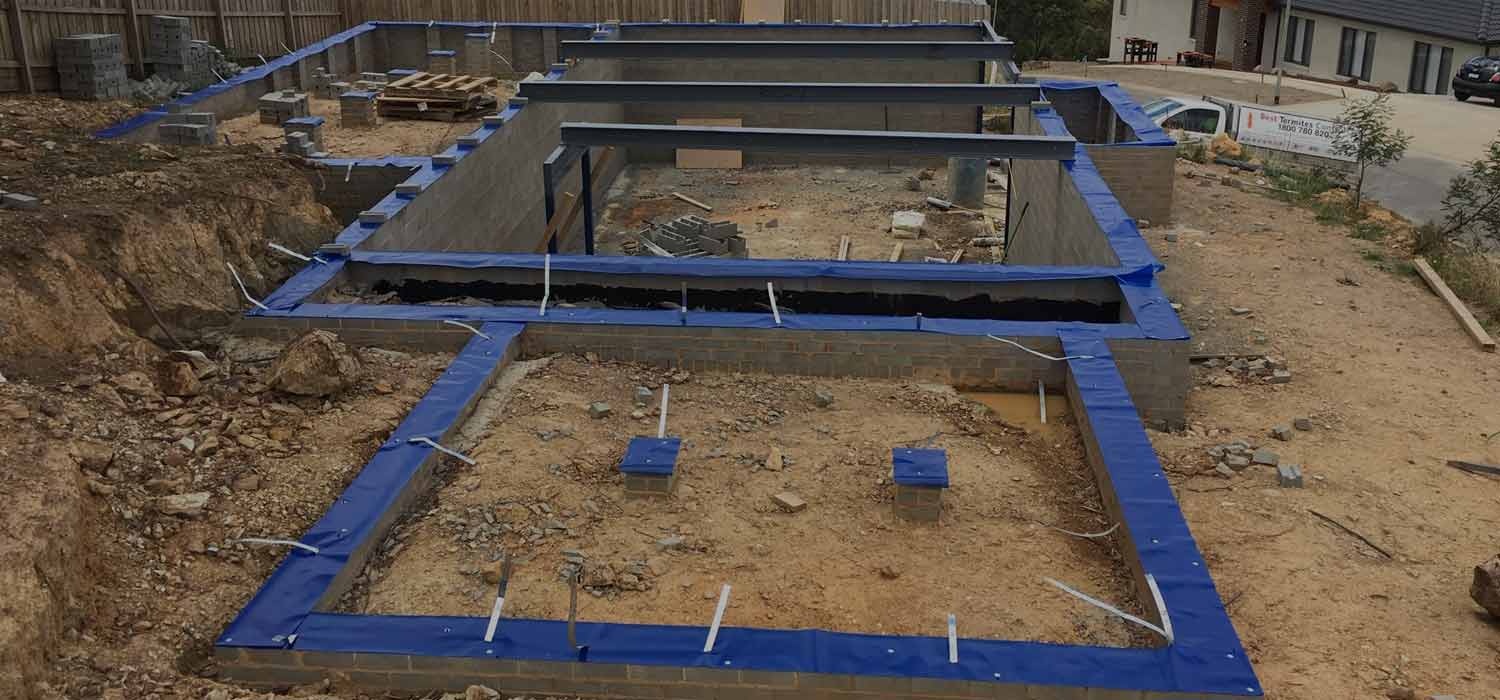
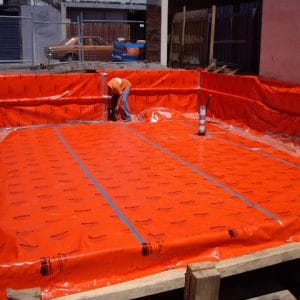
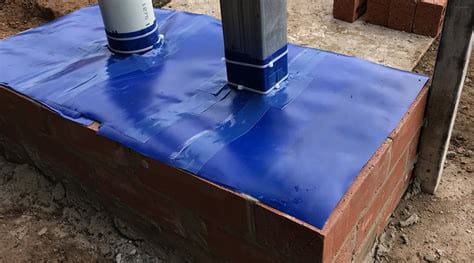
A geotextile or plastic sheet impregnated with termiticide, such as Kordon. It goes under or around the slab edge, at the cavity and around service penetrations, usually before the wall frames go up.
- Good: physical and chemical protection in one, flexible enough to wrap around awkward shapes, no ongoing recharging.
- Not so good: easily torn or punctured by trades if it isn't protected, and only works while it stays continuous.
- On site: check it hasn't been cut through by plumbers or electricians, and that laps and joins are taped or sealed as the manufacturer says.
Concrete slab and exposed slab edge
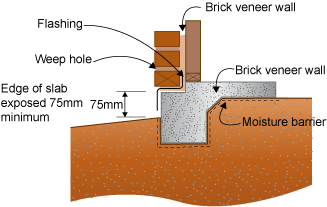
A well-made concrete slab is itself a barrier, as long as it's properly compacted and vibrated with no cracks, voids or honeycombing. Termites can't get through solid concrete, so they try to go around it.
AS 3660.1 lets an exposed slab edge of at least 75 mm act as an inspection zone. Termites crossing it have to build visible mud tubes. The catch is that it only works if someone actually looks. Garden beds, paving, render and soil built up against the slab edge later all hide termite tracks.
My view: a slab edge on its own relies entirely on regular inspections, and most people are too busy to keep that up. I'd rather see a physical or chemical product at the perimeter as well.
Reticulated chemical systems
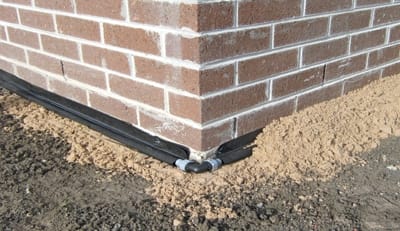
A network of perforated pipes laid around the perimeter (and sometimes under the slab) so termiticide can be pumped into the soil to create a treated zone. It's topped up periodically through an access point.
- Good: can be recharged without digging up paths, and suits both new and existing homes.
- Not so good: ongoing cost of recharging, chemical use around the home, and it only works if the chemical actually reaches the soil.
- On site: pipes must be bedded in free-draining material. If the perforations end up buried in clay, concrete or rubble, the chemical can't spread and you get gaps. Check the pipe layout before the paths and gardens go in.
Comparing the systems
- Stainless mesh: physical. Higher cost. Very low maintenance. Best for penetrations and edges where you want no chemicals and a long life.
- Graded stone or glass: physical. Moderate cost. Low maintenance, but watch for ants and disturbance. Best for cavities and penetrations.
- Chemical-impregnated sheet: physical plus chemical. Moderate cost. Low maintenance if it stays intact. Best for new slabs and cavities.
- Slab plus exposed edge: physical plus visual. Lowest cost. Relies on regular inspections and keeping the edge clear. Best used with another system.
- Reticulated chemical: chemical. Moderate install cost plus recharge costs. Needs scheduled top-ups. Best for perimeters on new or existing homes, especially where you want to re-treat later.
In high-risk areas, a combination of a physical system at penetrations and the perimeter plus a chemical perimeter treatment gives you two lines of defence. Your builder or pest manager can explain what suits your site and soil.
Where it goes wrong on site
Most failures I see aren't product failures. They're installation and coordination failures:
- A pipe is moved or added after the barrier is installed, and nobody redoes the collar.
- Sheets torn by trades and never repaired.
- Graded stone poured short of the required depth.
- Reticulation pipes buried in clay or concrete.
- The slab edge covered by paving, render or garden beds, so the inspection zone disappears.
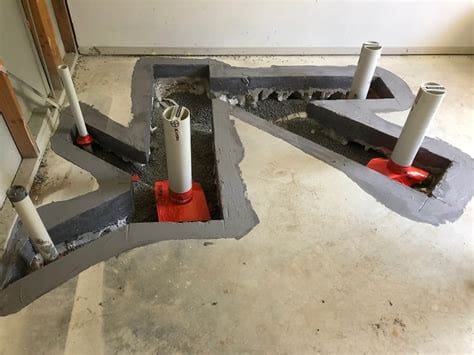
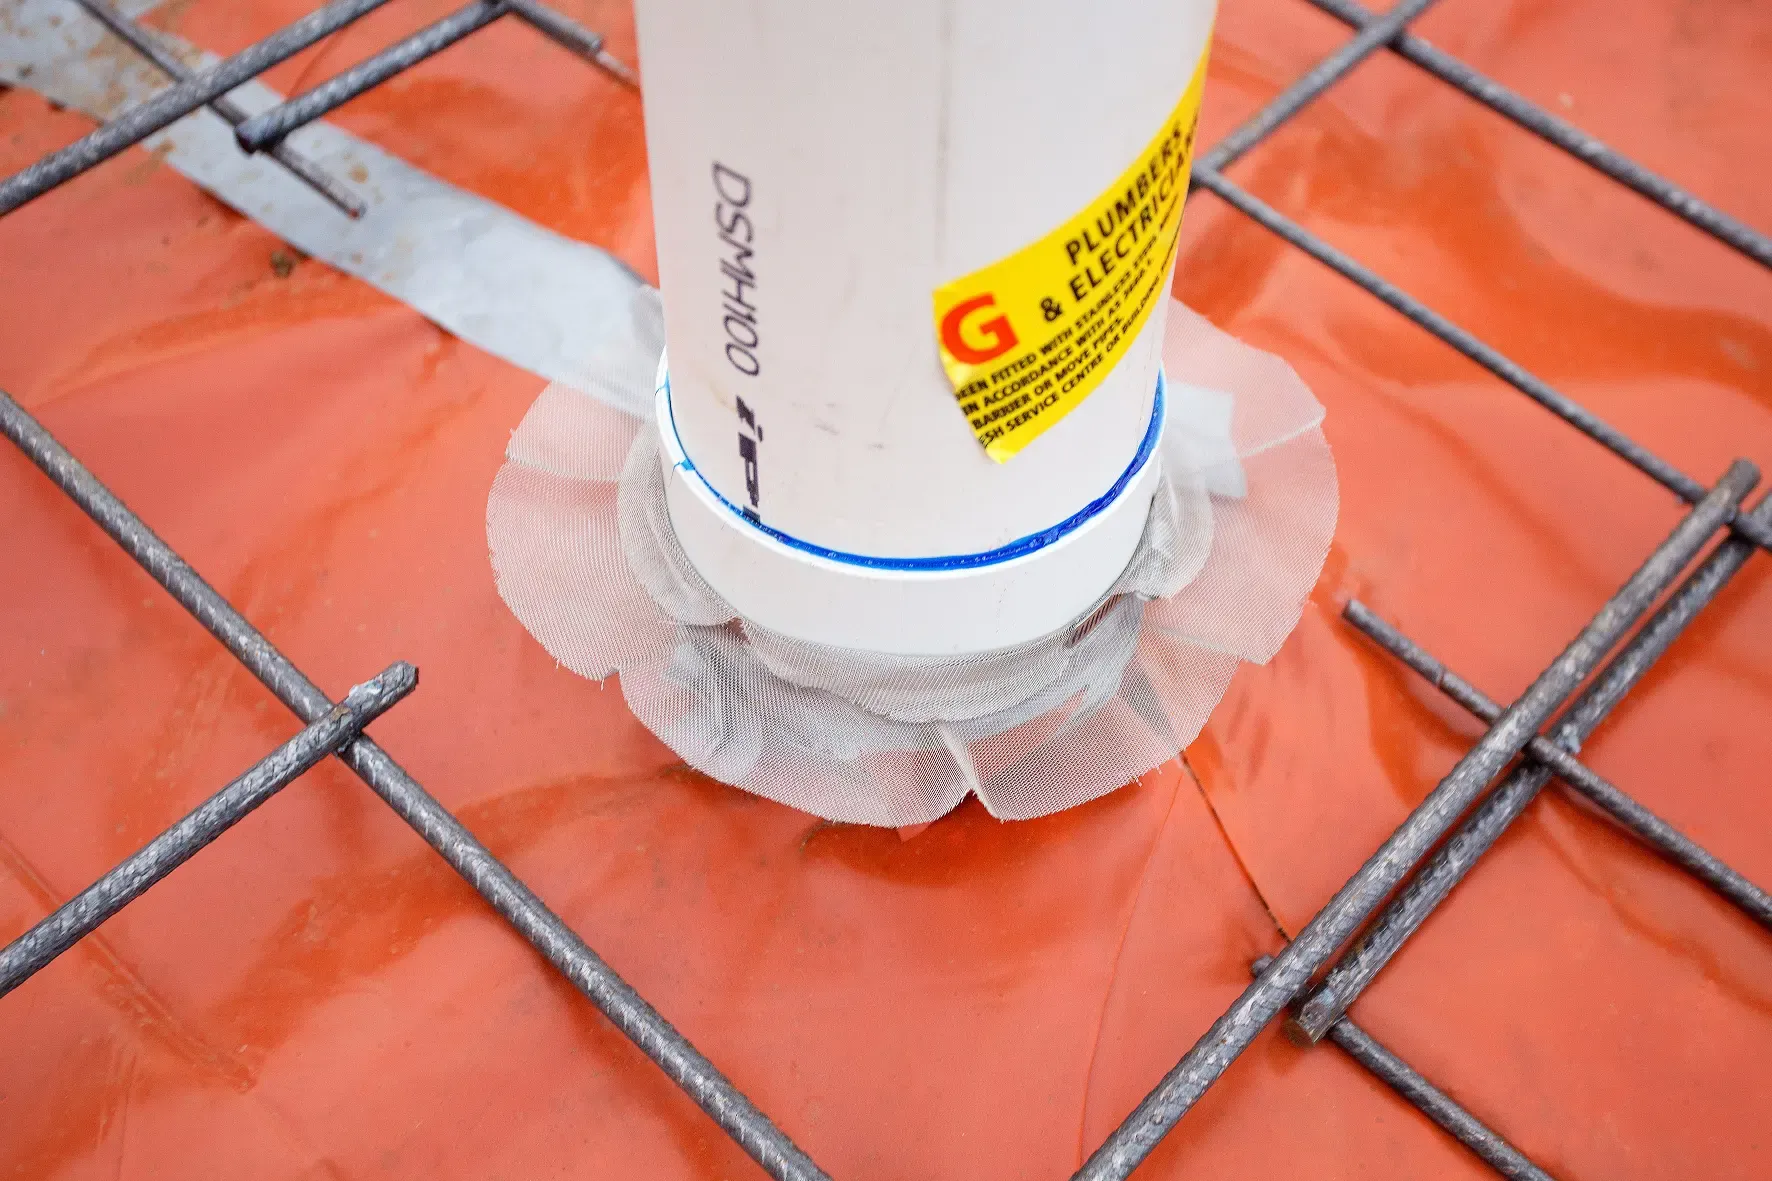
Before the slab is poured, check every penetration has its collar or barrier fitted and the perimeter system is in place. Photograph it. Once concrete goes in, you can't see it again. Our C5 Pre Pour Slab Inspection Checklist covers the termite items along with everything else to check before the pour.

C5 - Pre Pour Slab Inspection Checklist
$119.00 AUD
Checklist Type: Major (Base Stage)
Form Factor: Fillable, print-ready PDF (A4, 17 pages)
When to use: Base stage: after the slab is prepped, before concrete is poured
A 98-point pre-pour slab checklist. Check set-out, levels, reinforcement, services and formwork after the slab is prepped and before concrete is poured, while fixes are still simple.
Looking after it once you move in
A barrier only works if you don't undo it. The main things:
- Book an inspection at least once a year by a licensed pest manager, more often in high-risk areas or if your system's warranty says so. Keep the reports.
- Keep the slab edge and weep holes clear. No garden beds, mulch, soil, firewood or timber stacked against the house. Don't build paths or decks over the inspection zone without checking with your pest manager.
- Watch for signs: mud tubes on walls or piers, timber that sounds hollow, blistered paint, and discarded wings near doors and windows after rain.
- Don't let anyone cut through the barrier. If you add a pipe, deck, pergola or extension later, the barrier around it must be made good.
- Recharge reticulated systems on the schedule given by the installer.
- Fix leaks and drainage. Damp soil against the house is exactly what termites want.
Professional inspectors use moisture meters and thermal cameras as well as a visual and tap test, which picks up activity long before you'd notice it.
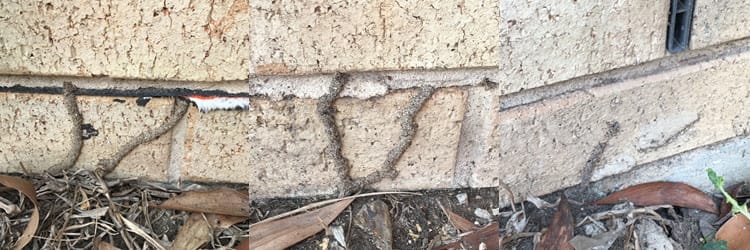
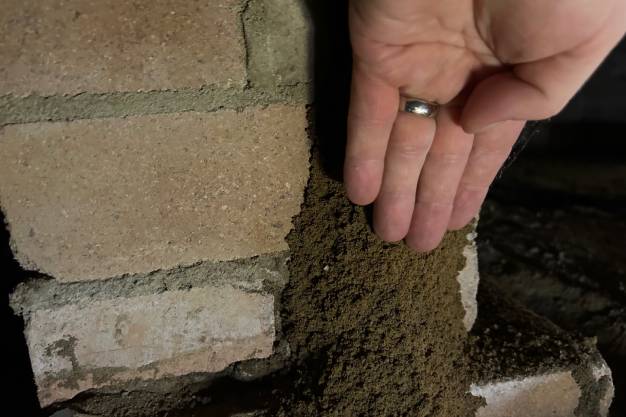
If you do find termites, don't spray them or knock the mud tubes off. That just makes them move on and hides the problem. Call a licensed pest manager so they can track the colony and work out how they got past the barrier.
Budgeting
Termite protection is part of the base build, but the type and extent varies between builders, so compare it when you compare quotes. Ask:
- Which system is used at penetrations, at the perimeter and in the cavity?
- Is it a combination system, or the slab edge only?
- What are the inspection and recharge requirements, and what will they cost each year?
- What does the product warranty cover, and what voids it?
A few hundred dollars a year for inspections is cheap compared with structural repairs, which can run into tens of thousands.
Test yourself
How often should termite barriers be inspected?
At least once a year.
Why might polymeric sheets require regular inspections?
They can be punctured or damaged during construction, compromising their effectiveness.
What is a potential drawback of using concrete slabs as termite barriers?
They can develop cracks, creating entry points for termites.
Further reading
 Anthony Painter
 Anthony Painter
 Anthony Painter