Introduction
The C10 Rough In Stage Inspection Checklist is designed to help homeowners, builders, and site supervisors identify and address construction issues before external cladding and internal linings are installed. This stage is very important because once walls and ceilings are in place, fixing errors becomes significantly more expensive and time-consuming.
Think of it as your last chance to catch mistakes before they’re hidden behind gyprock.
Let’s look at why this inspection is so important and how you can use the checklist to ensure your home is built to the highest standards.
Why Conduct a Rough-In Inspection?
Once all rough-ins—wall wrap (pliable membrane), plumbing, electrical, gas, HVAC, security, and network cabling—are installed but before gyprock or cladding is fitted, a thorough inspection is essential. Here’s why:
✅ Catch errors early – Fixing issues before walls go up is easier, faster, and cheaper.
✅ Reduce repair costs – Less need for cutting into walls, patching, and repainting.
✅ Prevent construction delays – Identifying issues now keeps the project moving smoothly.
✅ Ensure compliance – Confirm work aligns with Australian building standards and manufacturer guidelines.
Even if you’re not an expert, this checklist gives you the confidence to ask the right questions and ensure your new home is built to the highest quality standards.
What Is the Rough-In Stage and Why Does It Matter?
The rough-in stage is the foundation of your home's functionality. It’s the point in construction where essential systems—plumbing (water & gas), electrical, pliable membranes, solar and HVAC (heating, ventilation, and air conditioning)—are installed inside the walls, floors, and ceilings before they are covered with plasterboard, insulation, or external cladding.
This stage is important because:
✅ It sets up your home's core systems – Water pipes, electrical conduits, and ventilation ducts must be properly positioned and secured.
✅ Fixing errors later is expensive – Once walls and floors are sealed, any mistakes require demolishing sections of your home to fix them.
✅ Inspections now prevent long-term headaches – Poorly installed rough-ins can lead to leaks, electrical faults, or poor airflow, affecting your home's safety and energy efficiency.
Many homeowners assume their builder has everything covered at this stage. While a good builder will aim for quality, mistakes can happen, especially when multiple trades are working at once.
That’s why checking everything before the next phase of construction is essential.
An overview of the checklist
The C10 Rough In Stage Inspection Checklist is designed to help homeowners, builders, and site supervisors identify and address construction issues before internal linings and external cladding are installed. This ensures that errors can be fixed efficiently, reducing costs, delays, and potential disputes later on.
How to Use the Checklist
The checklist is structured into multiple sections, each focusing on a key area of construction. The process for using the checklist is as follows:
1️⃣ Start at Section 1 (Site Management) and work through the checklist in order.
2️⃣ For each checklist item, verify that the work has been completed correctly.
3️⃣ Take photos of any defects or incomplete work and note reference numbers where applicable.
4️⃣ If an issue is identified, mark the checklist with an ‘X’ and follow up with the responsible contractor.
5️⃣ If an item cannot be assessed due to site conditions (e.g., weather or incomplete work), mark it with an arrow (→) for review at a later date.
6️⃣ If an item is confirmed as correct, tick and mark it as ‘OK.’
Why You Should Use It
Many homeowners assume inspections are only the builder’s responsibility, but builders, subcontractors, and supervisors are managing multiple jobs at once, making it easy for mistakes to slip through the cracks.
This checklist gives you a structured way to double-check their work and ensure your home is built to a high standard.
Once the rough-in stage is complete, but before walls and ceilings are sealed, a thorough inspection should be conducted. This prevents hidden defects that could cause long-term issues. The checklist ensures:
✅ Errors are identified early, making them easier and cheaper to fix.
✅ Less cost associated with patching, compound repairs, and rework.
✅ Time savings in the construction schedule by resolving issues before follow-on trades begin.
✅ Improved communication between builders, subcontractors, and homeowners.
The checklist helps document defects properly—site notes can get lost, blown away, or ignored. Instead, homeowners and site managers should contact suppliers or contractors directly and keep records of all identified issues.
Key Features of the Checklist
- CINS Numbering System: To keep records aligned between physical and digital documents, each identified issue should be assigned a CINS number where applicable.
- Image References: It is recommended to take photos of issues and reference them against checklist items for better documentation.
- Follow-Up Action Items: The checklist includes space to mark whether an issue requires further action, allowing for efficient tracking and resolution before proceeding with internal cladding or fit-out.
This structured approach ensures no critical aspect of the rough-in stage is overlooked. By following this checklist step by step, homeowners and site managers can confidently verify quality before construction progresses.

SECTION 1. Key Sections of the Checklist and What to Look Out For
The checklist is organised into specific sections, each targeting a critical aspect of the rough-in stage. These sections ensure no detail is overlooked, helping you identify issues before internal linings and cladding are installed. Below is an overview of the main sections and their purposes based on the checklist.
1.1 Site Management Items
A well-managed site sets the foundation for a smooth construction process and prevents delays or damage during the rough-in stage.
A sample of checklist items:
- Sediment Fencing (S1.01): Ensure sediment fencing is operational and effective in controlling erosion. Check for any required repairs and take photos of damage.
- Signage (S1.02): Verify that the builder’s sign and safety sign are upright, stable, and visible from the street.
- Neighbouring Properties (S1.04): Inspect for any damage to neighbouring properties, yards, street signs, or kerbs. If damage exists, document it with photos and discuss it with neighbours to plan a remedy.
- Drainage (S1.13): Confirm that surface and subsurface water are diverted away from the structure to prevent pooling under the house. Ensure the ground surface slopes away from the building (subsidence policy compliance item).


1.2 Variations & Colours
In the checklist we emphasise the importance of ensuring that all variations and colour selections are reviewed prior to completing the checklist. This is important to make sure that any frame stage provisions have been installed prior to wall linings or cladding/facades are installed.
Checklist Highlights:
- Check for Compliance: Ensure all variations in materials, finishes, or locations are thoroughly reviewed and reflected in the builder’s plans. Identify any discrepancies and ensure follow up with builder/office to align all documentation to that most current version.
- Visual Confirmation: Verify that finishes, such as colour schemes or specific upgrades, match onsite what has been approved in contracts/documentation. Do this by putting a tick against the item checked with the date you inspected it. This way you wont be double guessing yourself later on and can always check back to remember where your up to.

1.3 Electrical Rough-In (Inside and Outside)
The electrical rough-in stage in residential new house construction in Australia is when where the basic electrical infrastructure is installed before the walls, ceilings, and floors are closed up. This stage typically occurs after the framing is complete but before insulation and plasterboard are installed. Here’s an overview of what happens during the electrical rough-in stage:
Key Tasks During Electrical Rough-In:
- Installation of Electrical Conduits and Cables:
- Electricians run electrical cables (wiring) through the walls, ceilings, and floors.
- Conduits (protective tubing) may be used to protect the cables, especially in exposed areas or where required by regulations.
- Positioning of Electrical Boxes:
- Electrical boxes for outlets, switches, light fixtures, and other devices are installed and secured to the framing.
- These boxes will house the electrical components once the house is finished.
- Running Cables to Key Locations:
- Cables are run to all planned locations for power points (outlets), light switches, lighting fixtures, ceiling fans, and appliances.
- Dedicated circuits are installed for high-power appliances like ovens, air conditioners, and hot water systems.
- Installation of Meter Box and Switchboard:
- The main switchboard (distribution board) is installed, which will house circuit breakers and safety switches (RCDs).
- The meter box, which connects to the utility supply, is also installed.
- Data and Communication Wiring:
- Cabling for internet, TV, phone, and other communication systems is installed if required.
- This may include coaxial cables, Ethernet cables, or conduits for future use.
- Safety Switch (RCD) Installation:
- Residual Current Devices (RCDs) are installed to protect circuits and ensure compliance with Australian electrical safety standards.
- Compliance with Australian Standards:
- All work must comply with the Australian/New Zealand Wiring Rules (AS/NZS 3000) and local regulations.
- Inspections may be required at this stage to ensure compliance before proceeding.
- Planning for Future Needs:
- Electricians may install additional conduits or cables for future upgrades, such as solar panels, electric vehicle chargers, or smart home systems.
A sample of checklist items:
- External Connections (S4): Inspect for proper installation of conduits for external services such as power, networking, or security systems.
- Meterbox installation (S4): Check the meterbox is installed plumb and square in to the wall frame, test the RCD and check circuits have been labelled.
- Internal Wiring (S5): Verify the placement of light switches, power outlets, and circuits. Check for proper labelling and secured wiring.
- Wiring Installation (S5): check holes drilled through timber building elements do not exceed 1/3 timber width or do not impact the structural capacity of the member. If yes, repairs are required.
- Network & Security (S6): Confirm the placement and connections of network and audio systems, ensuring everything aligns with the intended layout.

1.4 Plumbing Rough-Ins
The plumbing rough-in stage in residential new house construction in Australia is when the basic plumbing infrastructure is installed before the walls, ceilings, and floors are closed up. Here’s an overview of what happens during the plumbing rough-in stage:
Key Tasks During Plumbing Rough-In:
- Installation of Water Supply Lines:
- Plumbers run pipes for hot and cold water supply to all planned locations, such as bathrooms, kitchens, laundry rooms, and outdoor taps.
- These pipes are typically made of materials like copper, PEX (cross-linked polyethylene), or other approved materials.
- Drainage and Waste Pipe Installation:
- Drainage pipes are installed to carry wastewater away from sinks, showers, toilets, and other fixtures.
- Vent pipes (typically 50mm diameter connected to a 100/50 reducer - often located inside an internal wall) are also installed to allow proper airflow in the drainage system, preventing sewer gases from entering the home.
- Positioning of Plumbing Fixtures:
- Rough-in positions for toilets, sinks, showers, bathtubs, and other fixtures are marked and prepared.
- Stub-outs (exposed ends of pipes) are left in place where fixtures will later be connected.
- Gas Line Installation (if applicable):
- Gas pipes are installed for appliances like stoves, hot water systems, or heaters, if the home uses natural gas or LPG.
- Gas lines must comply with strict safety standards and regulations.
- Hot Water System Connections:
- Pipes are run to and from the hot water system (e.g., electric, gas, or solar) to supply hot water throughout the house.
- Compliance with Australian Standards:
- All plumbing work must comply with the Australian Plumbing Code (AS/NZS 3500) and local council regulations.
- Circuits should all be tested for continuity however this is often done at fit off stage, not the rough in stage.
A sample of checklist items:
- Hot/Cold Water Reticulation (S7): Ensure water lines are installed correctly and tested for leaks (council plumbing inspection has passed - green sticker). Make sure if lines are run across external walls they are not located where eaves framework will be fixed to the external walls (this doesn't work obviously, but does happen from time to time).
- Vent Pipe (S7): Confirm the cent pipe has been properly flashed to the roof ensuring no water leaks during construction.
- Piping Locations (S7): Verify that all pipes align with the intended locations for fixtures like sinks, toilets, and showers. Double check WC wastes are centred across room widths for small rooms or within tolerance (60mm)
- Fitting Setbacks and alignment (S7): Check all mixer tap bodies are correctly set back per manufacturers requirements, are plumb and securely fixed into framing members.
1.5 Gas Plumbing Rough-Ins
The checklist includes a section dedicated to ensuring gas plumbing systems meet safety and compliance requirements.
Key Tasks During Gas Rough-In:
- Installation of Gas Pipes:
- Licensed gas fitters install gas pipes to supply natural gas or LPG to appliances such as stoves, hot water systems, heaters, and ovens. These pipes are typically made of materials like copper or polyethylene, which are durable and compliant with Australian standards.
- Routing Through Framing:
- Gas pipes are routed through wall studs, floor joists, or ceiling spaces. In timber-framed homes, holes are drilled in the studs to accommodate the pipes, while steel-framed homes often come pre-drilled for such installations. Check drilled holes do not exceed the maximum of 1/3 of the framing element width or repairs are required to ensure structural capacity is maintained.
- Even if its not load bearing (often argued by trades) holes over 1/3 are NON COMPLIANT and require repair (like a fish plate).
- Gas pipes are routed through wall studs, floor joists, or ceiling spaces. In timber-framed homes, holes are drilled in the studs to accommodate the pipes, while steel-framed homes often come pre-drilled for such installations. Check drilled holes do not exceed the maximum of 1/3 of the framing element width or repairs are required to ensure structural capacity is maintained.
- Connection to the Gas Meter:
- The gas pipes are connected to the gas meter, which is typically located outside the house. If the gas meter is not installed yet, which is often the case, make sure the tails of gas pipework locate to the plan meter location. This is also a good time to think about organising the gas meter install. They often take some time for the contractor to schedule so calling up very early is good practice.
- Positioning of Gas Outlets:
- Gas outlets (stub-outs) are installed at the planned locations for gas appliances. These outlets are left accessible for final connections during the fit-off stage.
- Compliance with Australian Standards:
- All gas rough-in work must comply with the Australian Gas Installation Standard (AS/NZS 5601) and local council regulations. This includes proper sizing, sealing, and pressure testing of the gas lines to ensure safety and prevent leaks.
Checklist Highlights:
- Gas Line Integrity (S8): Inspect gas lines for proper installation and test for leaks to ensure safety before cladding is installed.
- Shut-Off Valves: Confirm that shut-off valves are in accessible locations as per the design.
- Gas Installation certificate (S8): Ensure you receive the gas installation certificate to certify the installation meets Australian Standards.
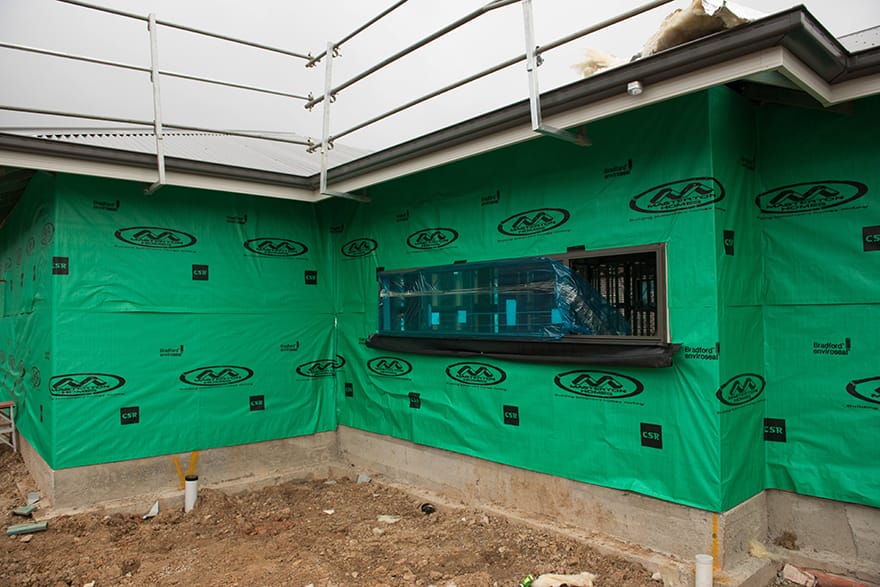
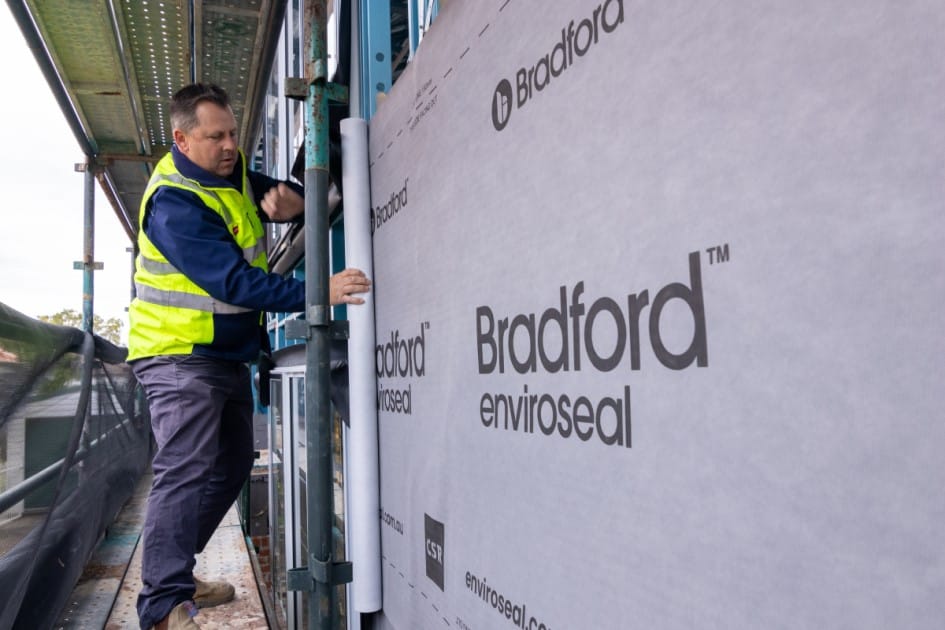
1.6 Pliable Membranes
This section focuses on the installation of pliable membranes (such as wall wraps and roof sarking/anticon installation) to ensure proper weatherproofing and insulation.
A sample of checklist items:
- Wall Membranes (S10): Ensure wall wraps are installed with the correct overlaps and no gaps or tears.
- Roof Sarking (S11): Confirm roof sarking is intact, secured, and free of any damage.
- Penetration Sealing (S12): Check that all penetrations in pliable membranes are properly sealed around pipes, ducts, or vents to prevent air or moisture ingress.
1.7 Air Conditioning & Duct Work
The HVAC rough-in stage is where the foundational components of the heating, ventilation, and air conditioning (HVAC) system, such as flexible ducts, return air units, insulated pipework, electrical cables and sensor wires are installed before the walls, ceilings, and floors are closed up.
Key Tasks During HVAC Rough-In:
- Installation of Ductwork:
- Ductwork is installed to distribute conditioned air throughout the house. This includes supply ducts (to deliver air) and return ducts (to bring air back to the system). Proper sizing and routing of ducts are crucial for efficient airflow and energy performance.
- Placement of Vents and Registers:
- Vents and registers, insulated boxes are positioned in walls, ceilings, bulkheads or floors to ensure even air distribution. These are placed according to the AC design layout or as noted on your plans.
- Remember, on highset homes framed service ducts are required to conceal the vertical rise of ductwokr between floors. Ensure provisions have been installed to conceal duct work movements.
- Vents and registers, insulated boxes are positioned in walls, ceilings, bulkheads or floors to ensure even air distribution. These are placed according to the AC design layout or as noted on your plans.
- Installation of HVAC Equipment:
- The main HVAC units, such as the air handler, furnace, or heat pump, are installed in designated areas like the roof cavity, basement, or a mechanical room. Outdoor units (e.g., condensers) are also positioned.
- Refrigerant Lines and Electrical Connections:
- Refrigerant lines are installed to connect indoor and outdoor units for air conditioning systems. Electrical wiring is also run to power the HVAC equipment and connect it to the main electrical panel.
- Ventilation and Exhaust Systems:
- Ventilation pipes and exhaust systems are installed to ensure proper air circulation and remove stale air from areas like bathrooms, kitchens, and laundry rooms.
- Compliance with Australian Standards:
- All installations must comply with Australian standards, such as AS/NZS 5601 for gas systems and AS/NZS 3000 for electrical work. Proper sealing of ductwork and pressure testing are often required to ensure efficiency and safety
Checklist Highlights:
- Ducting (S13): Confirm that all ducts are installed in the correct locations and supported properly.
- Ducting (S13): Check flexible ductwork is labelled with manufacturer details in repeating 1000mm intervals in at least 10mm high font.
- Condensate lines (S13): Check condensate lines are directed at least 50mm into a PVC downpipe.
- Duct supports (S13): The sadle or hanger material in contact witth he flexible duct shall be a minimum width of 25mm.
SECTION 2: Common Issues to Watch Out for During Rough-In Inspections
Even with a structured checklist, some issues appear more frequently than others. These common problems, if left unchecked, can lead to costly rework, delays, or safety hazards. The checklist helps catch these issues before the walls and ceilings are installed.
2.1 Electrical Rough-In Issues
Electrical installations must be checked carefully at this stage. Incorrectly placed outlets, missing conduits, or unsecured wiring can cause major issues later.
What to Check:
✅ Are all electrical boxes secured to studs properly? Loose boxes can move once walls are installed.
✅ Are all circuits labelled? Mislabelling can cause confusion during installation and future maintenance.
✅ Are light switches and power points installed at the correct height? Compare with architectural plans.
✅ Are there any exposed or unprotected cables? All wiring should be secured and protected, especially in wet areas.
✅ Have conduits for external power, security, and networking been installed correctly?
2.2 Plumbing Rough-In Issues
Plumbing rough-ins must be located according to plans and manufacturer installation details. If pipes are not properly located, they may foul installation of other trade packages or may prevent flush fitment of backplates at fitoff stage. Some tapware is extremely sensitive to installation errors, has little room for misalignment, requires careful measurement and checking to ensure correct setbacks are installed.
What to Check:
✅ Are all pipe runs secured and protected? Pipes should be properly braced and positioned.
✅ Have hot and cold water lines been pressure-tested? This helps detect any potential leaks before the walls are closed up.
✅ Are drainage pipes positioned at the correct fall for proper water flow?
✅ Have all fixture locations been confirmed? A misaligned pipe could mean your vanity, sink, or toilet doesn’t fit.
✅ Is insulation installed where required? Insulation should be placed on pipes running through unconditioned spaces.
2.3 HVAC & Ventilation Rough-In Issues
If ducts and vents are not properly installed, airflow problems can occur, leading to poor heating or cooling efficiency.
Some Of What to Check:
✅ Are all ducting and vents installed at the correct locations? Compare against the mechanical plans.
✅ Are ducts properly sealed and supported? Loose or improperly sealed ducts (correct duct tape, number of turns and tape overlap) will reduce energy efficiency.
✅ Has insulation been applied to ducts in required areas? This prevents heat loss and condensation issues.
✅ Are exhaust fans and ventilation outlets in place? Kitchen and bathroom exhausts must be correctly vented outside, not into roof cavities.
2.4 Gas Plumbing Rough-In Issues
Gas lines need to be installed and tested properly to ensure safety and avoid costly rework.
What to Check:
✅ Are gas lines installed in compliance with Australian gas standards?
✅ Are shut-off valves installed in the correct locations?
✅ Has a gas pressure test been completed? A test should be performed before cladding is installed.
✅ Is the gas meter location confirmed and accessible? Ensure placement matches approved plans.
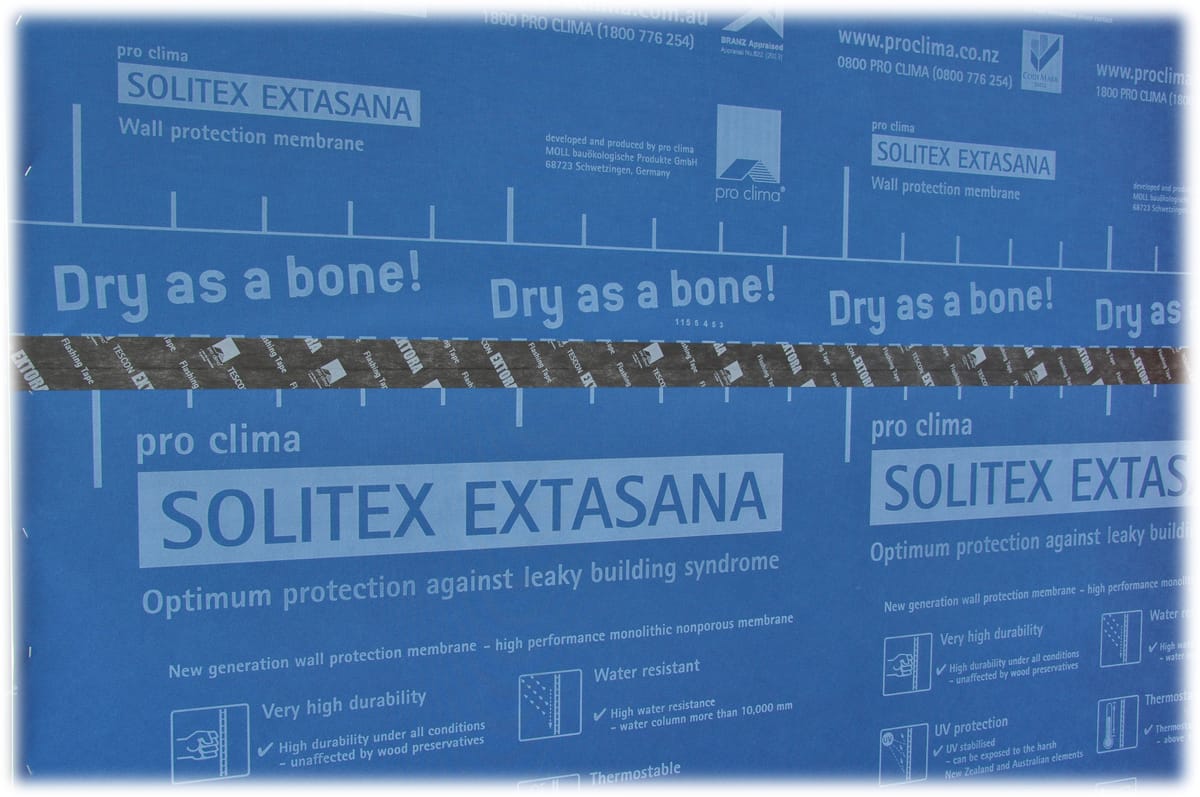
2.5 Pliable Membranes & Weatherproofing Issues
The C10 Rough In Stage Inspection Checklist includes checks for pliable membranes (sarking, vapour barriers, and insulation) in both wall and roof areas. These elements prevent moisture ingress, improve insulation, and ensure durability.
What to Check:
✅ Has pliable membrane been correctly installed with the required overlaps? Gaps can lead to water ingress.
✅ Are wall wrap penetrations sealed properly around pipes and ducts? Ensure all openings are sealed to prevent water or air leakage.
✅ Are roof sarking and wall wraps intact and secured? Tears or missing sections can lead to moisture damage.
✅ Is the insulation placement correct? Some areas require specific R-values—check compliance with energy reports.
2.6 Site Management Issues Affecting Rough-Ins
Before rough-ins are completed, site conditions must be safe and organised. A poorly managed site can lead to damaged materials, misplaced fittings, or incorrect installations.
What to Check:
✅ Is site drainage working correctly? Water pooling under or around the house can indicate poor site grading (must be 50mm fall over the first 1000mm to comply)
✅ Are all service entry points accessible? Ensure power, water, gas, and drainage connections are not obstructed.
✅ Is the site free from excess debris that could damage rough-in components?
✅ Are construction materials protected from weather exposure? Leaving pipes or ducts exposed to rain can cause warping or damage.
SECTION 3. How to Conduct a Rough-In Inspection (Step-by-Step Guide)
Conducting a thorough rough-in inspection ensures that all plumbing, electrical, gas, HVAC, and network installations are correctly installed before walls and ceilings are sealed. The C10 Rough In Stage Inspection Checklist provides a systematic process for identifying issues and ensuring that all elements comply with plans, Australian Standards, and manufacturer specifications.
3.1 Preparing for the Inspection
Before starting your inspection, ensure you have:
✅ A printed copy of the C10 Rough In Stage Inspection Checklist.
✅ A pen, highlighter, and a camera or phone to document issues.
✅ The latest set of approved construction plans for reference.
✅ Access to the site before any cladding or linings are installed.
✅ Protective gear if required (hard hat, high-vis vest, safety boots).
3.2 Following the Checklist Step by Step
The checklist is structured into sections covering site management, structural elements, plumbing, electrical, gas, and HVAC. Each section requires systematic verification of installations.
🔹 Start at Section 1: Site Management Items – Check site conditions, drainage, safety fencing, and material storage.
🔹 Verify Variations and Colour Selections – Ensure that all requested changes and specific finishes are documented and applied.
🔹 Inspect Electrical, Plumbing, and Gas Rough-Ins – Confirm all wiring, piping, and gas lines are installed according to the design.
🔹 Check HVAC and Ventilation Systems – Ensure ducts, vents, and exhaust fans are installed correctly and comply with plans.
🔹 Assess Wall Wraps and Pliable Membranes – Confirm that these are installed correctly with required overlaps and sealing.
3.3 Marking and Documenting Issues
The checklist includes a structured way to document defects, ensuring issues are recorded, tracked, and resolved before sign-off.
✅ Tick “OK” for items that meet requirements.
✅ Mark “X” for defects or incomplete work that need rectification.
✅ Use an arrow “→” for items that can’t be assessed due to site conditions (e.g., weather delays).
✅ Take photos and reference CINS numbers to track corrections efficiently.
✅ Follow up with trades immediately to ensure issues are addressed before the next stage.
3.4 Key Items to Verify During the Inspection
Below are the most critical items to check as part of the rough-in stage:
Plumbing Rough-In Checks
✔ Are all pipes securely fixed and positioned correctly according to the approved design?
✔ Have all pipes been pressure-tested for leaks?
✔ Do waste pipes have the correct fall to ensure proper drainage?
✔ Are hot and cold water lines installed correctly and insulated where required?
Electrical Rough-In Checks
✔ Are power points and light switches correctly placed at the right heights and locations?
✔ Is all wiring properly secured, labelled, and protected?
✔ Are ceiling lights positioned clear of fans and doors?
✔ Have network, security, and audio cables been installed according to specifications?
Gas Rough-In Checks
✔ Are gas lines correctly positioned and pressure-tested?
✔ Are shut-off valves accessible and installed as per Australian Standards?
HVAC & Ventilation Checks
✔ Are ducts and vents properly installed and sealed to prevent air leaks?
✔ Are exhaust fans vented externally (not into roof spaces)?
✔ Are air conditioning pipes and condensate drains installed correctly?
Pliable Membranes & Weatherproofing Checks
✔ Is the roof sarking and wall wrap installed correctly with no gaps or tears?
✔ Are all penetrations sealed properly to prevent water or air leakage?
3.5 Following Up on Issues Identified
Once the inspection is complete, any issues must be addressed before the next stage of construction.
What to Do If Issues Are Found:
1️⃣ Document the issue with photos and checklist references (CINS).
2️⃣ Contact the responsible contractor immediately to discuss rectifications.
3️⃣ Ensure corrections are made before internal linings go up.
4️⃣ Verify the issue has been resolved and update the checklist accordingly.
5️⃣ Sign off only when all defects have been addressed.
Conclusion
Building a new home is a major investment, and ensuring the quality of the construction at every stage is mandatory. The rough-in stage is one of the most important milestones in the building process because once the walls go up, mistakes become hidden and significantly harder to fix.
Our detailed C10 Rough In Stage Inspection Checklist gives homeowners, builders, and site supervisors a structured, systematic approach to inspecting and verifying key installations before proceeding with internal linings and external cladding.
Many homeowners assume builders will catch every issue, but in reality, construction sites are busy, and mistakes happen. This checklist is your best tool for ensuring that nothing gets overlooked, giving you confidence that your home is being built correctly.
By taking the time to inspect thoroughly, document issues, and ensure they are resolved before progressing to the next stage, you are protecting your time, budget, and future peace of mind.
FAQS
Below are some of the most common concerns, with answers based on best practices, compliance requirements, and the structured approach outlined in the checklist.
1. Do I need a professional to complete this checklist, or can I do it myself?
The checklist is designed for both professionals and homeowners. While a builder or site supervisor should conduct an official review, homeowners can use the checklist to double-check key elements and document concerns before signing off. If you are unfamiliar with construction quality standards, hiring a third-party inspector is a good idea.
2. What happens if I find an issue during the inspection?
If an issue is found, follow these steps:
✅ Mark the issue on the checklist with an ‘X’ and document it with photos.
✅ Reference the CINS number for tracking and resolution.
✅ Notify the relevant contractor or supplier immediately for rectification.
✅ Do not proceed with cladding or internal linings until the issue is resolved.
If the builder disputes the issue, request a written explanation and escalate it if necessary.
3. Can I still fix issues after the walls go up?
Yes, but fixing issues post-cladding is significantly more expensive. A misplaced power point, plumbing line, or structural element may require cutting through finished walls, which leads to:
❌ Extra material costs (gyprock, waterproofing, tiling)
❌ Additional labour costs
❌ Delays in project completion
4. How do I verify that plumbing rough-ins are installed correctly?
The checklist provides a step-by-step approach to verify:
✔ Correct pipe positioning – Compare with your plans to ensure all pipes align with fixture locations.
✔ Proper drainage slopes – Waste pipes should have the correct fall to prevent blockages.
✔ Pressure testing – Check that all pipes have been tested for leaks before cladding.
If anything seems off, ask your plumber for clarification before proceeding.
5. What should I check for in the electrical rough-in stage?
The C10 Rough In Stage Inspection Checklist highlights several electrical checks, including:
⚡ Power points and light switch heights – Ensure they match plans and are not obstructed.
⚡ Ceiling light positions – Verify that lights are centred and not interfering with ceiling fans or doors.
⚡ Wiring protection – Ensure electrical cables are clipped, labelled, and properly secured.
⚡ Weatherproofing – External power points must have IP-rated weatherproof covers.
6. Who is responsible for fixing rough-in issues?
The builder and subcontractors are responsible for correcting rough-in defects. However, homeowners should:
✅ Document issues clearly using the checklist.
✅ Ensure corrections are made before proceeding to the next stage.
✅ Verify compliance with Australian Standards before signing off.
Once walls are up, disputes become harder to resolve—so confirm all work before proceeding.
7. What should I do if my builder refuses to fix an issue?
If a builder refuses to rectify an issue:
1️⃣ Document the defect with photos and checklist references.
2️⃣ Request a written explanation as to why they are refusing to fix it.
3️⃣ Compare the issue against Australian Standards or manufacturer guidelines.
4️⃣ Escalate the dispute to consumer protection bodies if necessary (e.g., the relevant state building authority).
8. What’s the biggest mistake homeowners make at this stage?
The most common mistake is not conducting a thorough inspection before walls are sealed. Other frequent errors include:
❌ Assuming the builder has checked everything.
❌ Not comparing work against the approved plans and variations.
❌ Failing to document issues with photos and CINS references.
❌ Not ensuring trades correct issues before signing off.
9. How do I ensure my house meets Australian Standards?
The C10 Rough In Stage Inspection Checklist aligns with key Australian Standards, including:
✔ AS/NZS 3000 (Electrical Installations - Wiring Rules)
✔ AS/NZS 3500 (Plumbing and Drainage)
✔ AS 2870 (Residential Slabs and Footings)
✔ National Construction Code (NCC) compliance
To ensure compliance:
✅ Verify that all work follows relevant standards—ask for certification if unsure.
✅ Request compliance documentation from your builder before final sign-off/payment is made.
If something doesn’t look right, ask questions before work continues.
10. How long should a rough-in inspection take?
A proper rough-in inspection takes time—it should not be rushed. A thorough review typically takes:
⏳ 2-3 hours for a small home
⏳ 4-6 hours for a larger or more complex build
It’s essential to walk through every room and systematically verify each checklist item before proceeding.
Further Reading