Introduction
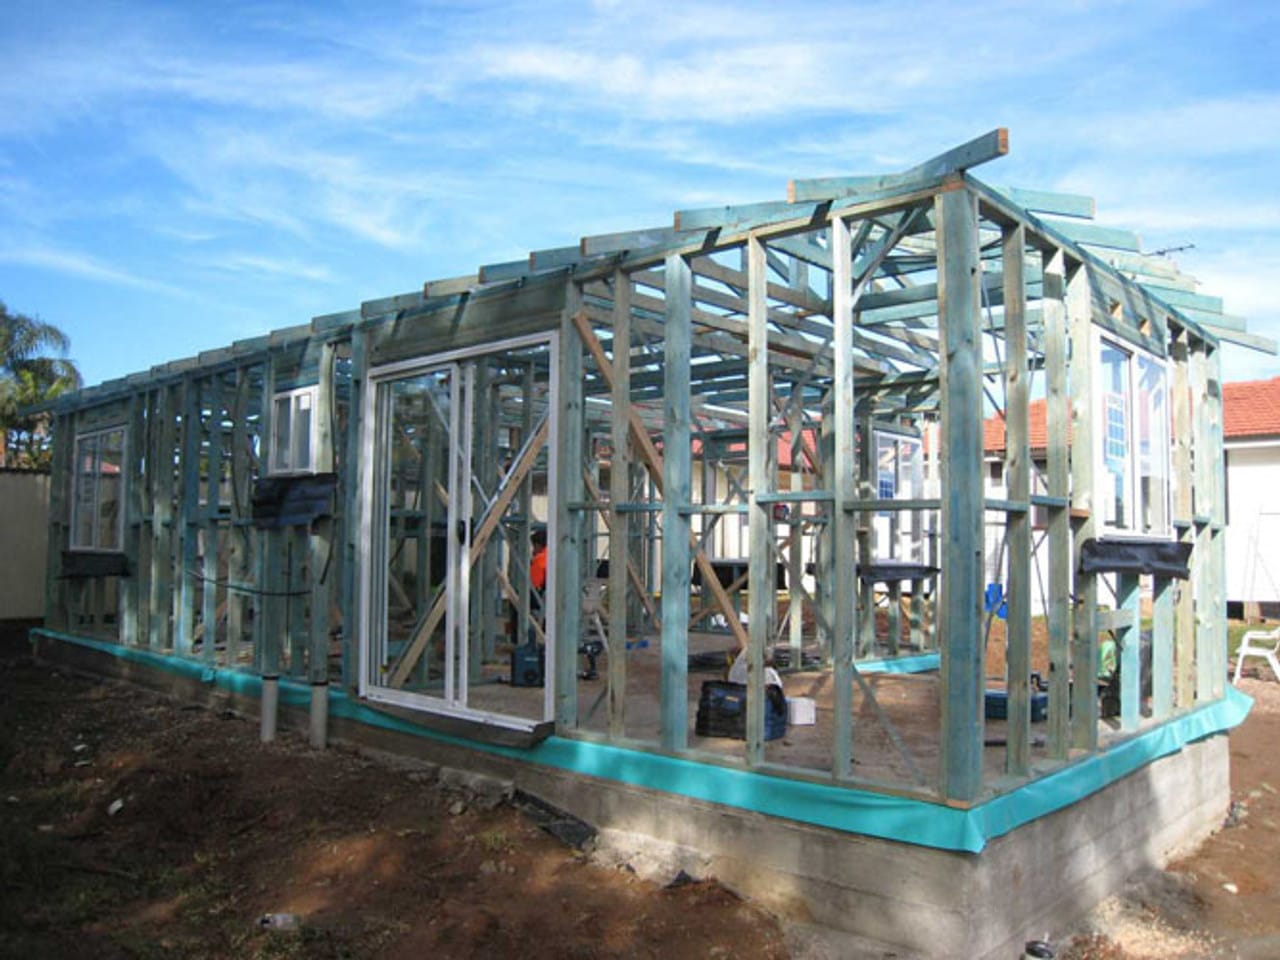
Building or renovating a home can feel like stepping into a whole new world—one filled with technical terms, detailed plans, and big decisions. I’ve been there, trying to wrap my head around what’s happening on-site and wondering if everything’s up to scratch. One of the trickiest yet most important parts to navigate is the timber frame stage of construction. This stage sets the groundwork for your home’s walls, floors, ceilings, and roof structure, ultimately determining how solid, safe, and comfortable your place will be for decades to come.
That’s where the C7 Timber Frame Stage Inspection Checklist comes in.
Think of it as your personal guide, something that translates those technical plans and Australian construction standards (like AS1684) into an easy-to-follow roadmap to ensure quality. We designed it to be comprehensive, helping everyday homeowners—those without a building background—identify potential issues, ask the right questions, and ensure everything behind your walls is done correctly before the plasterboard goes up.
In this post, I’m going to walk you through what the C7 Timber Frame Stage Inspection Checklist is, why it matters, and how to use it.
We’ll cover everything from the basics of framing and trusses, to tie-downs and bracing, all in plain English. By the end, you’ll know exactly what to look for, how to identify warning signs, and when to speak up if something doesn’t seem right.
The goal here isn’t to turn you into a builder overnight. Instead, it’s about giving you the confidence and understanding to ensure your home’s frame is sound. After all, when you’re pouring so much of your time, effort, and money into your home, you deserve peace of mind.
With this checklist as a guiding hand, you’ll be able to head on-site, look closely at your new home’s bones, and feel more certain that you’re getting the quality you’ve paid for.
At the time, the company had no formal quality management system in place—no standardised stage checklists, no process for identifying or tracking defects, and no methods to manage or mitigate issues in the future.
Don’t let the absence of proper business processes or quality management systems compromise the frame quality of your new home. Keep reading to explore our detailed C7 Checklist and ensure top-notch results.

What is the C7 Timber Frame Stage Inspection Checklist?
At its core, the C7 Timber Frame Stage Inspection Checklist is a tool that helps you make sense of the structural elements going into your home at the frame stage. Think of it like a blueprint for quality, but in everyday language. Rather than simply trusting that everything’s been done correctly behind the scenes, this checklist gives you a hands-on way to verify that important framing details align with the construction plans and meet Australian building standards.
Breaking Down the Basics
This checklist is tailored for the people who may not have a construction background. It walks you through each component—walls, floors, ceilings, trusses, bracing, and tie-downs—and explains to you what’s right, what’s questionable, and what might need further investigation. The idea is that you don’t have to be a carpenter or an engineer to understand most of the key concepts.
Why Australian Standards Matter
If you’ve ever heard of AS1684, that’s the Australian standard for residential timber framing. These guidelines ensure that materials, installation techniques, and structural requirements are all up to scratch. The C7 checklist incorporates these standards, helping you confirm that your builder is using the correct timber sizes, fixings, and installation methods. By doing so, it bridges the gap between industry language and the real-world outcome you can see on-site.
What the Checklist Covers
Walls and Noggings:
Far more than just “blocking” between studs, noggings are critical structural elements that help maintain straight, stable walls. The checklist ensures that each nogging is placed at the correct height and spacing as per AS1684, that studs aren’t over-notched or over-bored, and that all connections use the right nail sizes and patterns. Properly installed noggings help distribute loads, minimise timber movement, and reduce issues like bowed walls down the track.
Ceiling and Floor Frames:
Floor joists and ceiling joists must be accurately spaced, level, and aligned to prevent long-term sagging or deflection. By following the checklist, you’ll confirm correct timber grades (e.g., MGP10, MGP12), verify that joist hangers are properly fixed, and ensure that load-bearing walls align with supporting members below. This attention to detail at the frame stage significantly reduces the risk of uneven floors, creaking boards, or cracked plaster ceilings down the line.
Roof Trusses and Tie-Downs:
Prefabricated roof trusses, engineered by suppliers like MiTek or Pryda, come with manufacturer’s specifications that must be followed to the letter. The checklist guides you in checking that trusses match approved drawings, are accurately positioned and oriented, and that each connection point—be it a bracket, screw, or strap—is correctly installed. Given Australia’s varied wind regions, verifying proper tie-downs ensures the roof structure can resist uplift and lateral forces, maintaining the integrity of your home’s “top hat.”
Bracing Systems:
Bracing elements—whether metal straps, timber bracing units, or sheet bracing—give your home structural stiffness and resistance against racking forces. The checklist helps confirm that brace types, locations, and fixings meet the design documentation and AS1684 requirements. Correct tensioning of speed braces, proper edge distances for nails, and adherence to bracing layouts not only keep your home rigid under load but also assure compliance with Australian standards.
A Roadmap for Accountability
Most homeowners rely heavily on their builders or independent inspectors for quality control. While these professionals are helpful, the C7 checklist puts some control back in your hands. It empowers you to double-check that what’s being promised is actually delivered. It’s not about catching the builder out—it’s about collaborating and ensuring everyone’s on the same page, especially when it comes to structural integrity.
By having this checklist as a reference, you’ll feel more confident walking around the construction site, asking informed questions, and making sure that any concerns are addressed well before the plasterboard covers everything up. This proactive approach helps keep your project on track, on budget, and in line with Australian standards, all while reducing the risk of costly surprises later.


Why is the Frame Stage So Important?
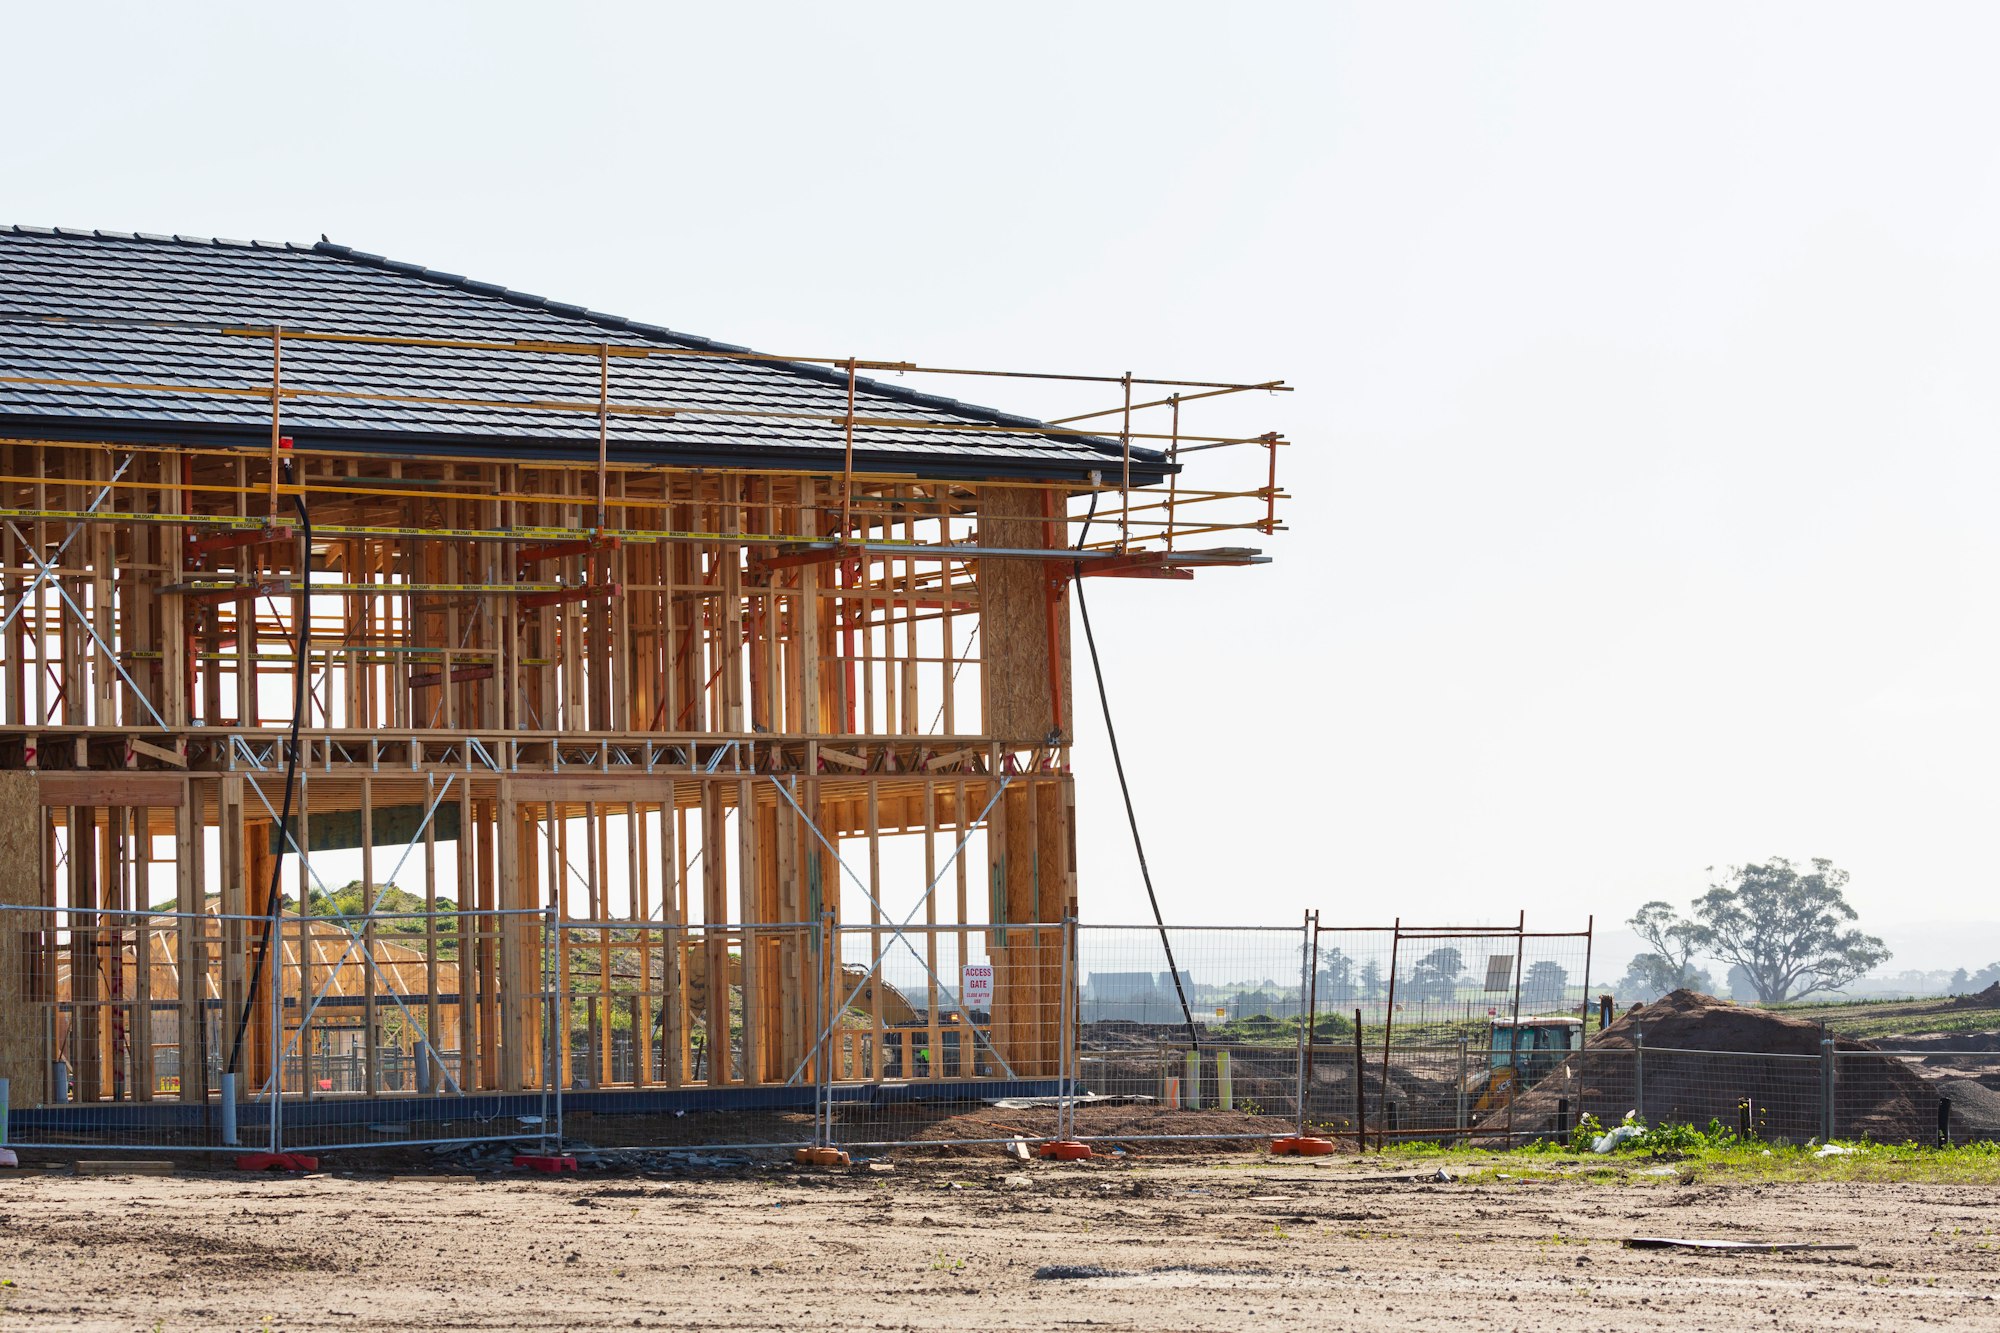
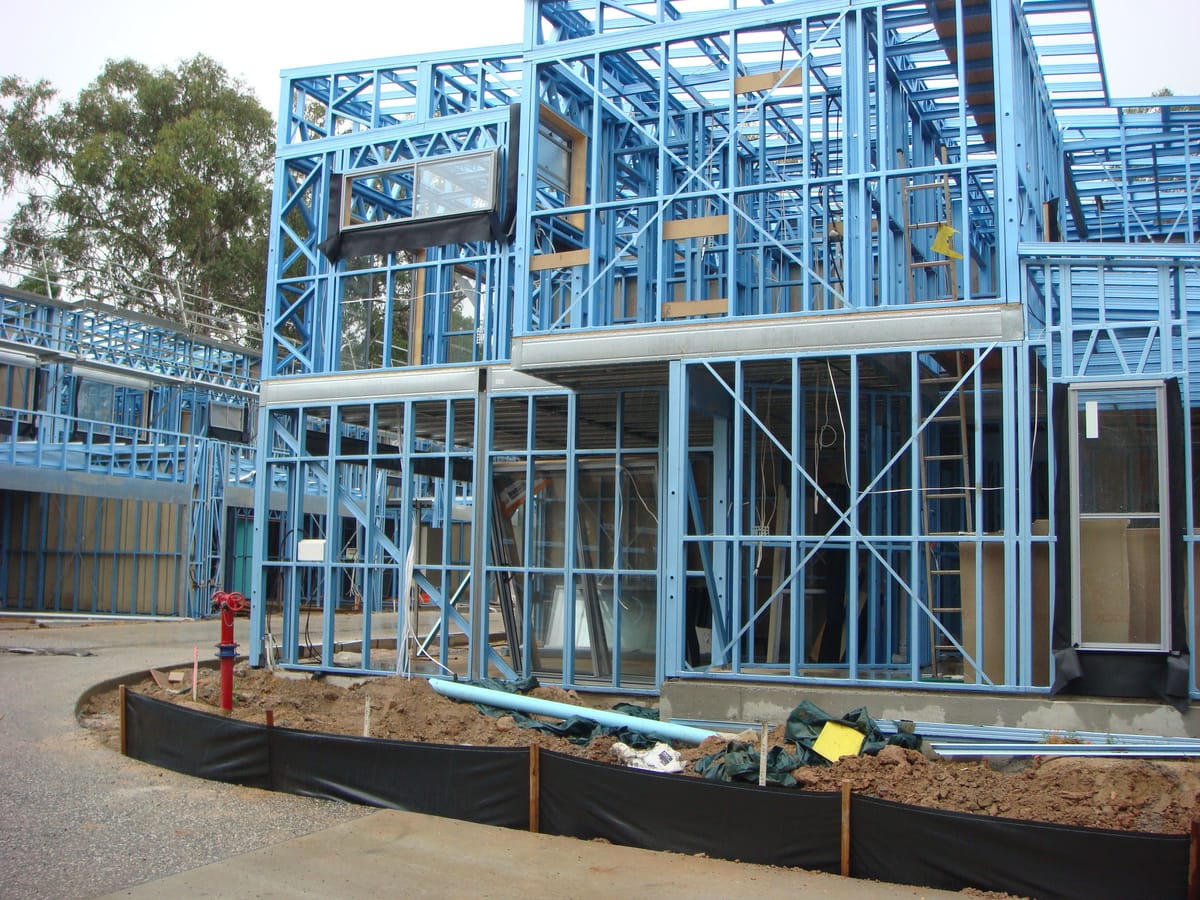
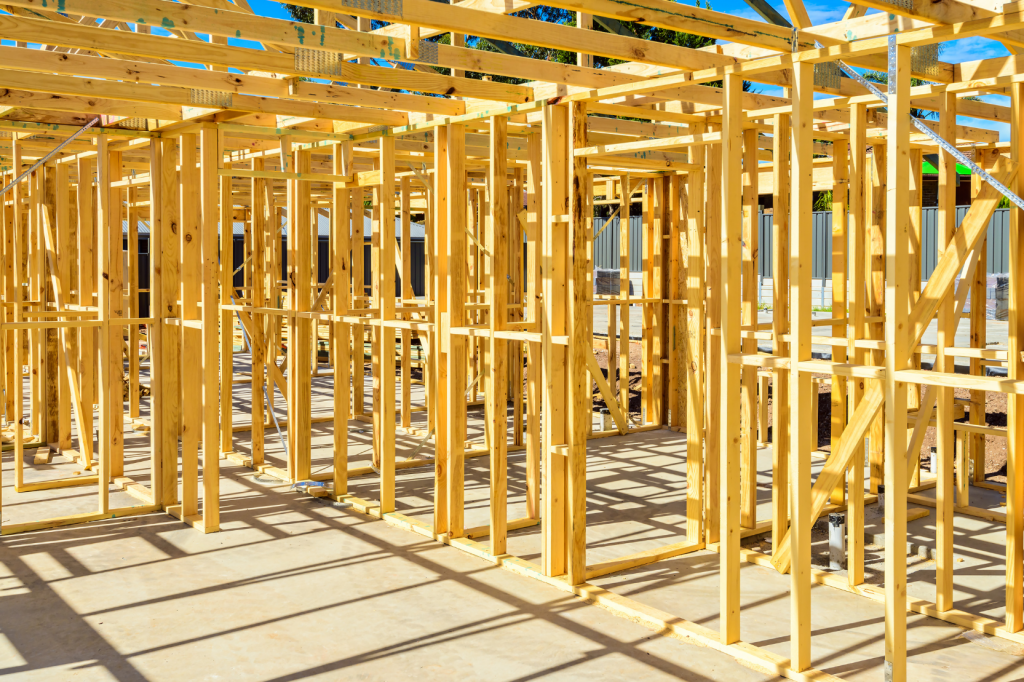
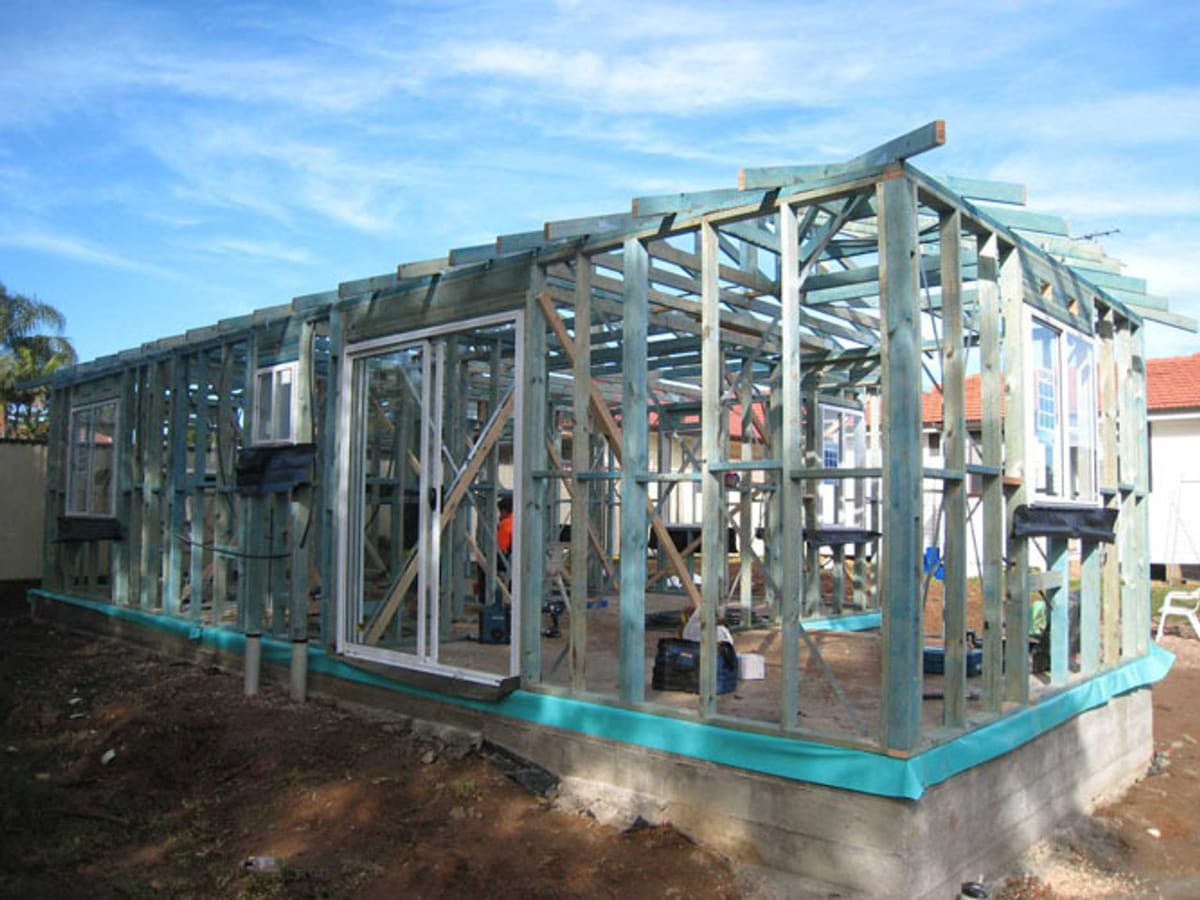
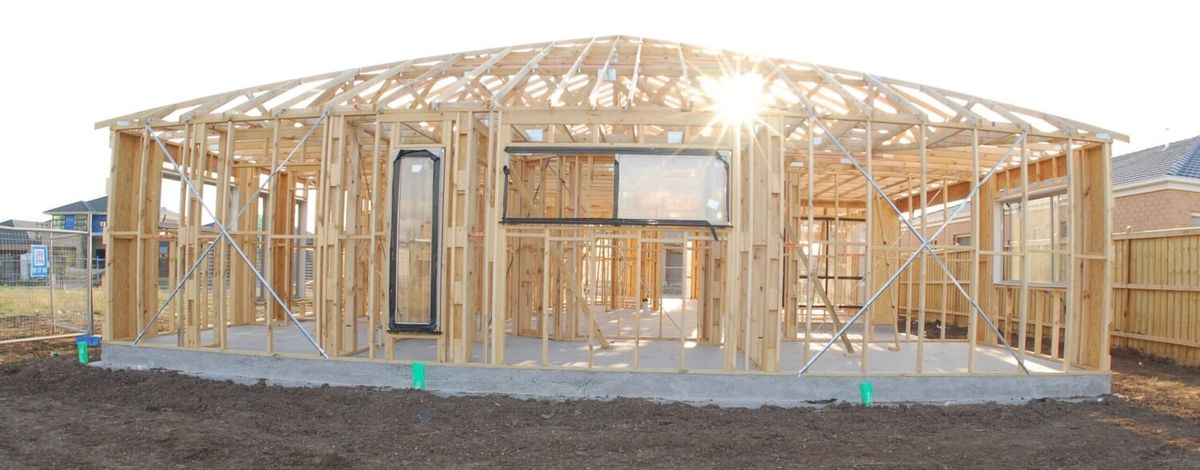
The frame stage of construction might not look as exciting as when the wall linings are fixed or the kitchen is installed, but it’s the foundation on which the rest of your home is built—literally. If you think of your home as a living body, the timber frame is its skeleton. It gives shape, supports weight, and ensures every piece fits together the way it should.
Laying the Groundwork for Durability:
A properly built frame safeguards you against a host of future problems. If the frame is crooked, not properly braced, or uses incorrect materials, issues can pop up long after the builders have left. You might notice doors that don’t close smoothly, floors that feel a bit “bouncy” underfoot, or cracks forming over time. By getting things right at the frame stage, you’re setting yourself up for a more comfortable, worry-free living environment down the road.
Managing Costs and Timelines:
Making sure the frame is correct from the get-go can save you both money and time. Picture this: if a key structural element is misplaced or a truss isn’t tied down properly, it might not be discovered until much later, possibly when the plasterboard is up and the finishing touches are in place. Fixing that kind of problem at a late stage can mean ripping out walls, redoing work, and shouldering unexpected extra costs. Early detection through the C7 checklist helps you avoid these costly detours.
Ensuring Compliance with Australian Standards:
Your home isn’t just any building—it must comply with the Building Code of Australia and standards like AS1684. These requirements ensure that your home’s structure can handle your site conditions, from strong winds to seasonal changes.
Setting the Stage for Everything Else:
The frame stage lays the groundwork for wiring, plumbing, insulation, and interior finishes to follow. When the frame is put together correctly, it makes life easier for other trades. Electricians, plumbers, and plasterers will have an easier time working, reducing delays and minimising the chance of conflicts or last-minute adjustments. In other words, a solid frame speeds up the entire construction process and keeps everyone happy.
Key Areas of the Checklist Explained
The C7 Timber Frame Stage Inspection Checklist breaks down the frame inspection process into clear, manageable parts. Each section focuses on a particular aspect of your home’s frame, guiding you on what to look for, what’s acceptable, and what might raise a red flag. Let’s take a closer look at these key areas and why they matter.
1. Site Management Items
Before you get to the frame itself, it’s important to inspect the conditions on the building site. Is the site tidy, safe, and properly managed?
What to Look For:
- Sediment Fencing: Are temporary fences in place to prevent soil erosion and protect neighbouring properties?
- Signage and Safety Measures: Is the site clearly marked, with the appropriate warnings and safety notices displayed?
- Clean, Accessible Workspace: Is the area relatively free of obstacles, rubbish, or materials left haphazardly?
Why It Matters:
A well-managed site reduces the risk of accidents, delays, and damage to materials. When the crew can work efficiently in a well-organised environment, it keeps the entire project running smoothly. Plus, good site management shows professionalism and adherence to local regulations.

ESC is more than just putting a sediment fence in the ground. Some pre-planning and effort is required.

Use this checklist before you start site works.

C4 is your earthworks inspection checklist
2. Variations & Colour Read
Each house build is unique, even if you have bought a "standard plan" and sometimes you might request changes or upgrades along the way—different timber types, window finishes, or additional structural features. Site conditions are different on every building site so there are always changes from standard allowances. These are known as “variations.”

What to Look For:
- Plan Consistency: Check if the variations you’ve agreed to with your builder (like upgraded timber grades or special window frames) are actually reflected on-site.
- Correct Materials: Ensure the right materials and finishes are being used, as specified in your updated plans.
Why It Matters:
If variations aren’t properly noted or followed, you might end up with unexpected changes to the look, feel, or long-term structural performance of your home. Confirming these details now helps avoid confusion and disappointment later.
3. General Timber Frame Quality
This is the heart of the checklist—ensuring that the main structural frame of your home is built to a high standard.
Some general items to look for include:
- Nail Sizes and Patterns: Are the correct nail sizes used, and is everything properly nailed off (fastened securely)?
- Skew Nailing and Corrosion Protection: Skew nailing (nails driven in at an angle) should be done correctly, and metal parts must have corrosion protection to suit the exposure category for your site location.
- Stress-Graded Timber & sizing: Timber should be of the right strength grade and size. Crazy, I know but sometimes ordering mistakes happen by schedulers who are without their 10x morning cups of Kopi Luwak!
Why It Matters:
Quality at this stage affects the strength and stability of your home. Correct nailing patterns and corrosion-resistant fixings ensure the structure remains safe and sound over time.
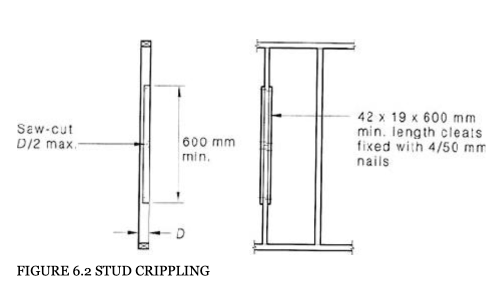
4. Cutting & Drilling Guidelines
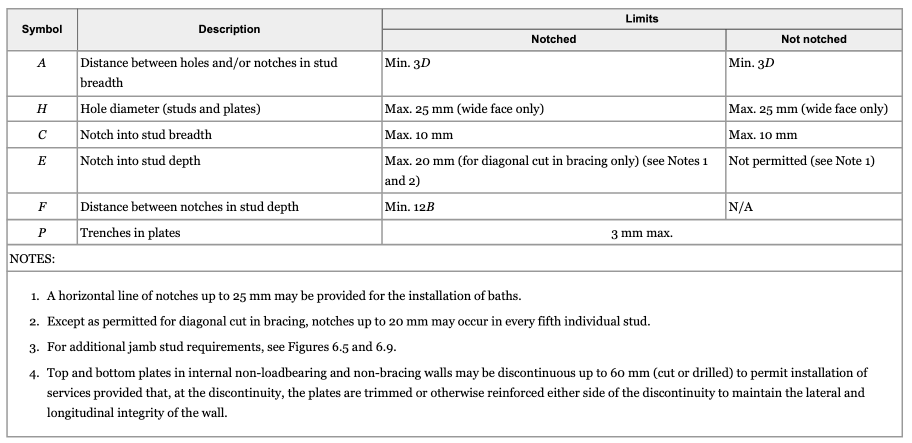
Timber studs, beams, and joists aren’t just slapped together; they need careful cutting and drilling. Incorrect installation can weaken the frame. There are standards and guidelines to what can and cannot be done in manufactured timber products. When in doubt, read the manufacturers installation guidelines - they are clear and concise.
What to Look For:
- Approved Holes and Notches: Holes drilled for services (like plumbing pipes or electrical conduits) must be placed in acceptable areas and kept within size limits.
- No Excessive Cutting: If a piece of timber looks overly cut or notched, it might compromise structural strength.
- No hacking or bashing: sounds crazy but some people are just stupidly stupid and don't care that this is your new home. Some trades give absolutely zero fucks about quality.
Why It Matters:
Drilling holes and making notches is necessary to fit utilities, but doing it wrong can create weak spots that may cause issues later—like sagging floors or creaking walls.
5. Outside Items & Openings
This part covers areas where the frame interacts with windows, doors, and external features.
What to Look For:
- Window and Door Opening sizes & installation: Are they framed to the correct size and installed properly. This ensures your doors and windows fit right, open and close smoothly, and don’t leak. Always make sure they are installed in accordance with the manufacturers recommended support and fixing methods (often on the product wrapping itself)
- Eaves, Fascia, and Soffits: Check that these elements are framed with proper support and securely fixed/fastened in position using the correct fixing types, lengths and corrosion resistance to suit the exposure classification for your site location.
Why It Matters:
The external openings are points of vulnerability. When done right, they ensure weather-tightness, security, and structural integrity for features that connect your home’s interior to the outside world.
The embed file below is not really timber framing, more external framing but its old and worth reading to get general context around material classification and durability and factors affecting its performance over time.
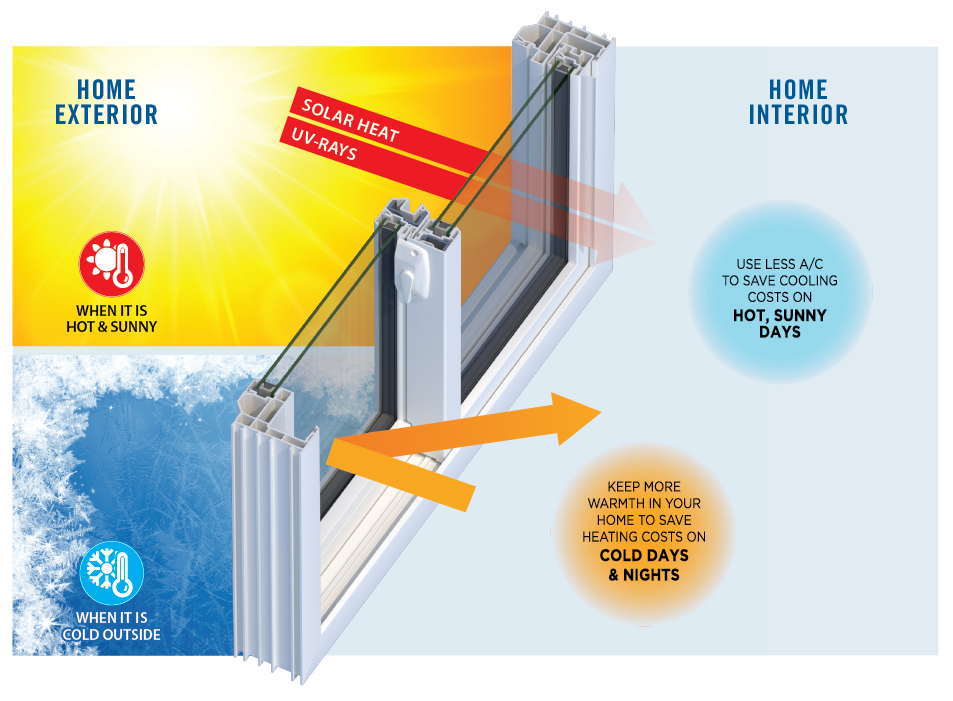
Glazing - windows and doors, their material and installation has a huge effect on the livability of your new home.
6. Floor Framing & Ceiling Framing
Your home’s floors and ceilings rely on strong framing to remain level and stable.
What to Look For:
- Bearers and Joists: These are horizontal beams that carry floor loads. They must be correctly spaced, level, and securely fastened.
- Ceiling Joists and Noggings: Ceiling joists support the overhead load, while noggins provide extra bracing to load bearing vertical members, they also provide a fixing point for the interior linings, which help brace the structure from raking forces. Check that everything’s plumb, straight and properly fixed to ensure quality appearance and make finishing trades look their best.
- Change of Direction: When trusses change direction—shifting from running parallel to turning at right angles, often at girder truss or truncated girder locations—the ceiling framing must be fully nogged out in accordance with Redbook (Gyprock) guidelines. This provides a solid backing for fixing your ceiling sheets. Essentially, where the ceiling lining changes direction, you need properly installed noggings to ensure everything stays secure and supported. It makes sense, doesn’t it?
Why It Matters:
Getting your wall and ceiling framing right at this stage is important. If these are off, you’ll end up with finishing and aesthetic issues.
7. Timber Trusses & Tie-Down
The roof trusses form a integral part of your home’s structure, and tie-downs secure these trusses to the wall framing holding them in place against wind uplift forces.
What to Look For:
- Correct Truss Installation: Trusses must be installed as per the design, without unauthorised modifications.
- Tie-Downs: Metal straps or fixings that “tie” the roof structure down to the walls. Ensure these are properly installed with the correct number of fixings, and fixings located correctly through punched holes - not blasted anywhere the nail gun lands - this is non compliant everyday of the week.
Why It Matters:
Poorly secured trusses might lead to roof failures in strong storms and insurance claim issues. Proper tie-downs keep your roof where it’s supposed to be—over your head. and not in your neighbours front yard. There is a huge difference in uplift capacity between half-assed installation and per the manufacturers with hardly any time difference between both installation methods.
Page 7 onwards in this embed is worth looking at 👇️
8. Bracing & Speed Bracing
Bracing keeps your walls from raking forces (lateral forces applied to the ends and sides of the house), and speed bracing is a special type of metal strap that ensures internal and external rigidity (along with timber sheet braces, villa board bracing).
What to Look For:
- Correct Placement and Tension: the correct number of braces must be installed in the right locations as per the bracing and tiedown layout. Its really not hard, they tell you what to put and where and as long as you have a tape measure that can measure up to 1200mm - your in business. Braces must be installed at the right angles and tensioned correctly and have the correct number and type of fixings at the designed spacings.
Why It Matters:
Without proper bracing, your home’s frame could shift under wind loads or general settling, potentially causing cracks and structural issues later.
9. Garage Framing & Special Features
Garages might have different framing needs due to larger doors and unique load requirements.
What to Look For:
- Garage Door Supports: Lintels and extra framing around the large garage door opening must be solid.
- Noggins for Fixtures: Ensure that the garage door motor, track and tension bar mounting points all have solid timber blocking in the correct locations per the manufacturers set our diagram for your door width, type and motor style. They are all similar but can be slightly different depending on the head height and weight of the garage door used (wind rating also affects this).
Why It Matters:
No fixings in place means additional call out costs and interior wall lining repairs to install what is necessary2 to allow the garage door installation.
10. Plan Walkthrough & Features
Take a final pass through your home’s layout.
What to Look For:
- Check Room Dimensions: Make sure walls are placed where they should be, corners are at right angles, and everything matches your floor plan.
- Shelves, Niches, and Bulkheads: If you’ve planned custom features, confirm that the framing accommodates them properly.
Why It Matters:
This final once-over ensures you won’t have surprises later, like a niche that’s too narrow or a room that isn’t quite the size you expected.
11. Reference Area & Technical Drawings
This part of the checklist encourages you to look at any reference drawings or technical details provided by your builder or architect.
What to Look For:
- Comparing On-Site Work to Plans: Cross-check what you see on-site with the drawings. Does everything align with the approved plans?
- Clarifying Confusing Details: If something doesn’t match the plans, note it down and ask your builder to explain.
Why It Matters:
Having the right reference material ensures that any questions you have are based on solid evidence. It’s a way to keep everyone accountable and maintain open communication.
Identifying Issues & Taking Action
Let’s say you’ve gone through the checklist and noted a few items that raise questions or concerns. Maybe a tie-down strap isn’t where it should be, or you’ve spotted a truss that doesn’t look like it matches the approved plans. The beauty of using the C7 Timber Frame Stage Inspection Checklist is that it not only helps you spot potential problems but also guides you on what to do next. Take photos and note the image reference next to the elements. Or, if your super motivated (like im sure you are anyway) use our CINS numbering system. It lets you physically identify elements and associate them with images and checklist items. no rocket science here.
Early Detection is Key
Spotting issues at this stage saves you a world of trouble later. If something looks off now—before the plasterboard goes up and the finishing touches are applied—you can bring it to your builder’s attention and get it fixed when it’s still relatively simple and inexpensive. This early intervention helps keep your budget and timeline under control.
Open Communication with Your Builder
If you find an item on the checklist that doesn’t match what you see on-site, don’t panic. Instead, approach your builder or site supervisor with clear, specific questions. For example, you might say, “I noticed that the ceiling joists in the living room don’t seem evenly spaced. Could we review the plans and see if this needs to be adjusted?” By being calm, direct, and polite, you set the stage for a productive conversation rather than a confrontation.
Requesting Corrections and Follow-Ups
Builders understand the importance of delivering a sound structure. If there is a genuine issue, most reputable builders will address it promptly. In some cases, you might consider bringing in an independent building inspector or a structural engineer for a second opinion, especially if a problem seems significant or you’re not fully satisfied with the builder’s explanation.
Document Everything
Keep records of what you observe, including notes and photos. If you’ve sent emails or made phone calls discussing particular issues, save that information too. This documentation provides a reference point if disputes arise later. It also shows that you’re actively engaged in the process and expect accountability.
Plan for Future Assurance
Some homeowners might use the checklist multiple times during the frame stage—once when the frame first goes up, after the framing carpenter has finished 97% of the installation, and again after the frame write up has been done by the carpenter.
Re-checking ensures that any identified problems were indeed resolved.
Common FAQs About the C7 Timber Frame Stage Inspection Checklist
1. What if I don’t understand a term on the checklist?
It’s completely normal to come across unfamiliar jargon. If a term leaves you scratching your head, don’t be shy about asking your builder or an independent inspector. You can also do a quick online search or refer to resources like AS1684. The goal is to clarify, not confuse.
2. Do I need a professional inspector, or can I do this myself?
You don’t need to be a construction expert to use the checklist—it’s designed for everyday homeowners. That said, a professional building inspector or structural engineer can offer valuable peace of mind, especially if you encounter items that you’re unsure about or that seem significant.
3. How often should I use the checklist during construction?
At the very least, use it once the frame is up but before the plasterboard goes on. Some homeowners like to do multiple checks, especially if they find issues or want to confirm that corrections have been made. The more proactive you are now, the fewer surprises you’ll have later.
4. What if my builder is resistant to following the checklist?
A good builder should welcome transparency and quality assurance. If your builder seems reluctant, approach the topic calmly and stress that this is about ensuring everyone’s on the same page. If you’re still not satisfied, you might consider an independent inspection or seek guidance from your state’s building authority.
5. How does this checklist differ from final building inspections?
A final building inspection typically happens once the home is nearly complete. The C7 checklist is specific to the frame stage, allowing you to catch structural issues early. Think of it as a preventative measure rather than a post-mortem review.
6. Does this checklist align with the National Construction Code (NCC)?
Sort of. The checklist is designed with Australian standards and the NCC in mind. It doesn’t replace a formal compliance check, but it helps ensure that what’s being built meets the relevant guidelines. This checklist is bases on the same checklists we have developed and continued improving over the last 25 years in construction. Most recently, we have re-read the most relevant standards and manuals an re-updated this checklist to ensure its up to date.
7. Can I customise the checklist based on my home’s design or material changes?
Absolutely. If you’ve got unique features or have agreed upon variations with your builder, feel free to add or modify items. The point is to make it as relevant as possible to your specific project.
8. Is it normal to find issues during the frame stage?
Some minor issues are common—it’s part of the building process. What matters is how they’re addressed. A small oversight now can be fixed quickly, preventing larger problems down the track. Plumb and straight items are the most common along with service trades removing noggings, overcutting or over nothing framing timber to make their installation easier.
9. How do I know if something is a minor fix or a major problem?
If you’re unsure, ask your builder for clarification. You can also consult an independent inspector. Generally, minor fixes don’t threaten the home’s structural integrity and can be resolved easily. Major problems often involve load-bearing elements or critical connections. When in doubt, seek professional advice.
10. Why So Many Checklist Items?
Yes, there are a lot of items—maybe more than you expected. However, having a detailed checklist ensures that you know exactly where to look and what to ask before the frame stage is locked in. Rather than trusting everything is fine, you can verify each critical detail. By doing so, you’ll be better prepared to raise any concerns, request corrections, or seek clarity from your builder before finalising the frame stage and paying the associated progress claim. In short, this comprehensive approach gives you greater confidence that your home’s frame meets the required standards, ultimately helping you avoid uncertainty and potential costly fixes down the track.
Conclusion
Building a home is a journey filled with excitement and, at times, uncertainty. The C7 Timber Frame Stage Inspection Checklist is designed to make one of the most critical phases—the frame stage—a little more transparent and a lot less stressful. By using this checklist, you’re not just ticking boxes; you’re empowering yourself to play an active role in your home’s construction.
Getting the frame right early can prevent future headaches, reduce unexpected costs, and ensure long-term comfort and stability. Armed with this checklist, you can head on-site, review the critical components, and confidently engage with your builder to clarify any concerns. Rather than worrying about what you don’t know, you’ll have a clear roadmap guiding you through each inspection point.
Ultimately, the C7 checklist isn’t about challenging your builder or becoming a construction expert overnight. It’s about giving you the peace of mind that your investment is on track and being built to a standard that meets Australia’s regulations and your own expectations.
With this knowledge and assurance behind you, you can proceed to pay your frame stage claim knowing that your home’s “bones” are as strong, straight, and dependable as they should be.
Further Reading


Pro Tip: Mitek and Pryda installation guides are invaluable at the frame stage, as they detail the proper methods for installing and bracing frame elements. Seek out these documents—they’re often stored in the meter box inside a ziplock bag, along with a pencil that, admittedly, may not be the carpenter’s favorite.


