

This is the second post in our short series on a concrete pathway repair job. You can read all about the basis for the repair in our Part 1 of the post (link below).
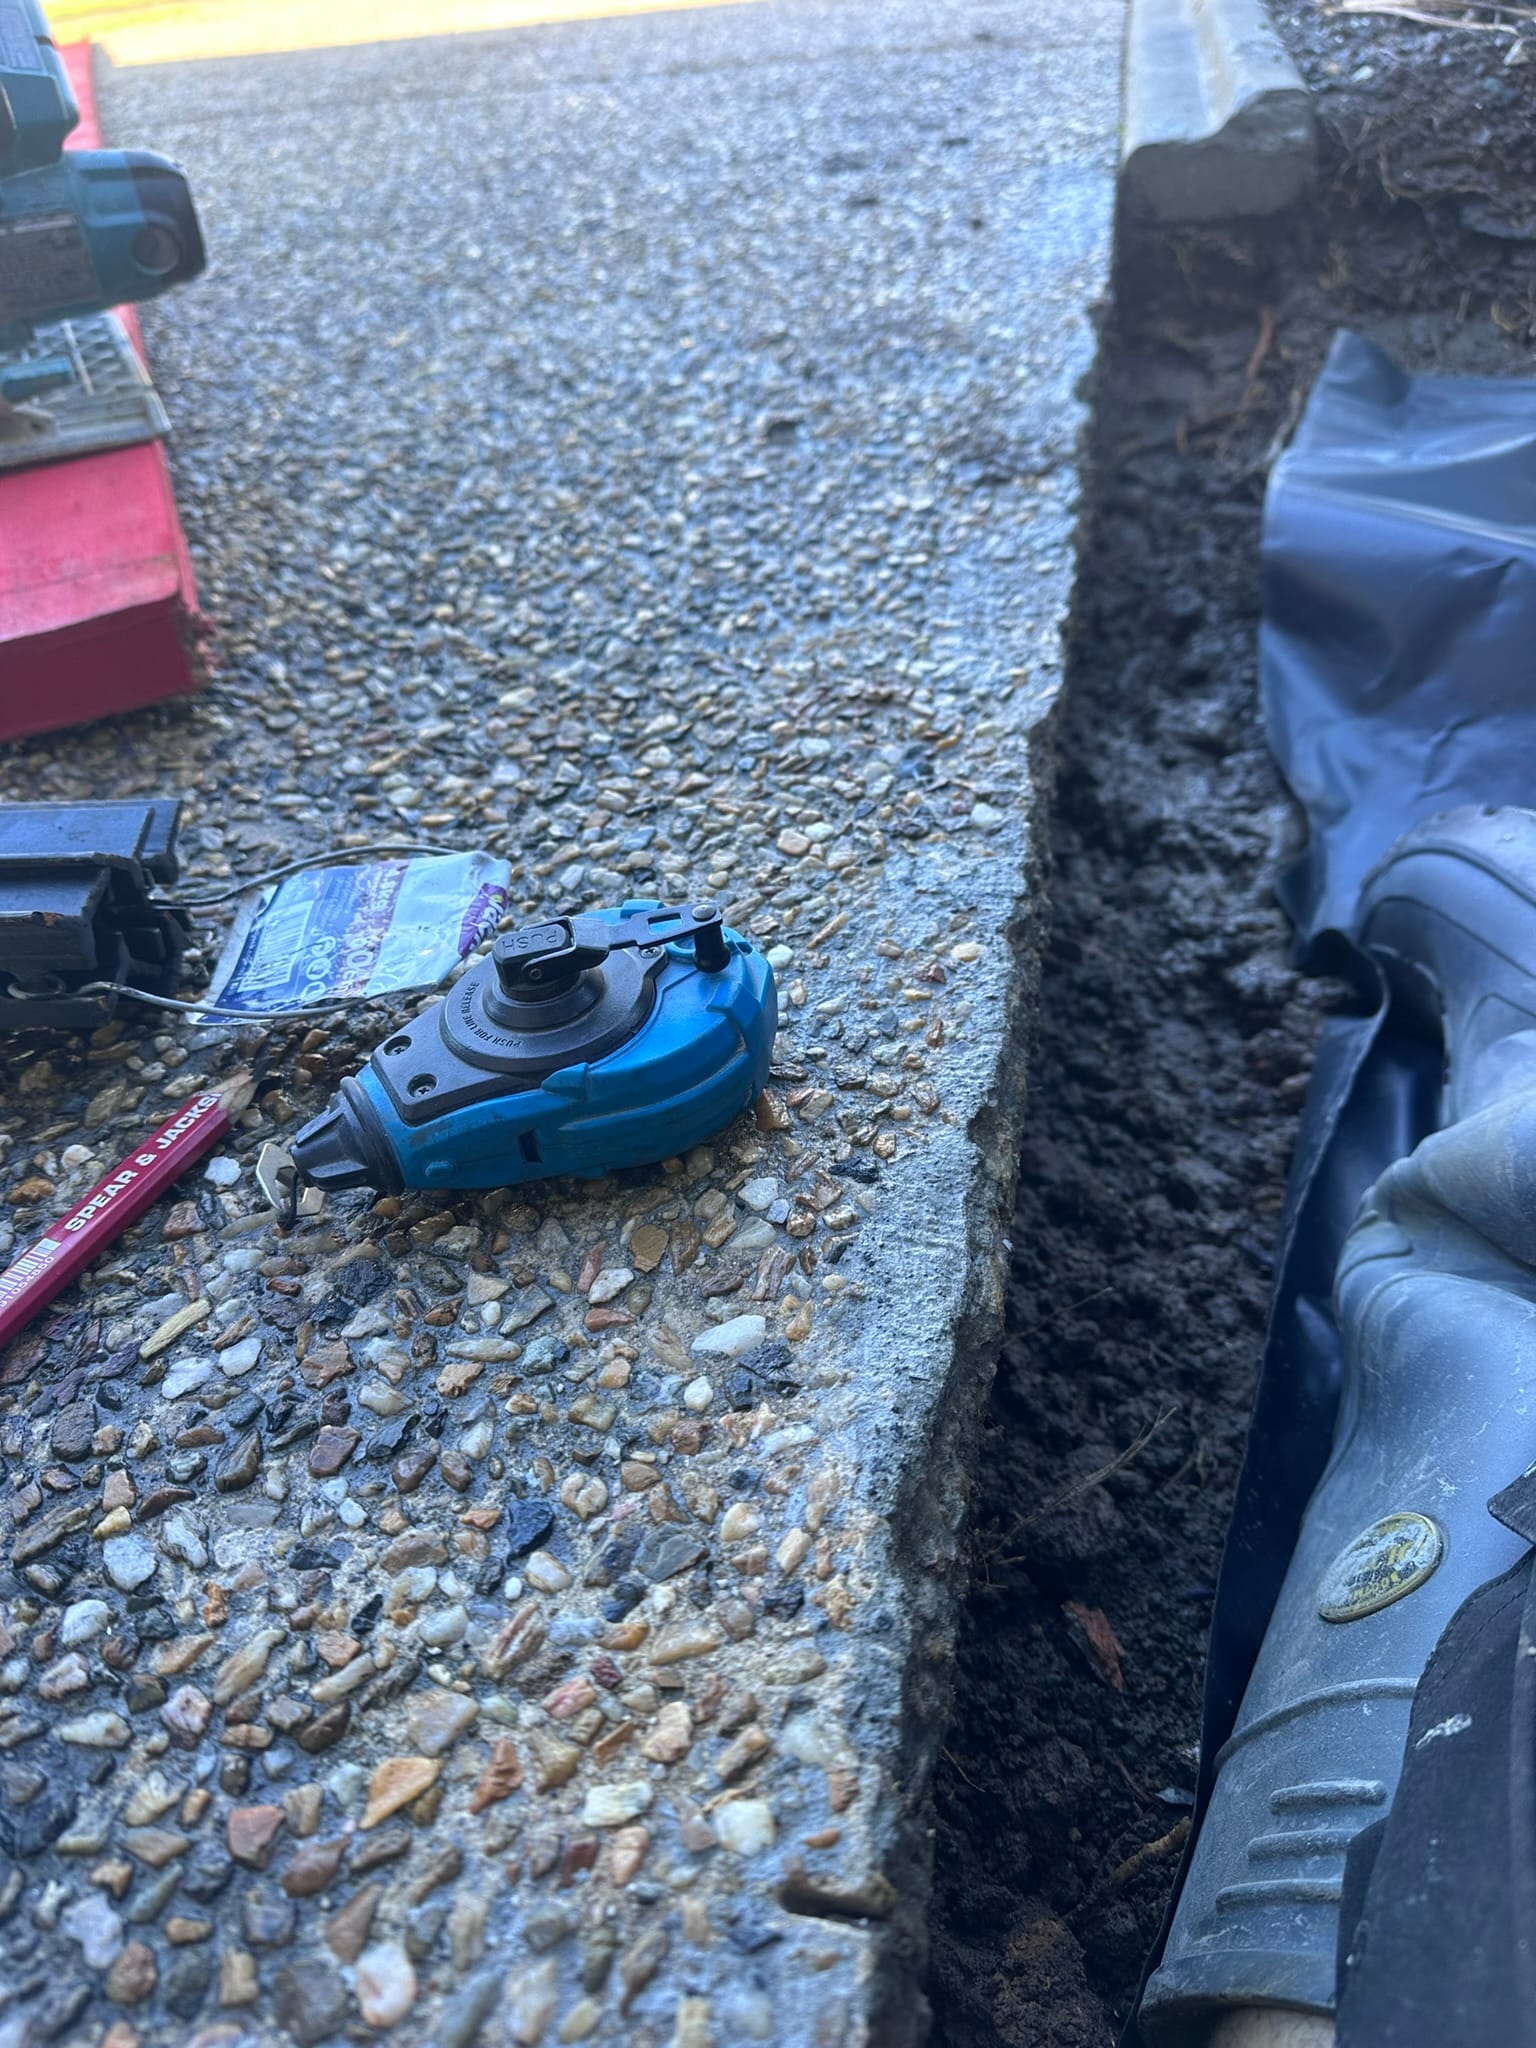
Missing Prep Photos
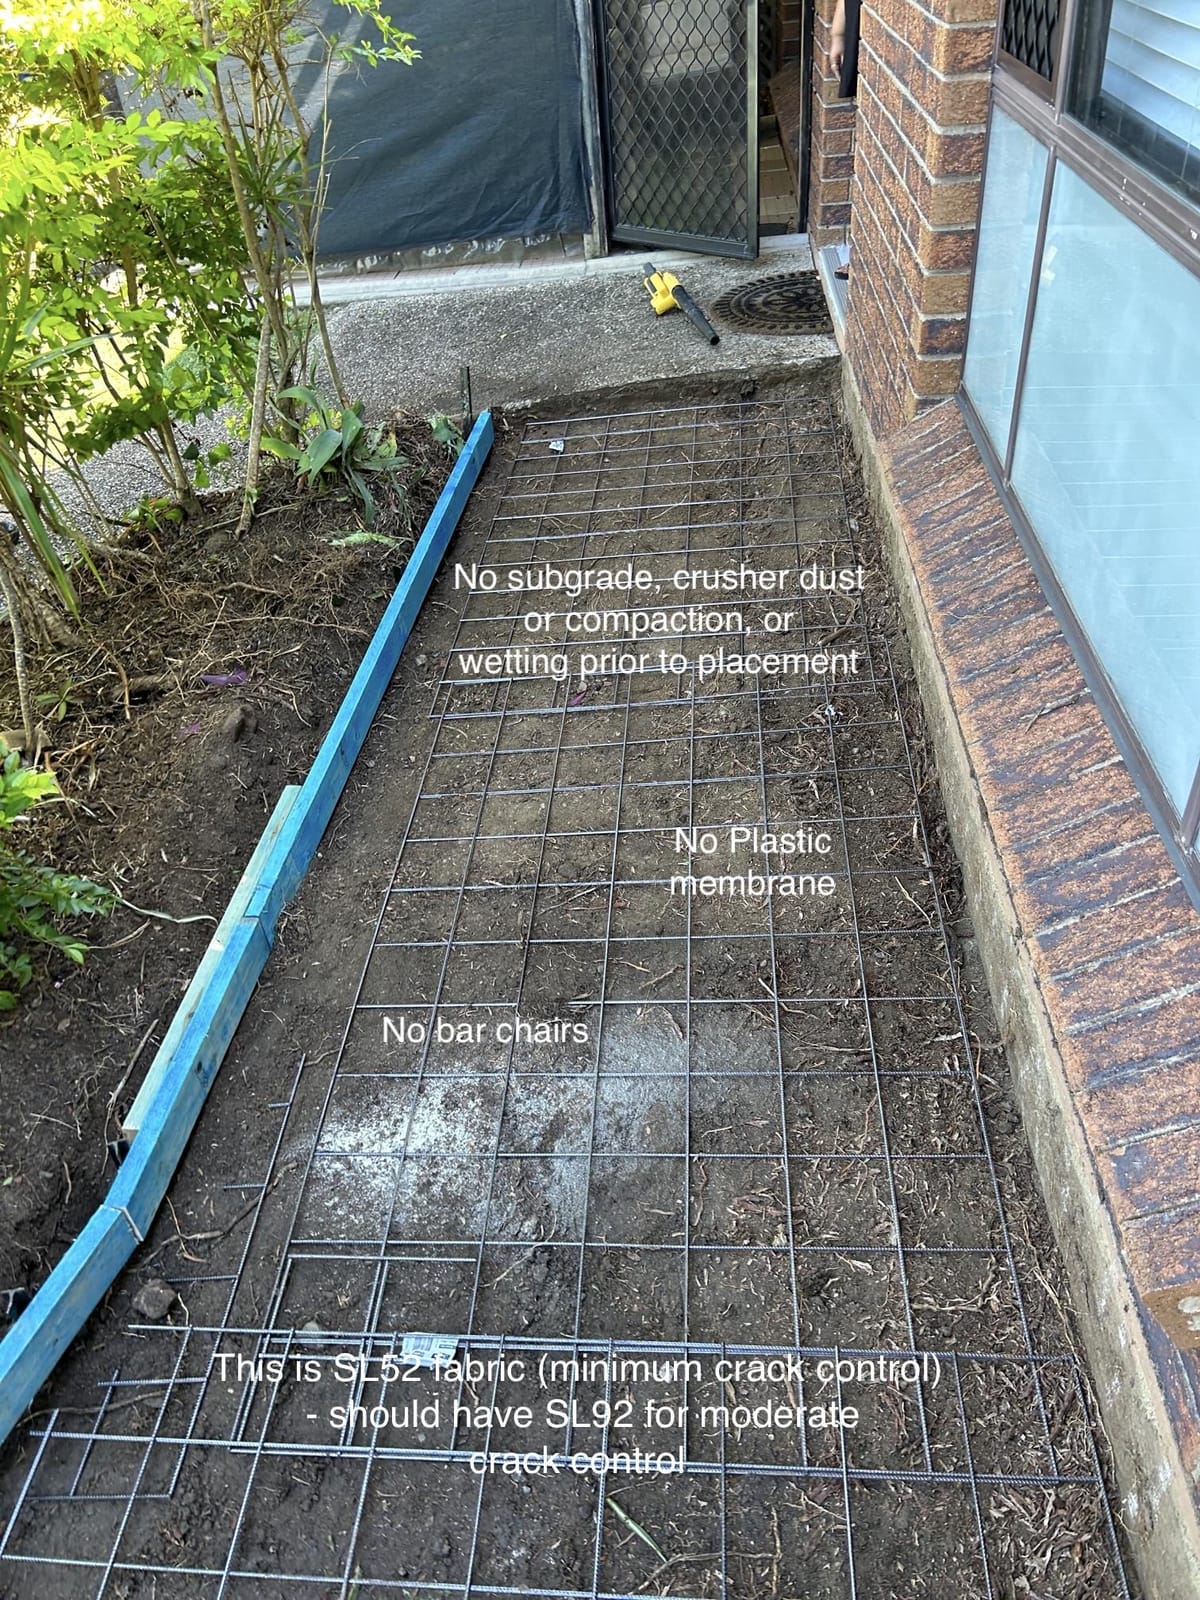
I missed taking some of the photos as this job was prepped so I'm only including some of the post pour photos. In particular, we missed taking photos post demo of the existing concrete pathway, photos of the existing subgrade, and after placing crusher dust.
Prepping, Prior to Pour
We forget to take as many pictures as we should have during this stage which is why we have tried to outline as much as possible in text form below.
Update 06-07-2024 - We found more pictures!
After the concrete was saw cut into approx 400mm square blocks we used a cro bar to pry between the saw cuts and lever out the blocks. We then hard carted and placed these in the site skip. We did get a 4.5m3 skip instead of the budgeted 3m3. This was mainly to counter possible variable concrete thickness and spoil to be remved and disposed. The maximum weight of a 4.5m3 skip with concrete and spoil is 3 tonnes - which adds up quickly considering that concrete weighs 2.4T per m3 in volume.
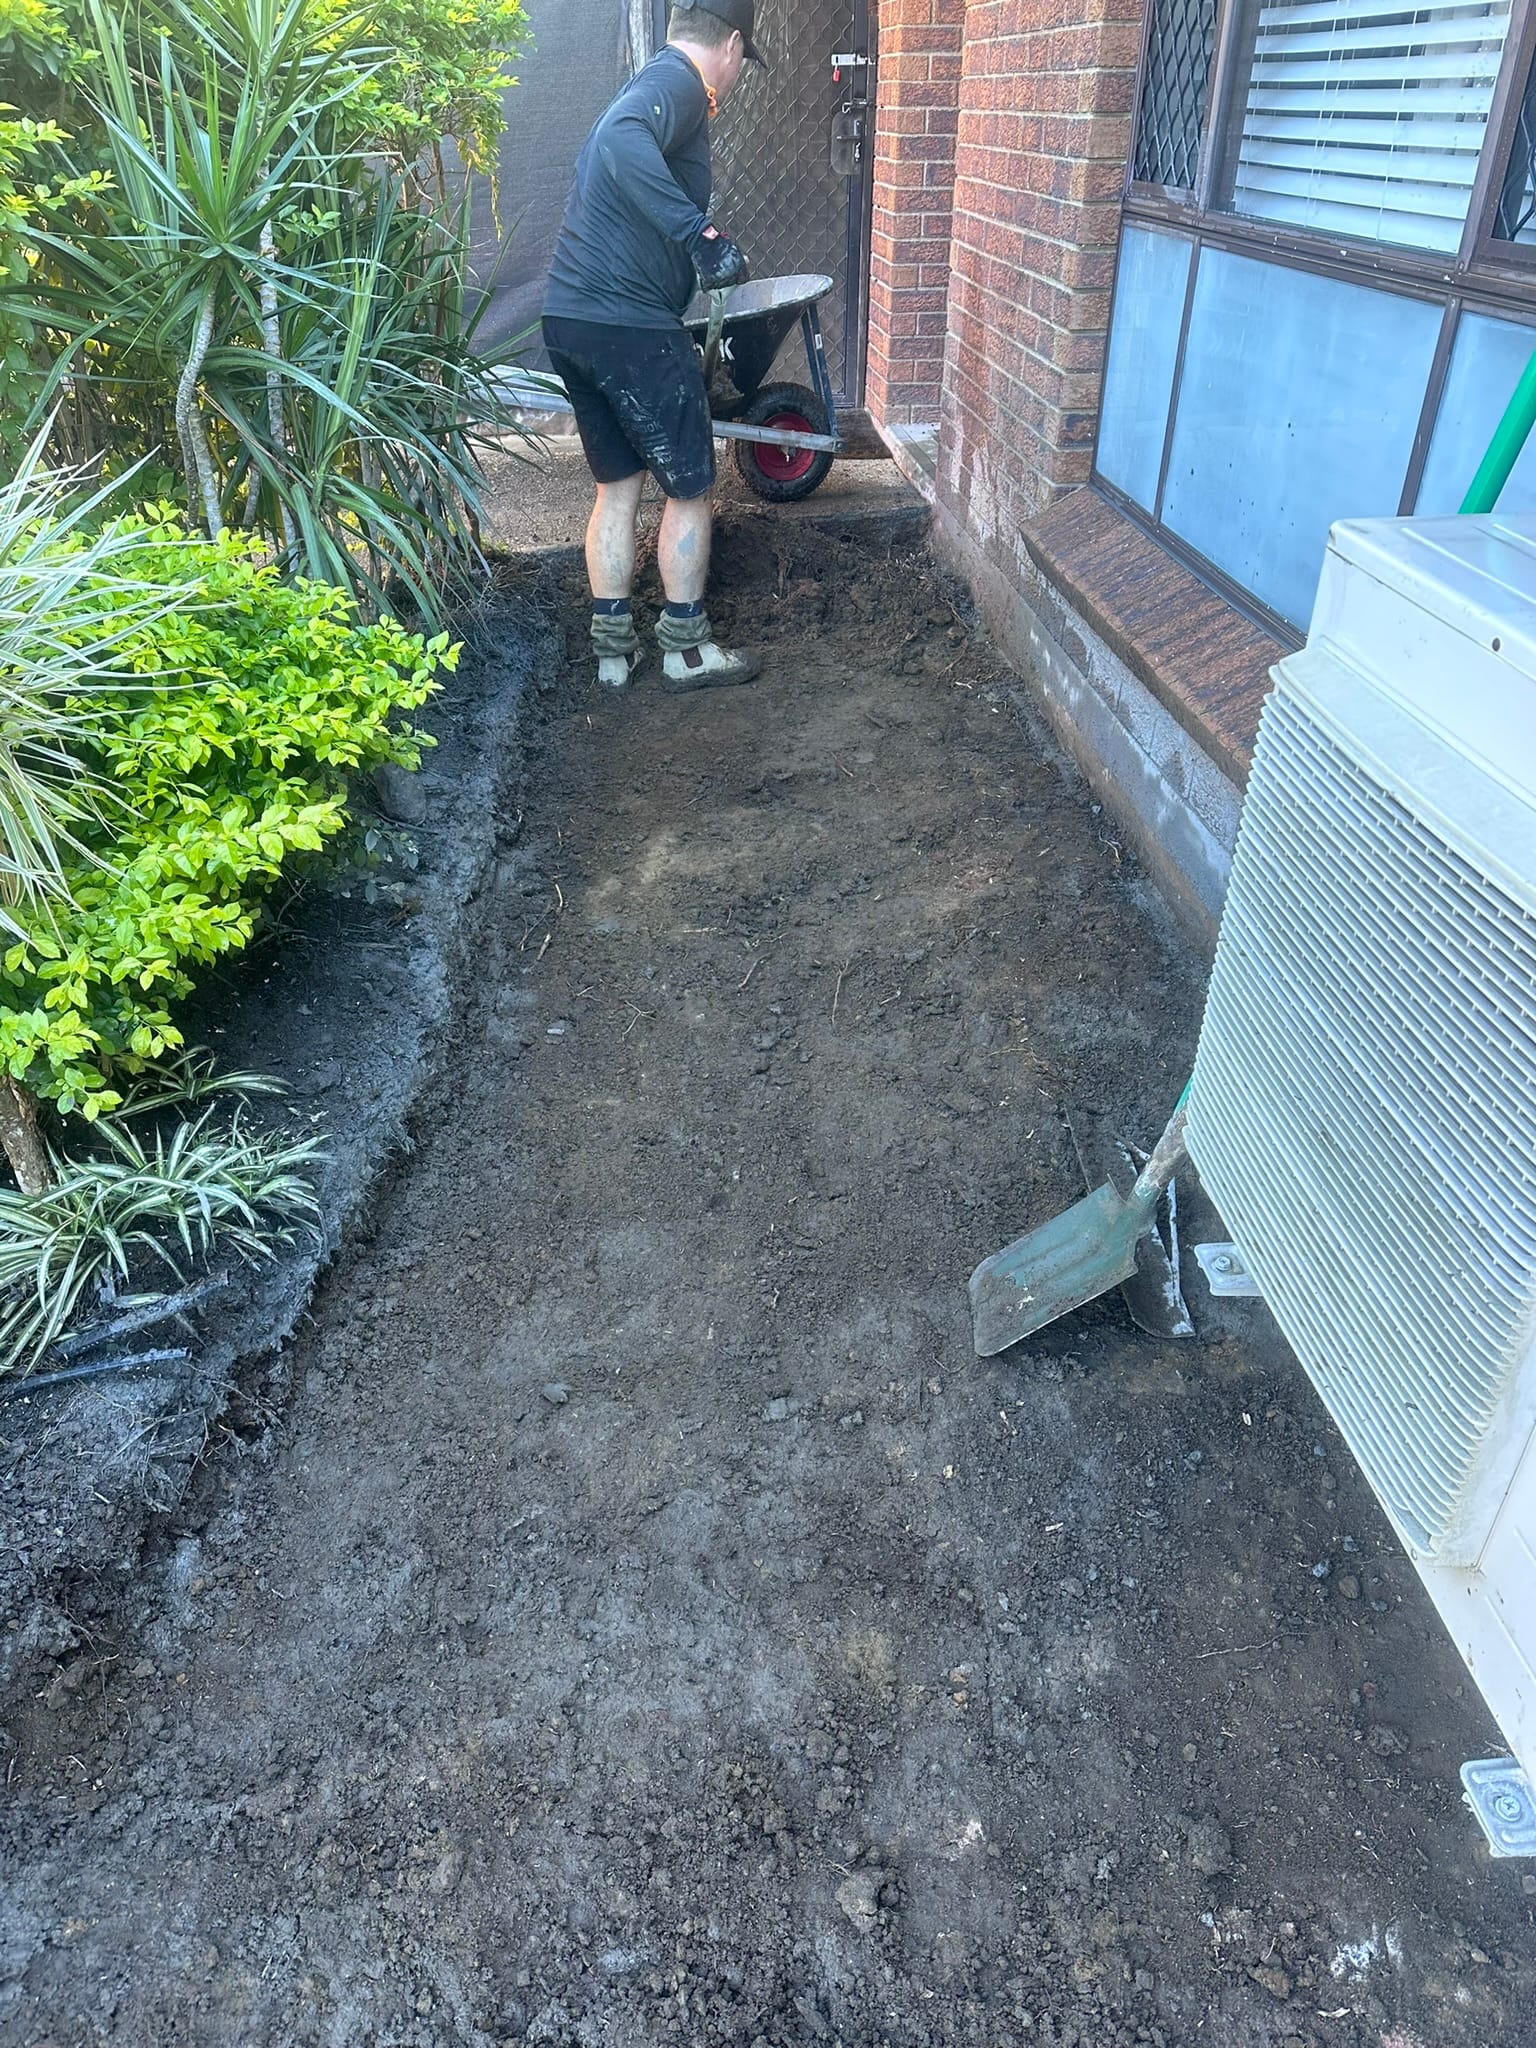
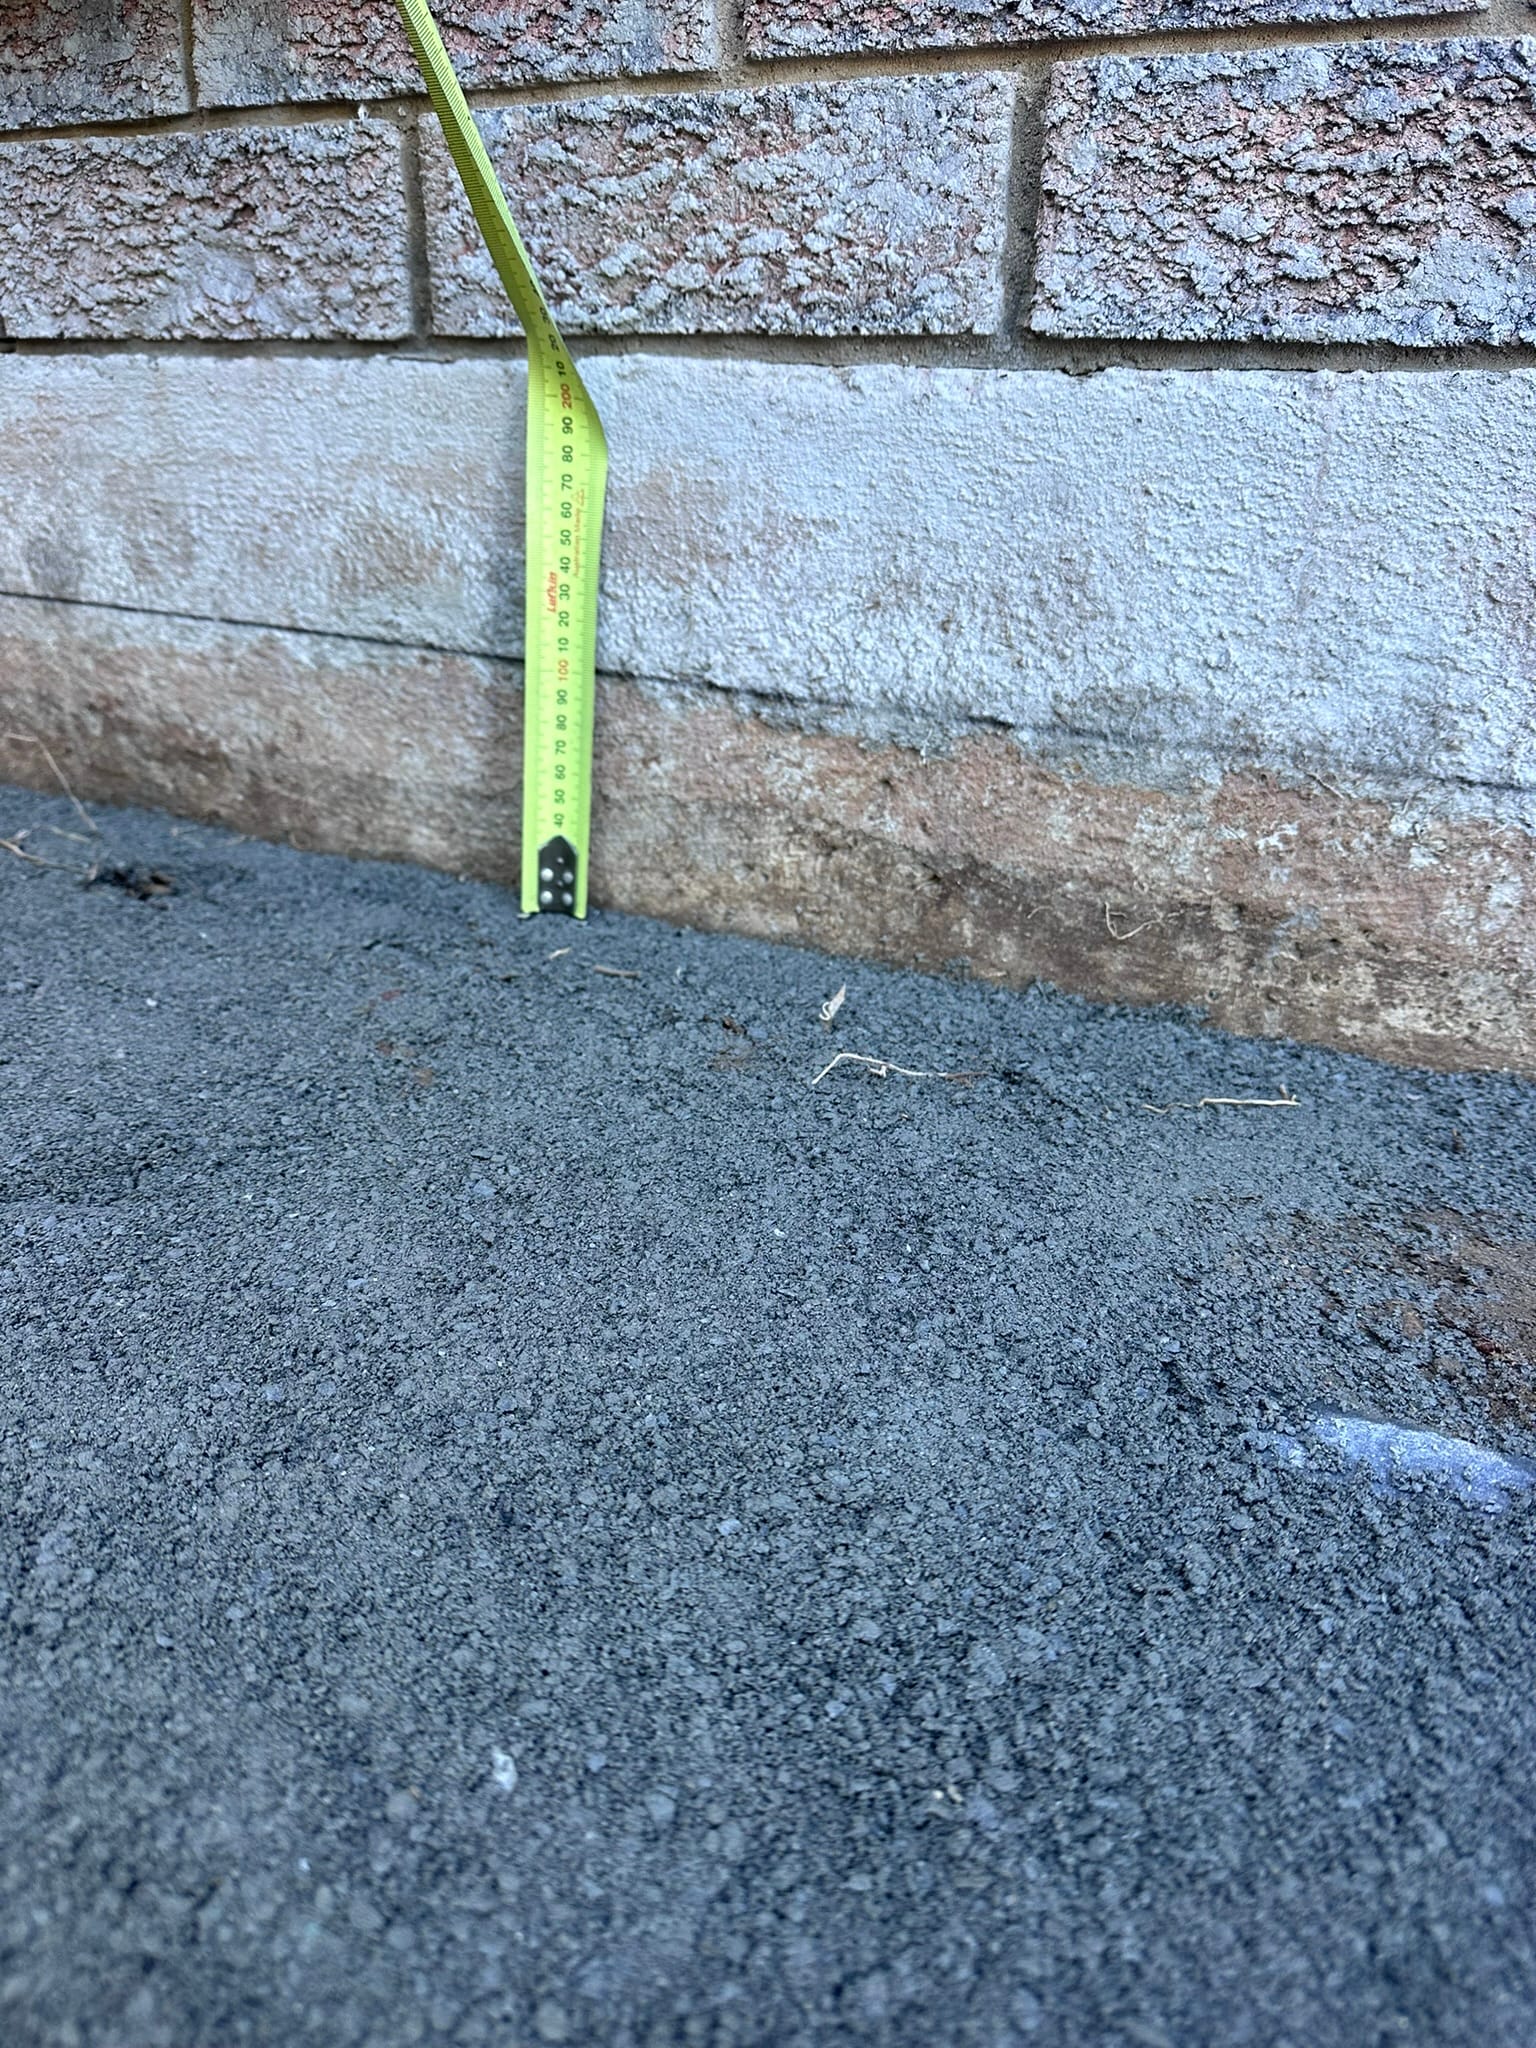
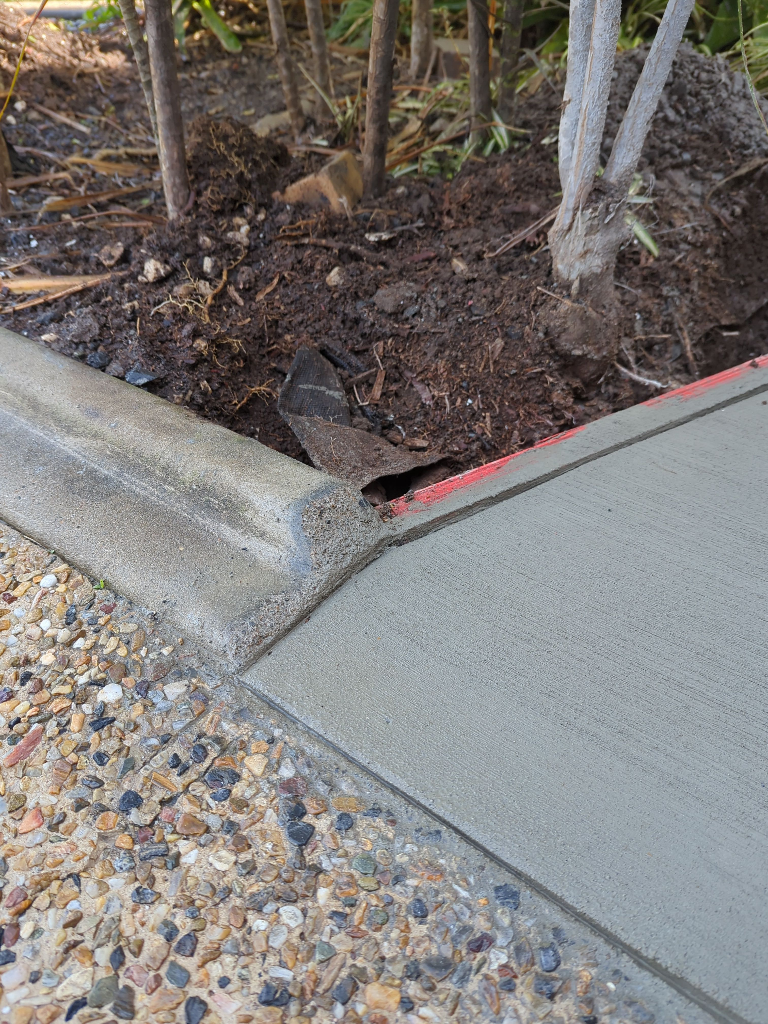
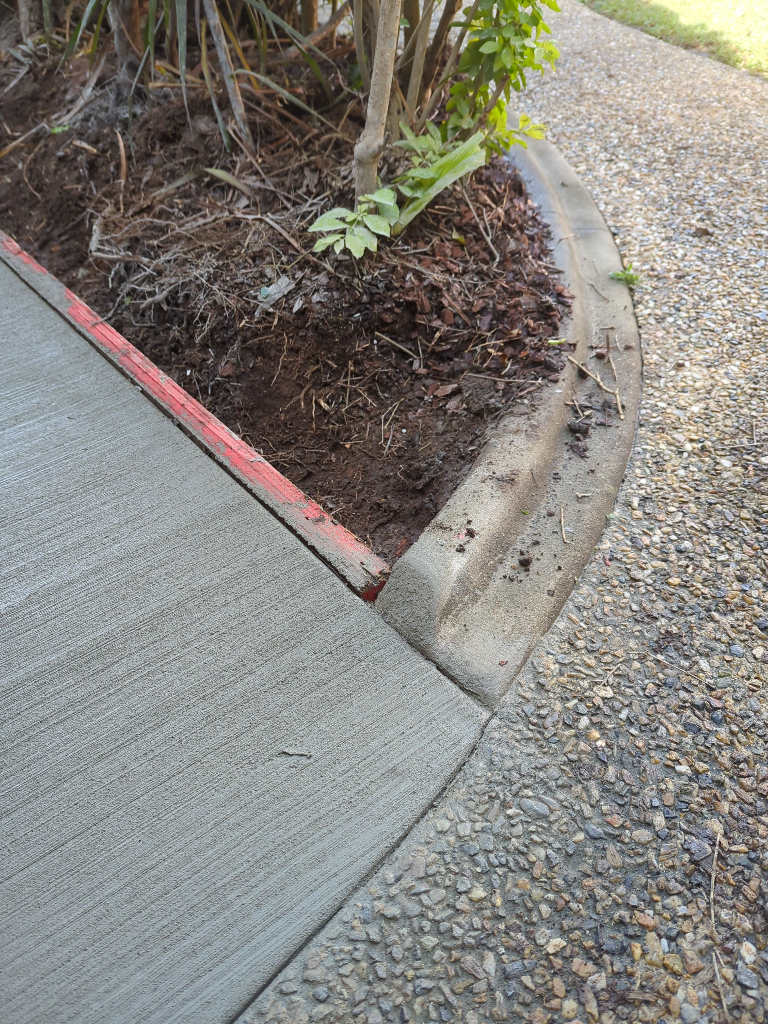
We excavate 150mm of soil, existing subgrade level as the original contractor did no subgrade prep other than scraping the existing soil from the surface.
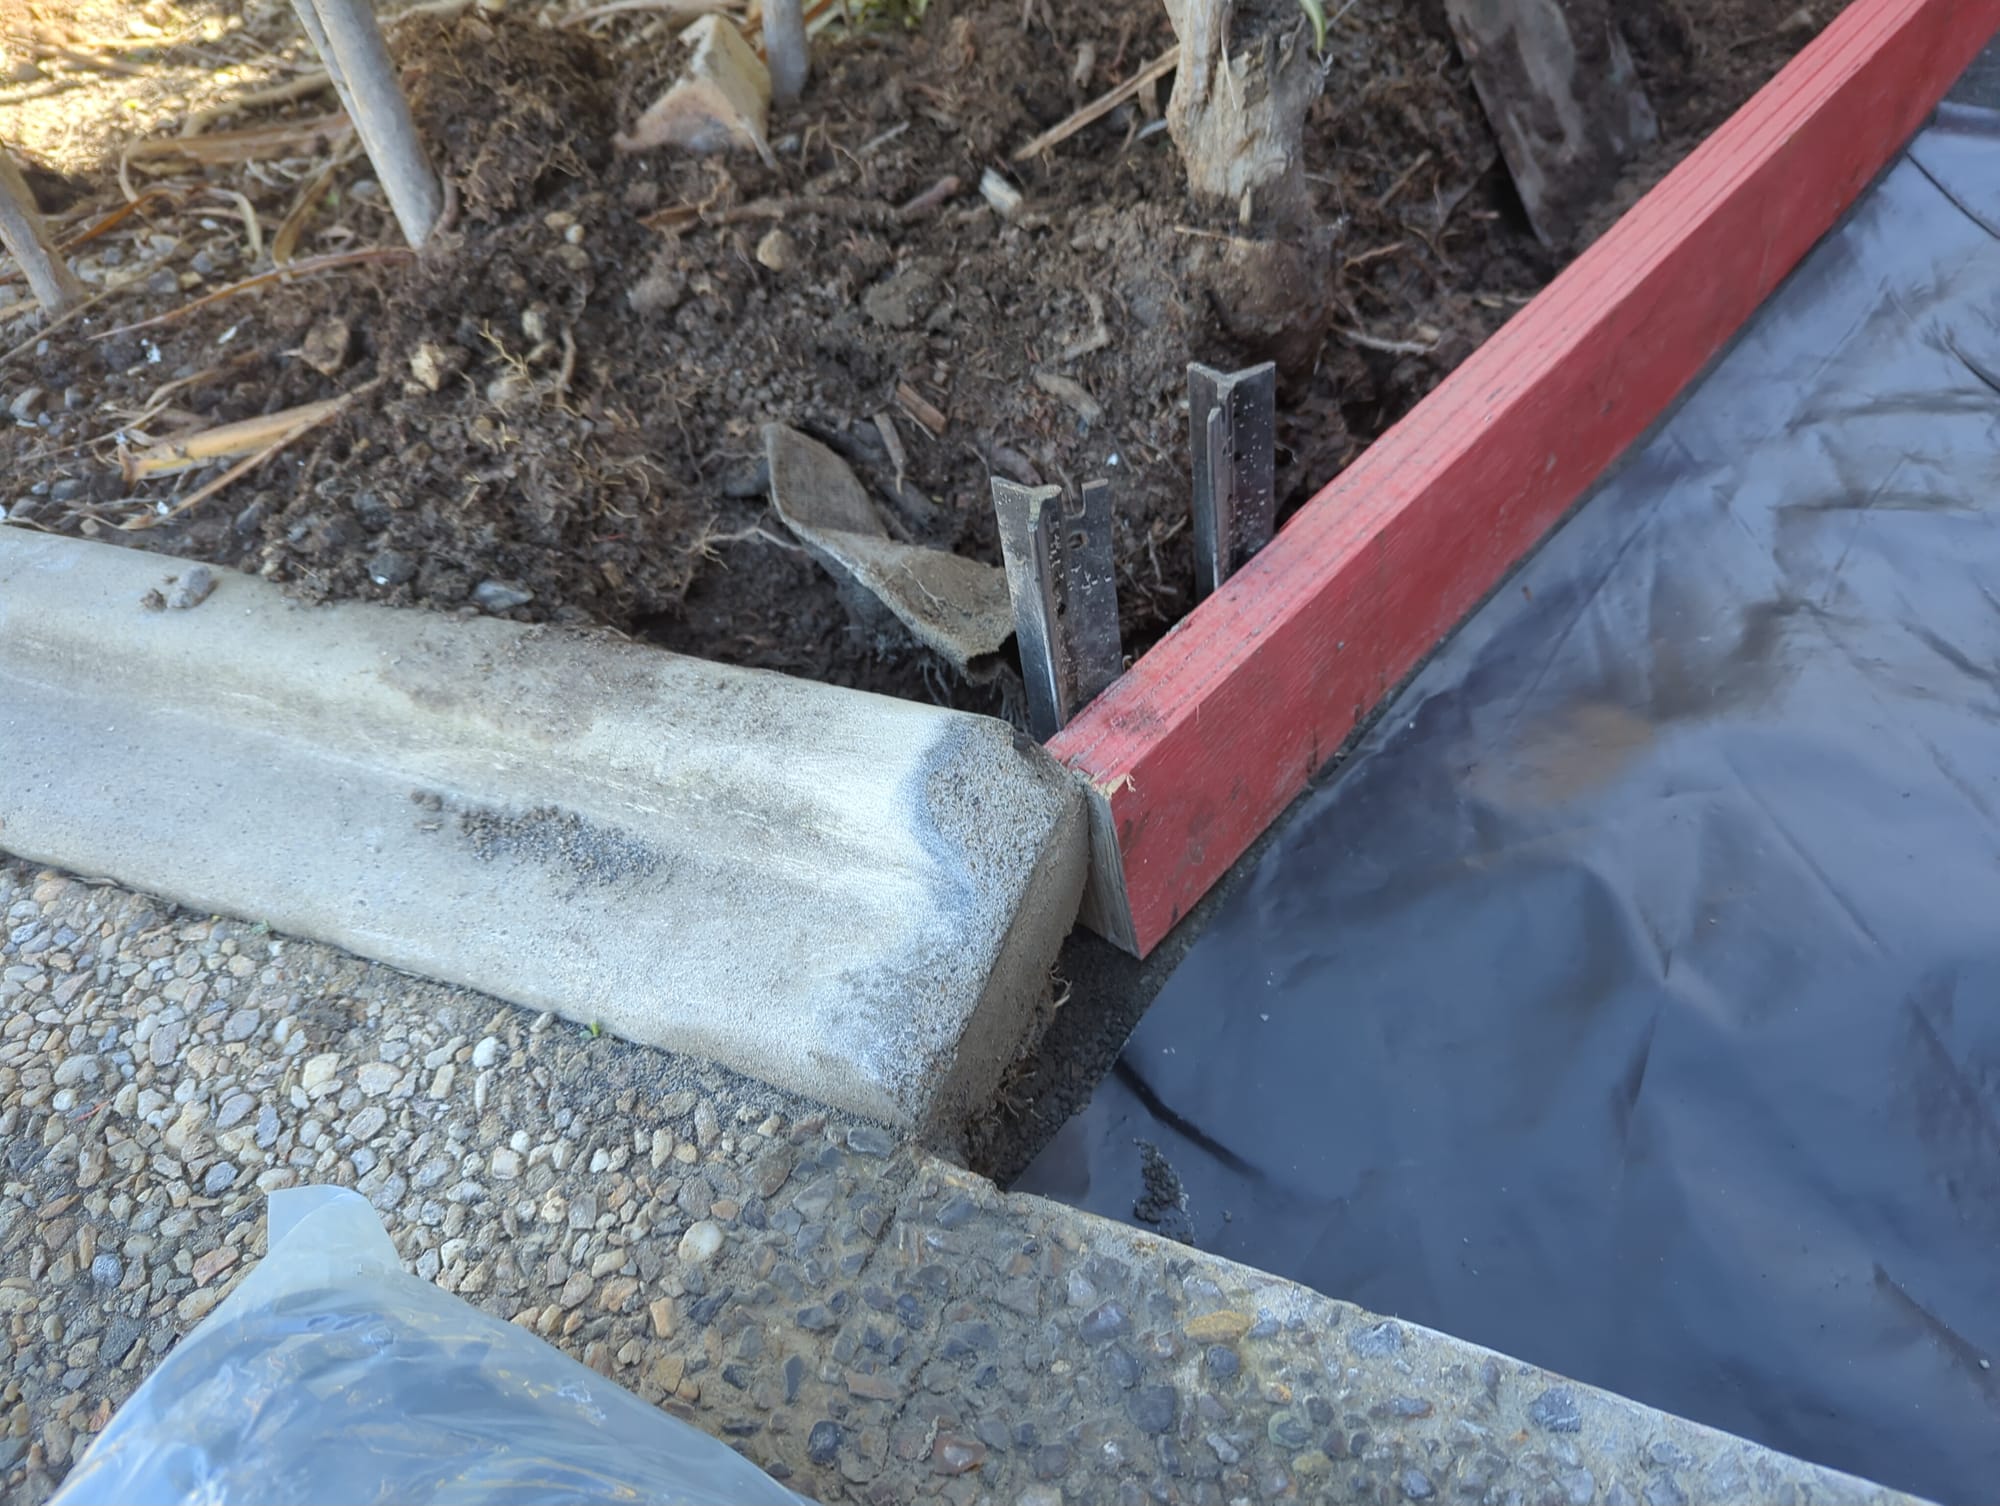
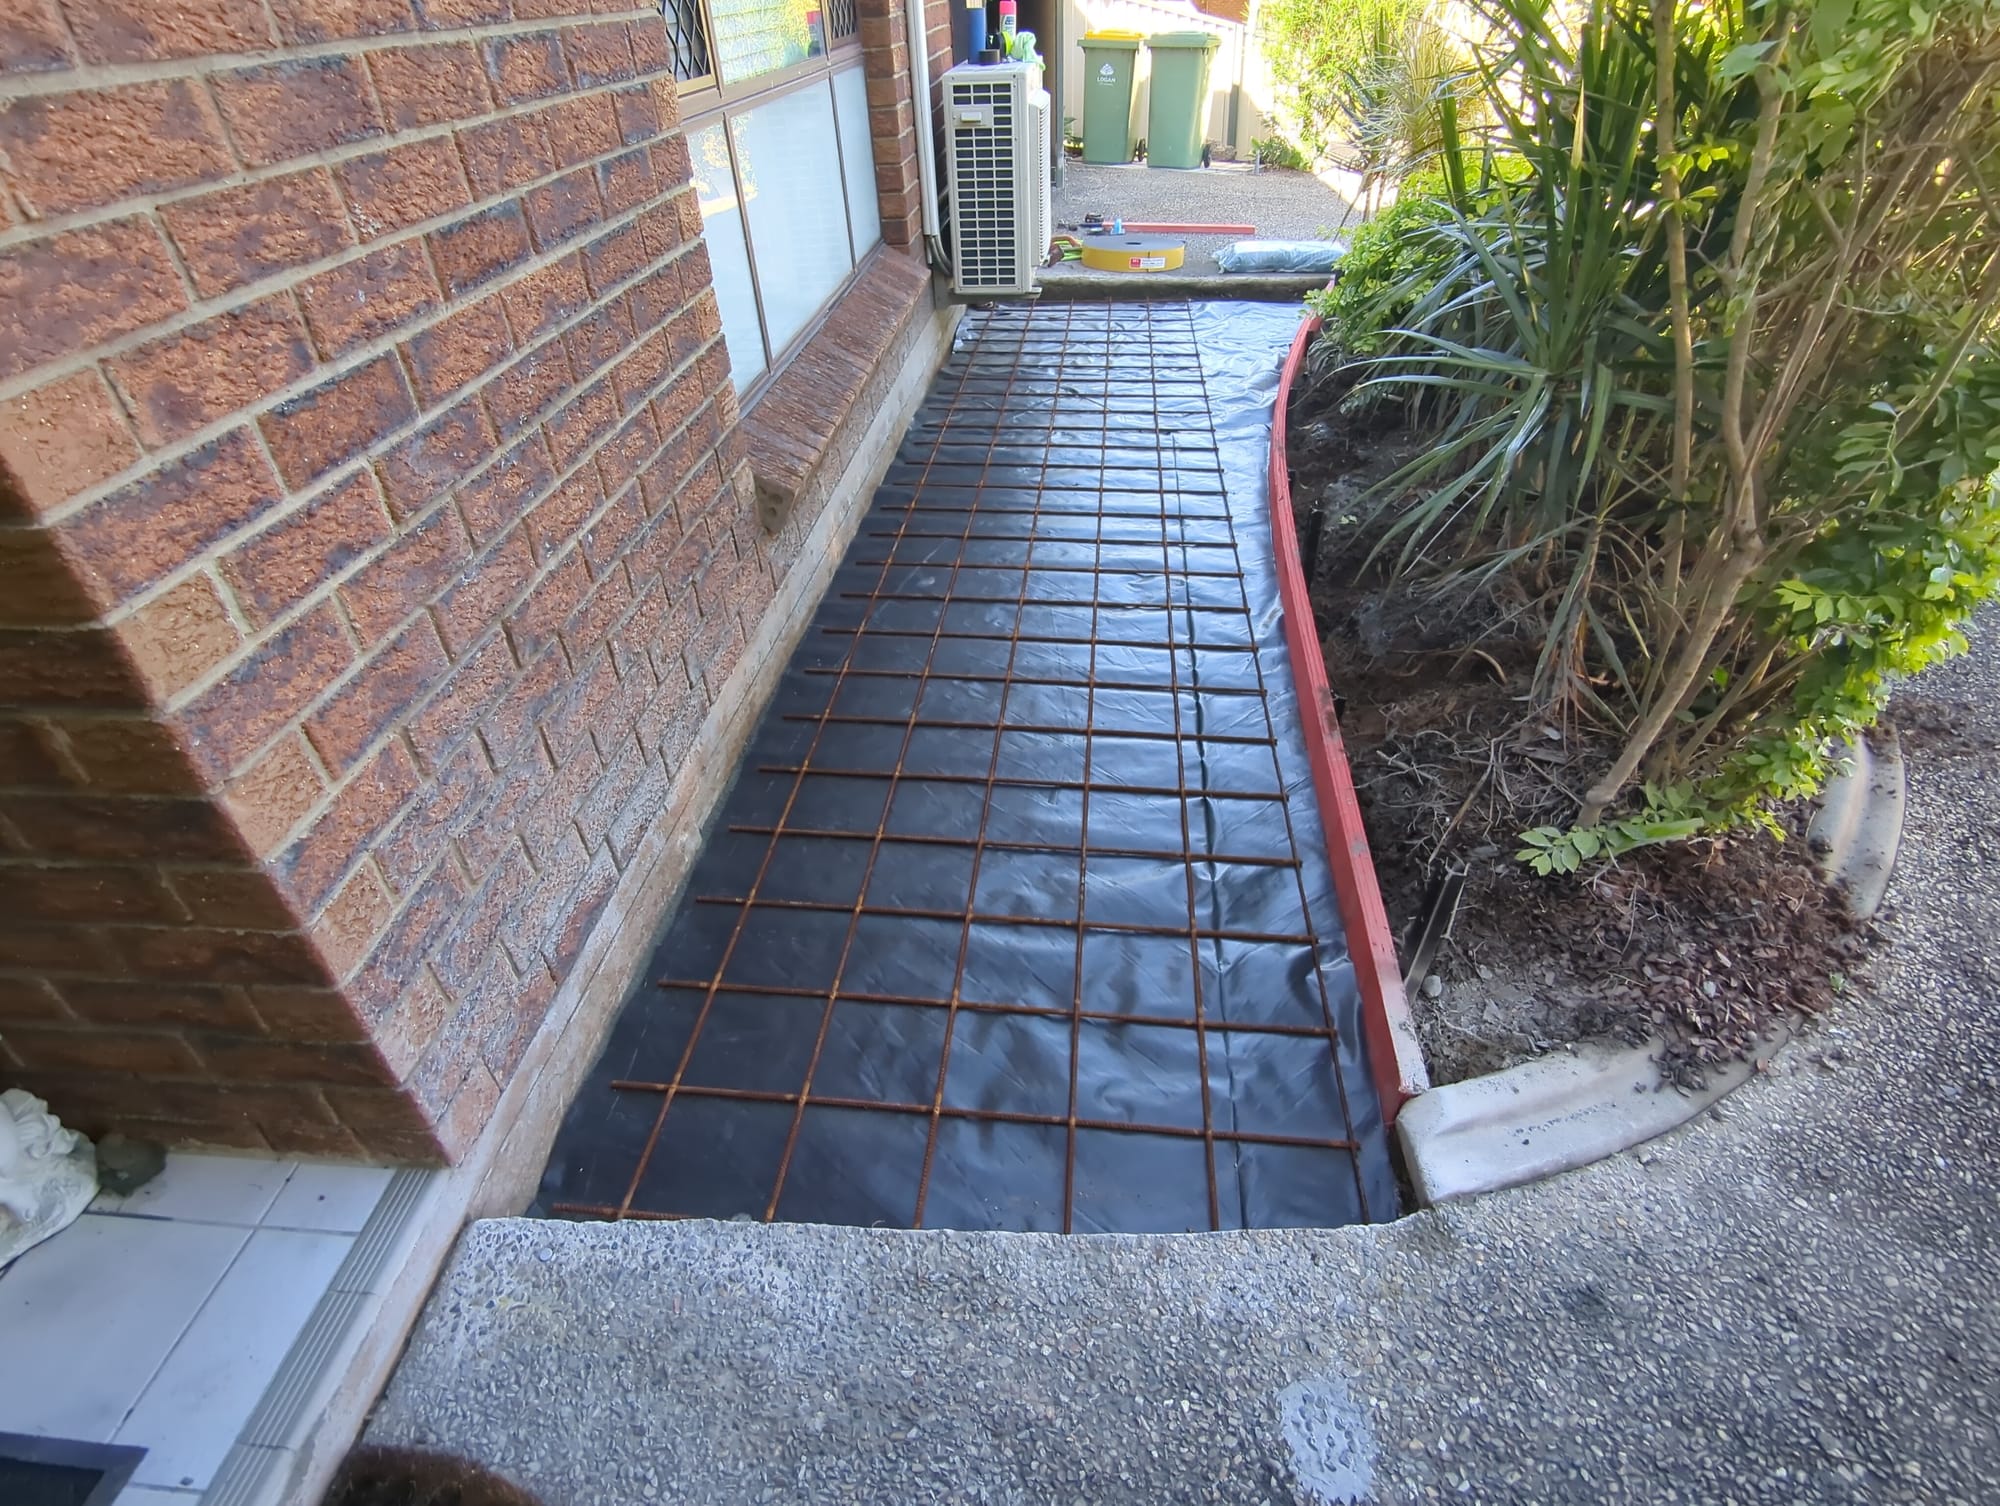
After excavating and breaking up the existing subrgrade, we set our path heights (fall) by establishing a level line (chalk line) across the existing house footing and then setting the fall we wanted across the path to the height of the edge form (red timber). Now that we have these two heights, we know water will run away from the house.
We then placed around 0.3m3 of blue crusher dust to a depth of 50mm and screed this to level. Doing this ensures that your overall concrete thickness will be consistent and to scope and make it easier to order concrete.
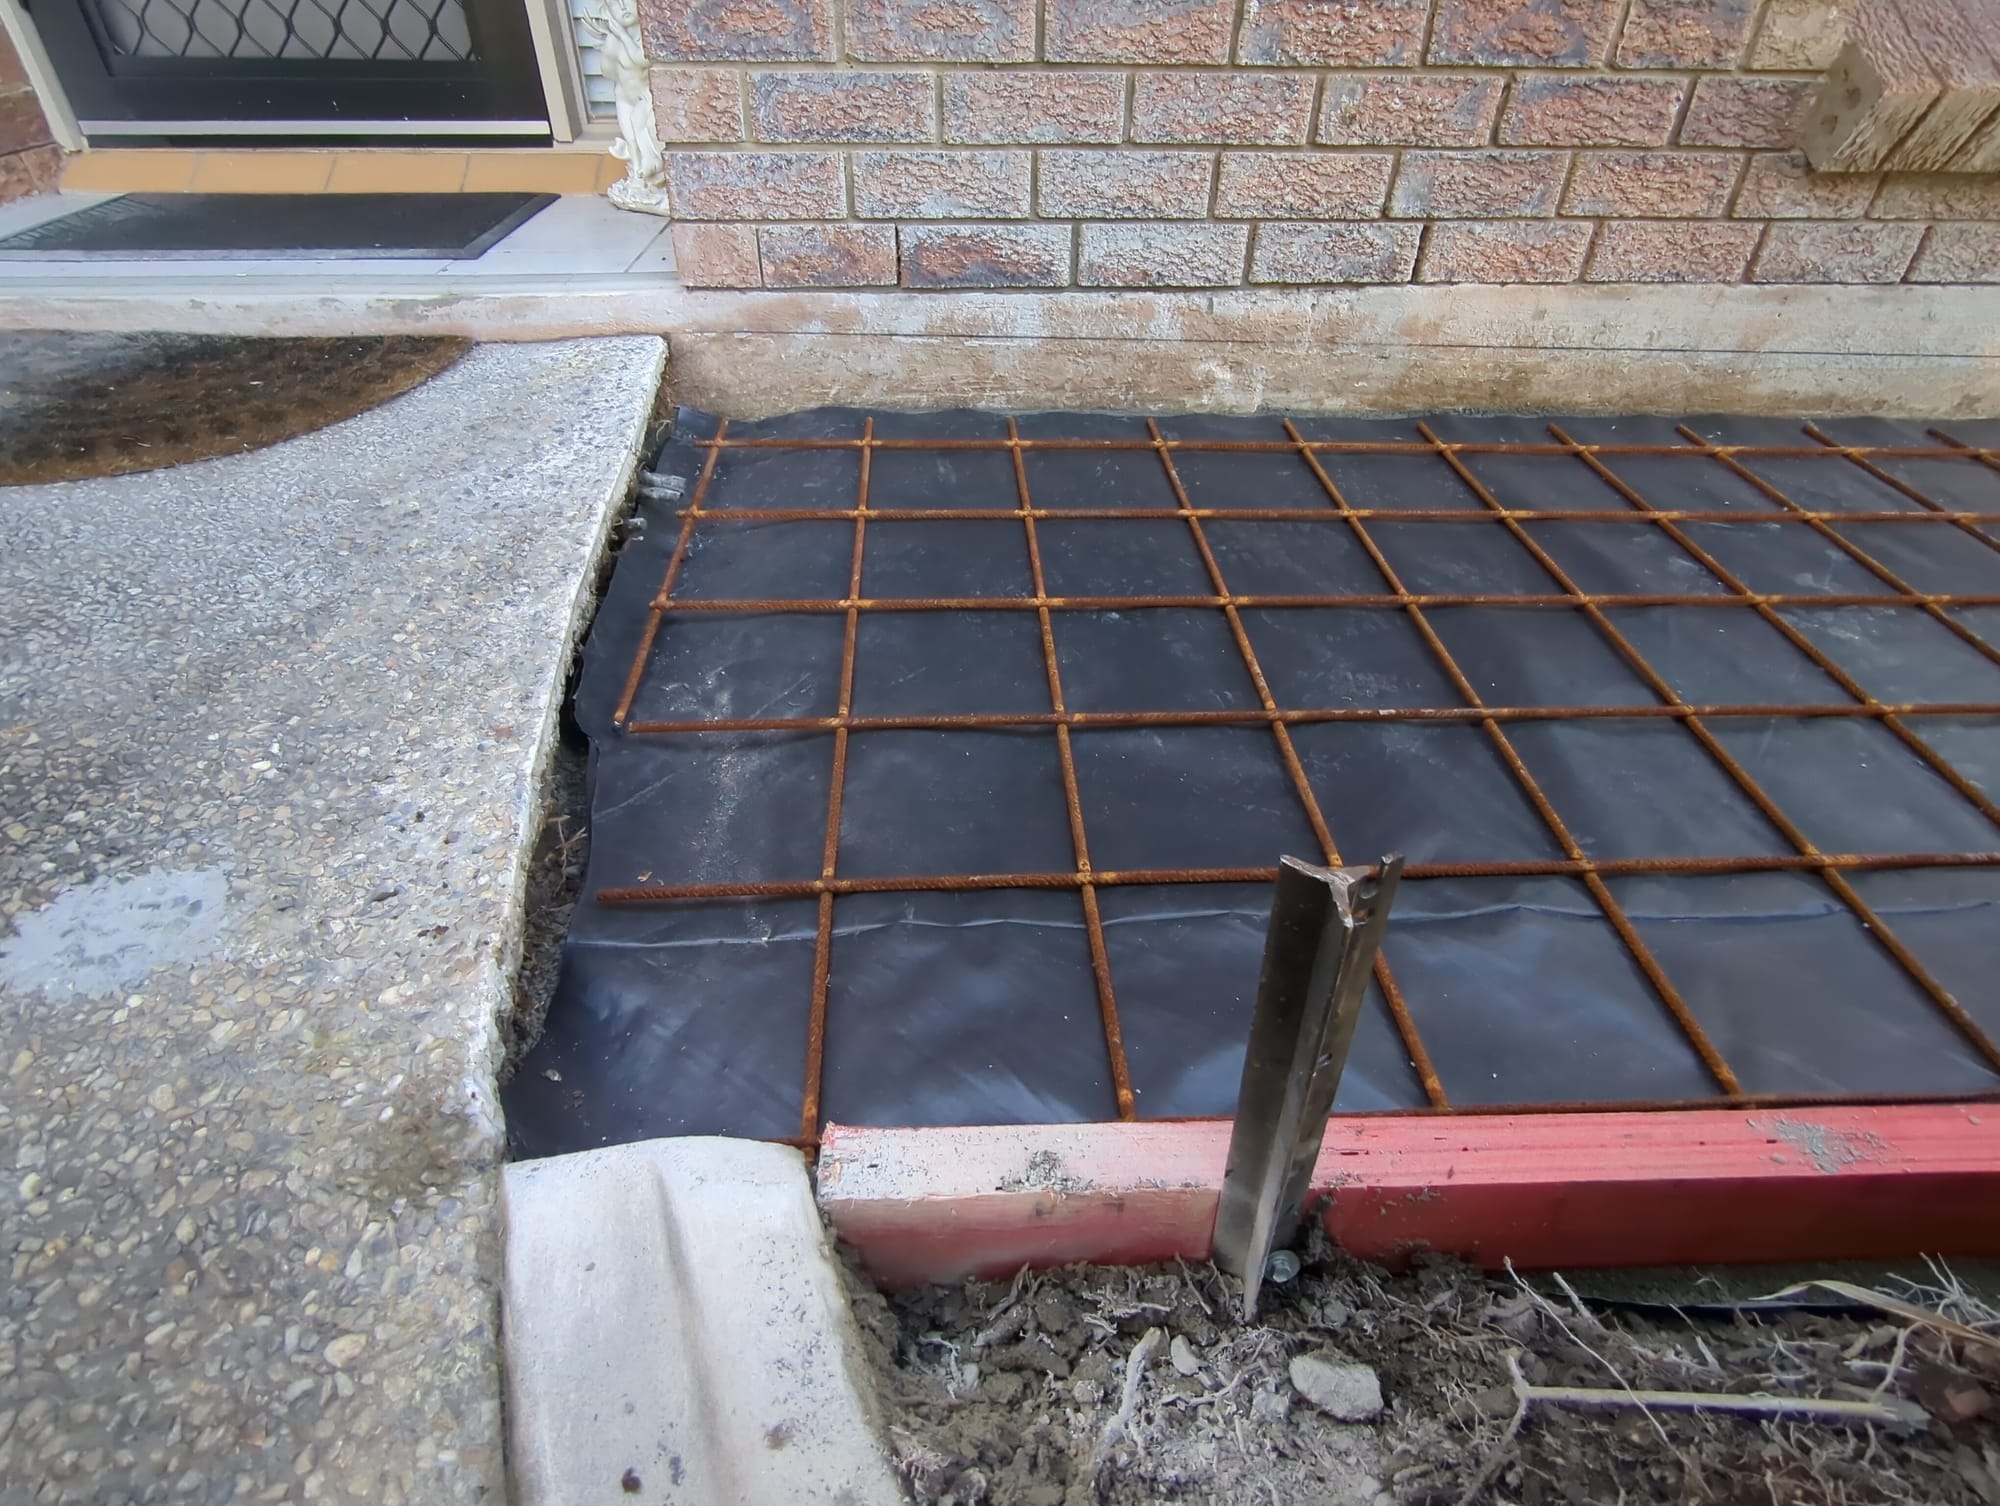
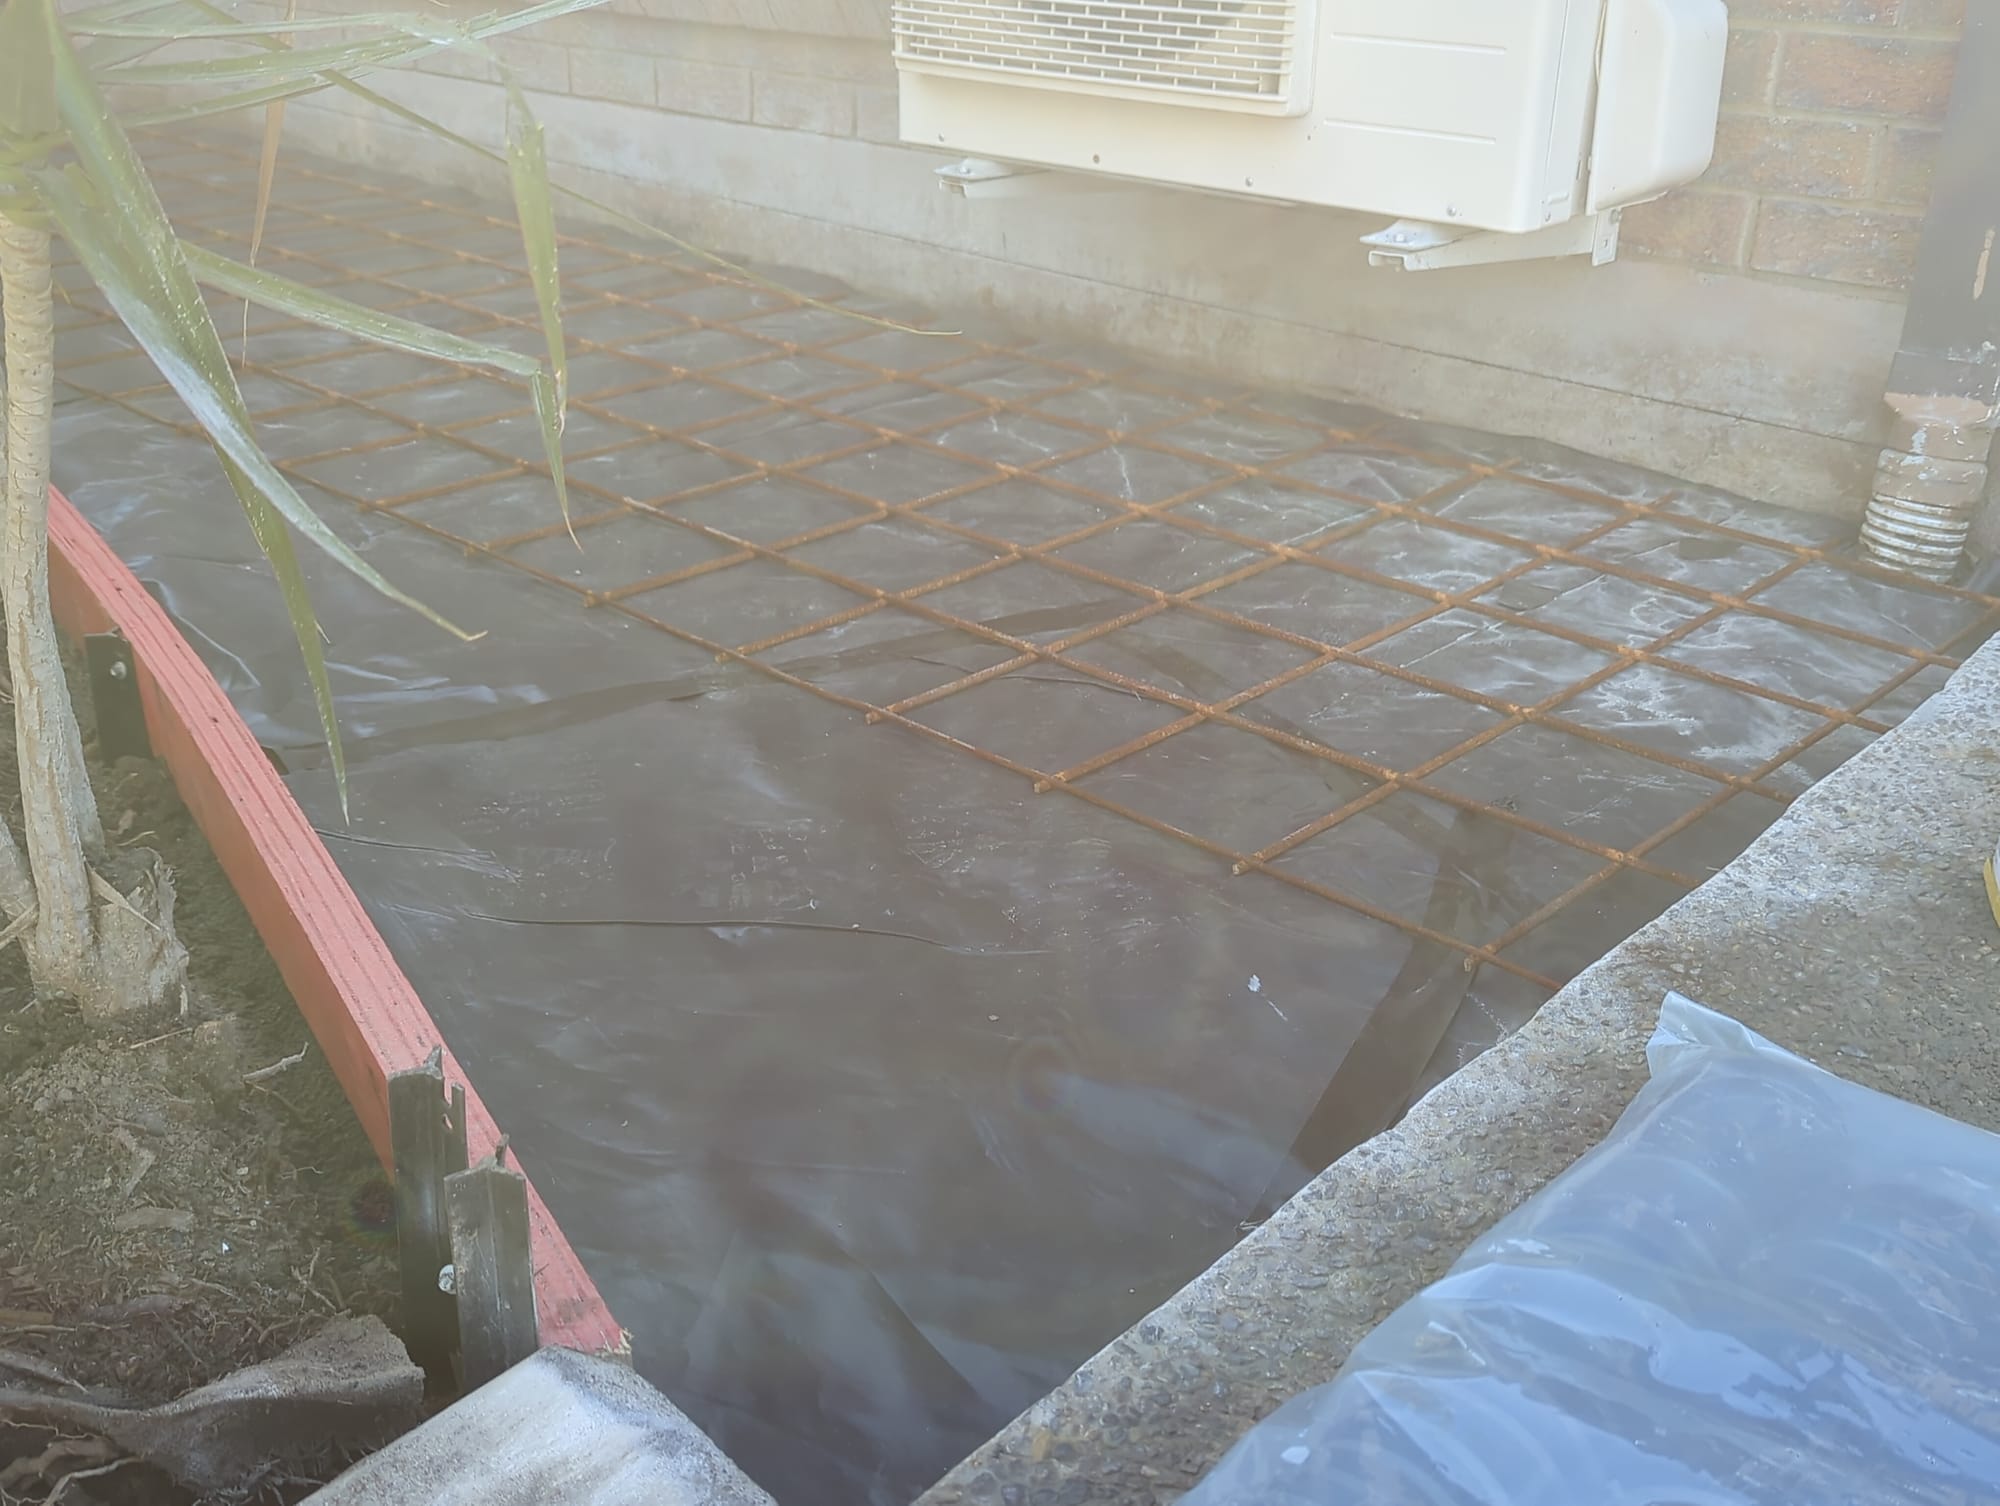
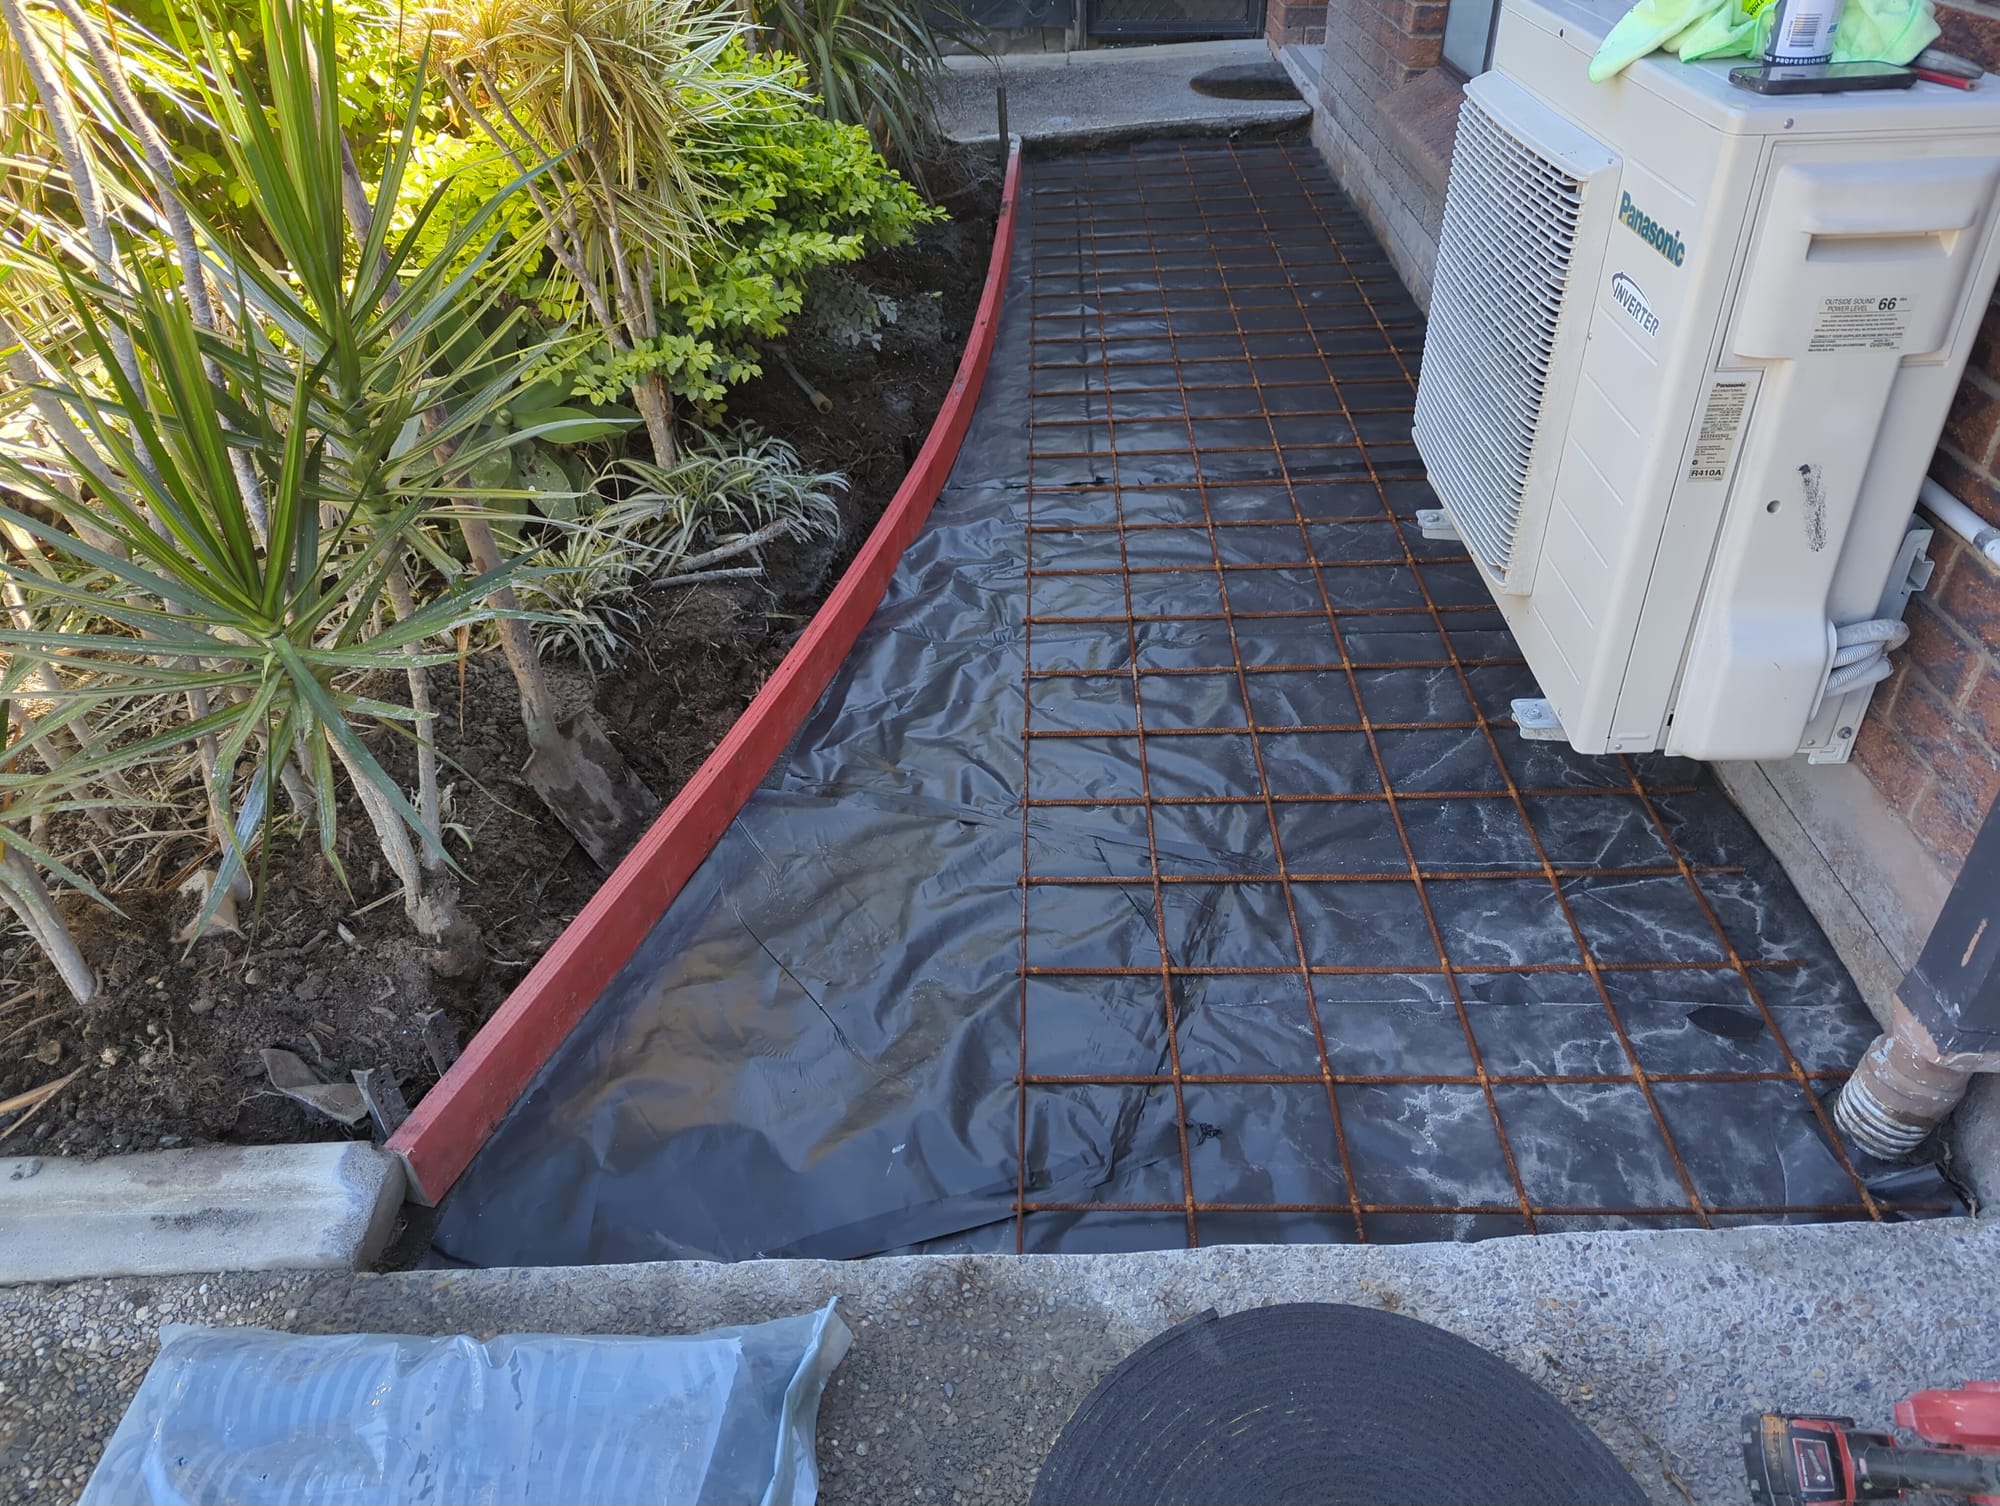
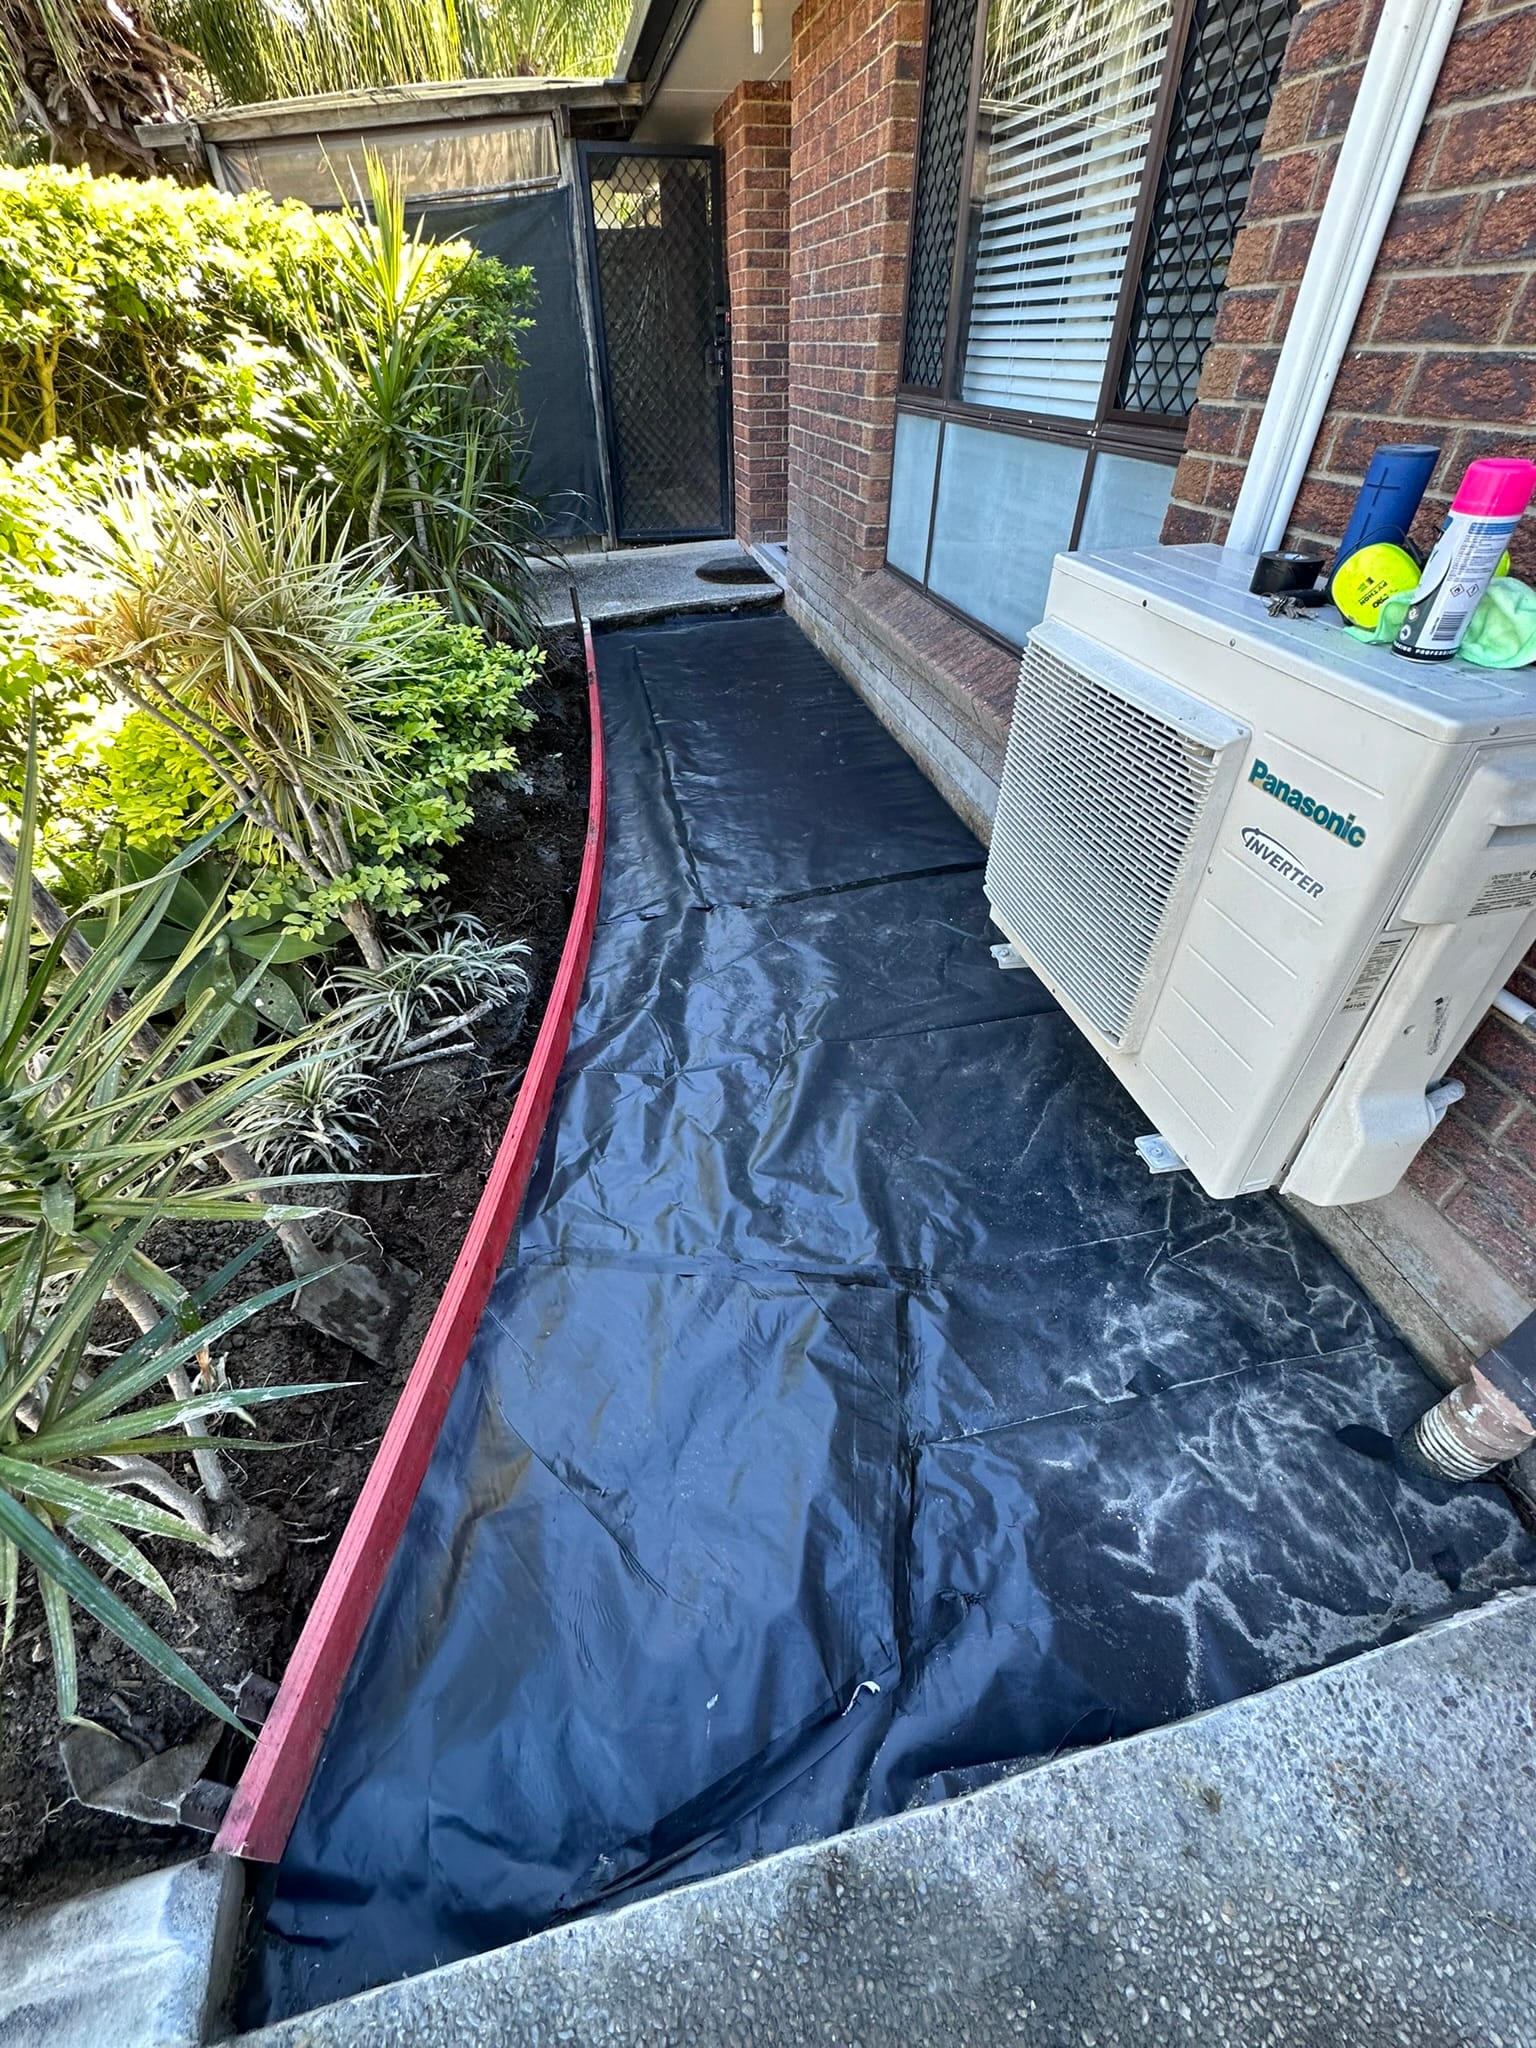
We then laid the 200um black polyethylene plastic, taping joints where they existing. We now have a level and solid working platform.
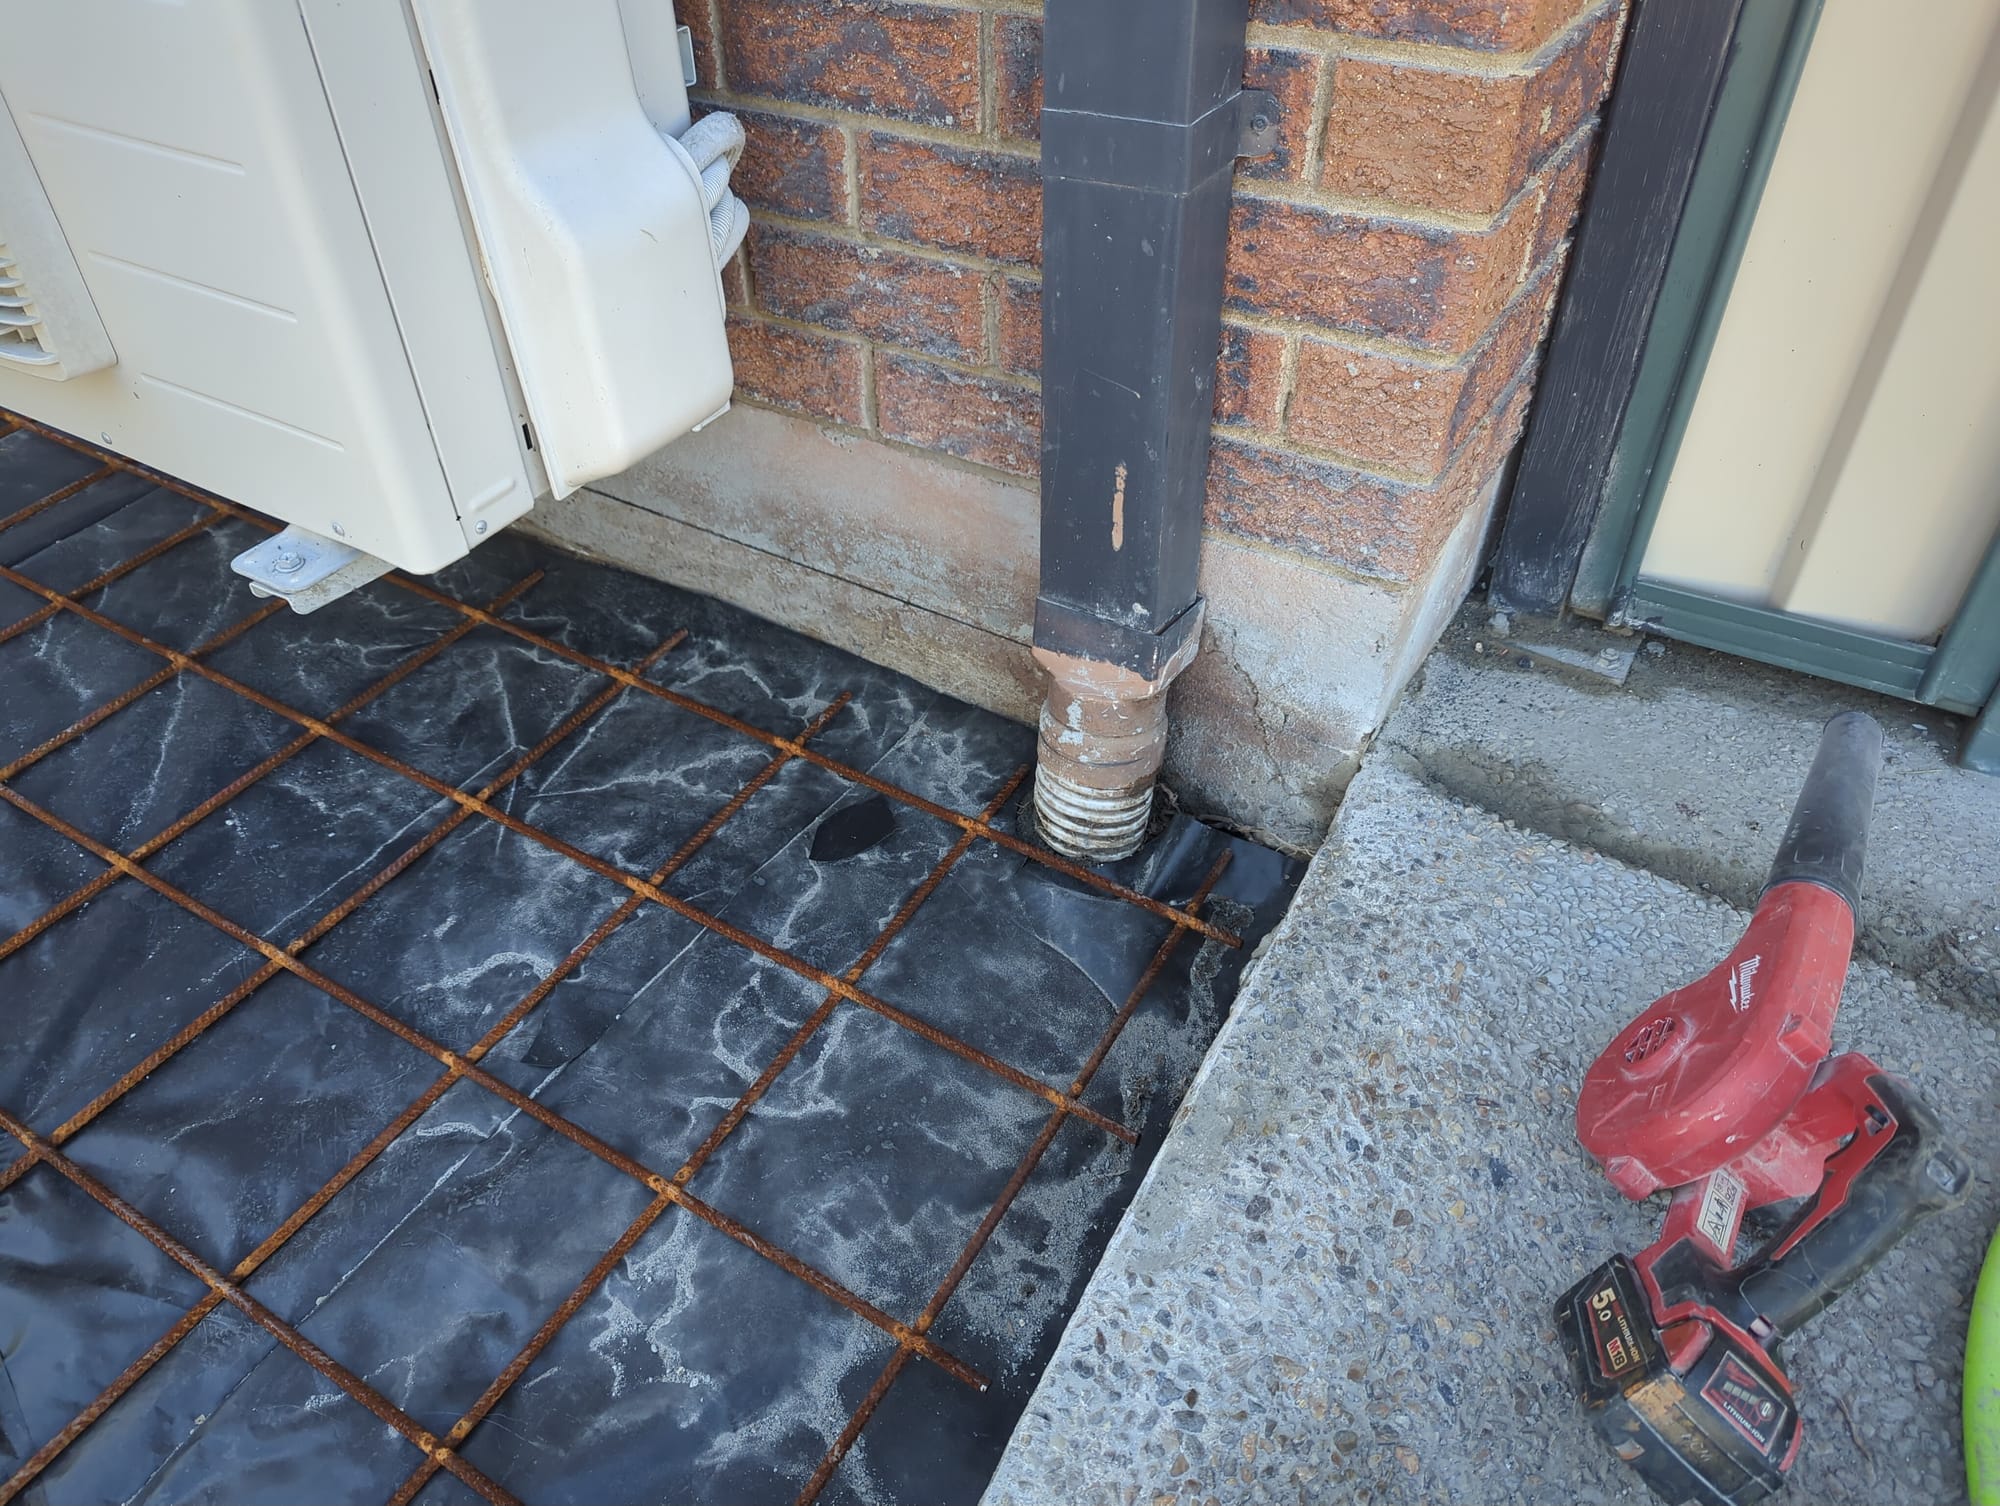
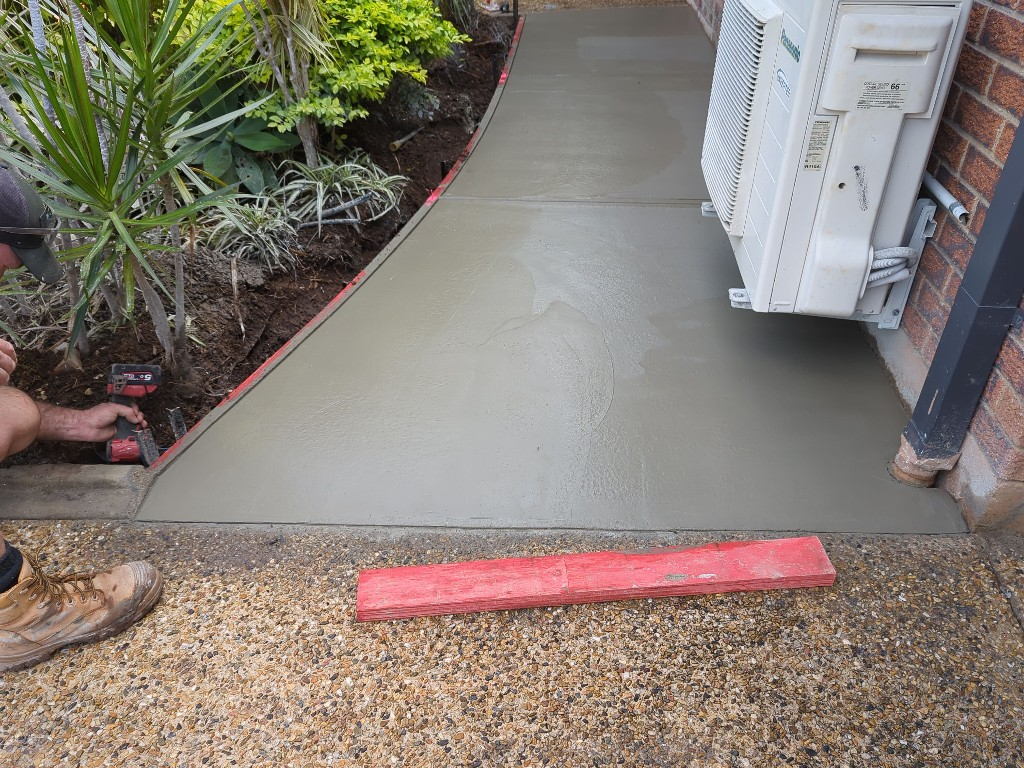
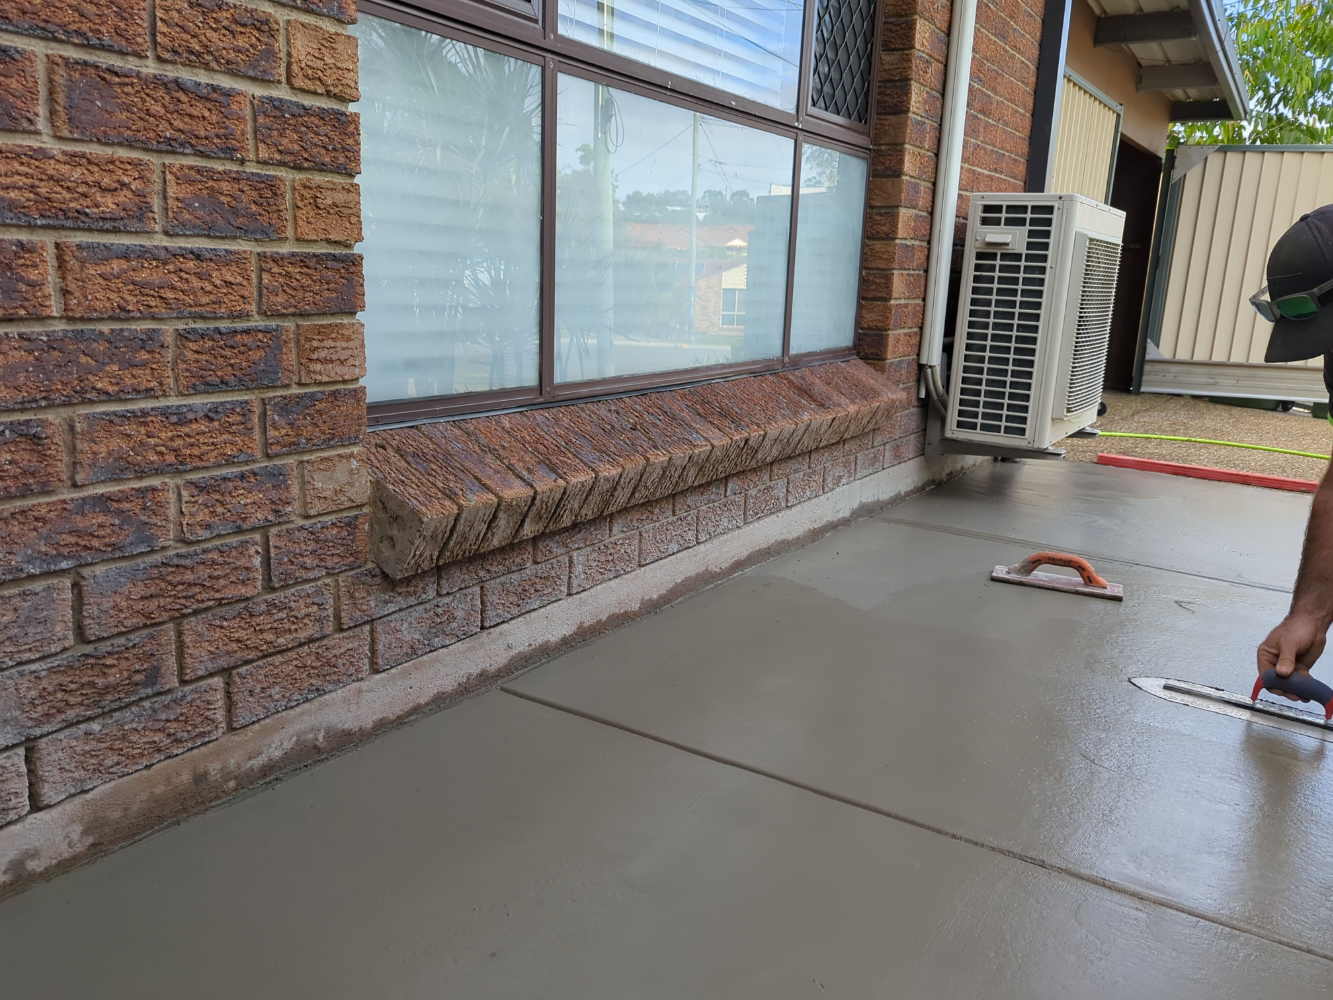
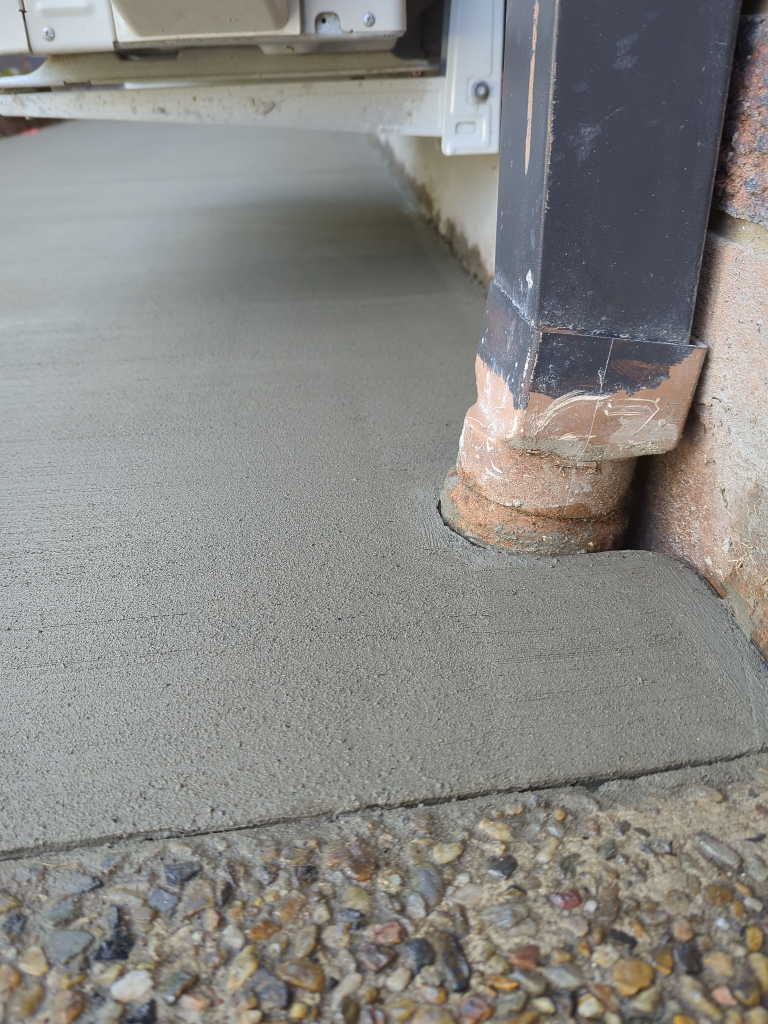
Next we installed the ableflex (sticky back) against the house in line with the flicked chalk line and also around the downpipe (to isolate the house from the path).
We wanted to install three dowels into the existing concrete pathways but found that the existing concrete pathway was less than 50mm thick, meaning, if we had of drilled 12mm dia or 14mm dia holes, we may have broken the existing concrete pathways - which we would have then had to replace as well, increasing the job scope and cost.
Note: if dowels were installed you would then place bar chairs under the ends of the dowels sticking into the yet to be poured concrete, bend them to ensure the chair is supporting and maintain cover, then tie the dowel to the chair with tie wire.
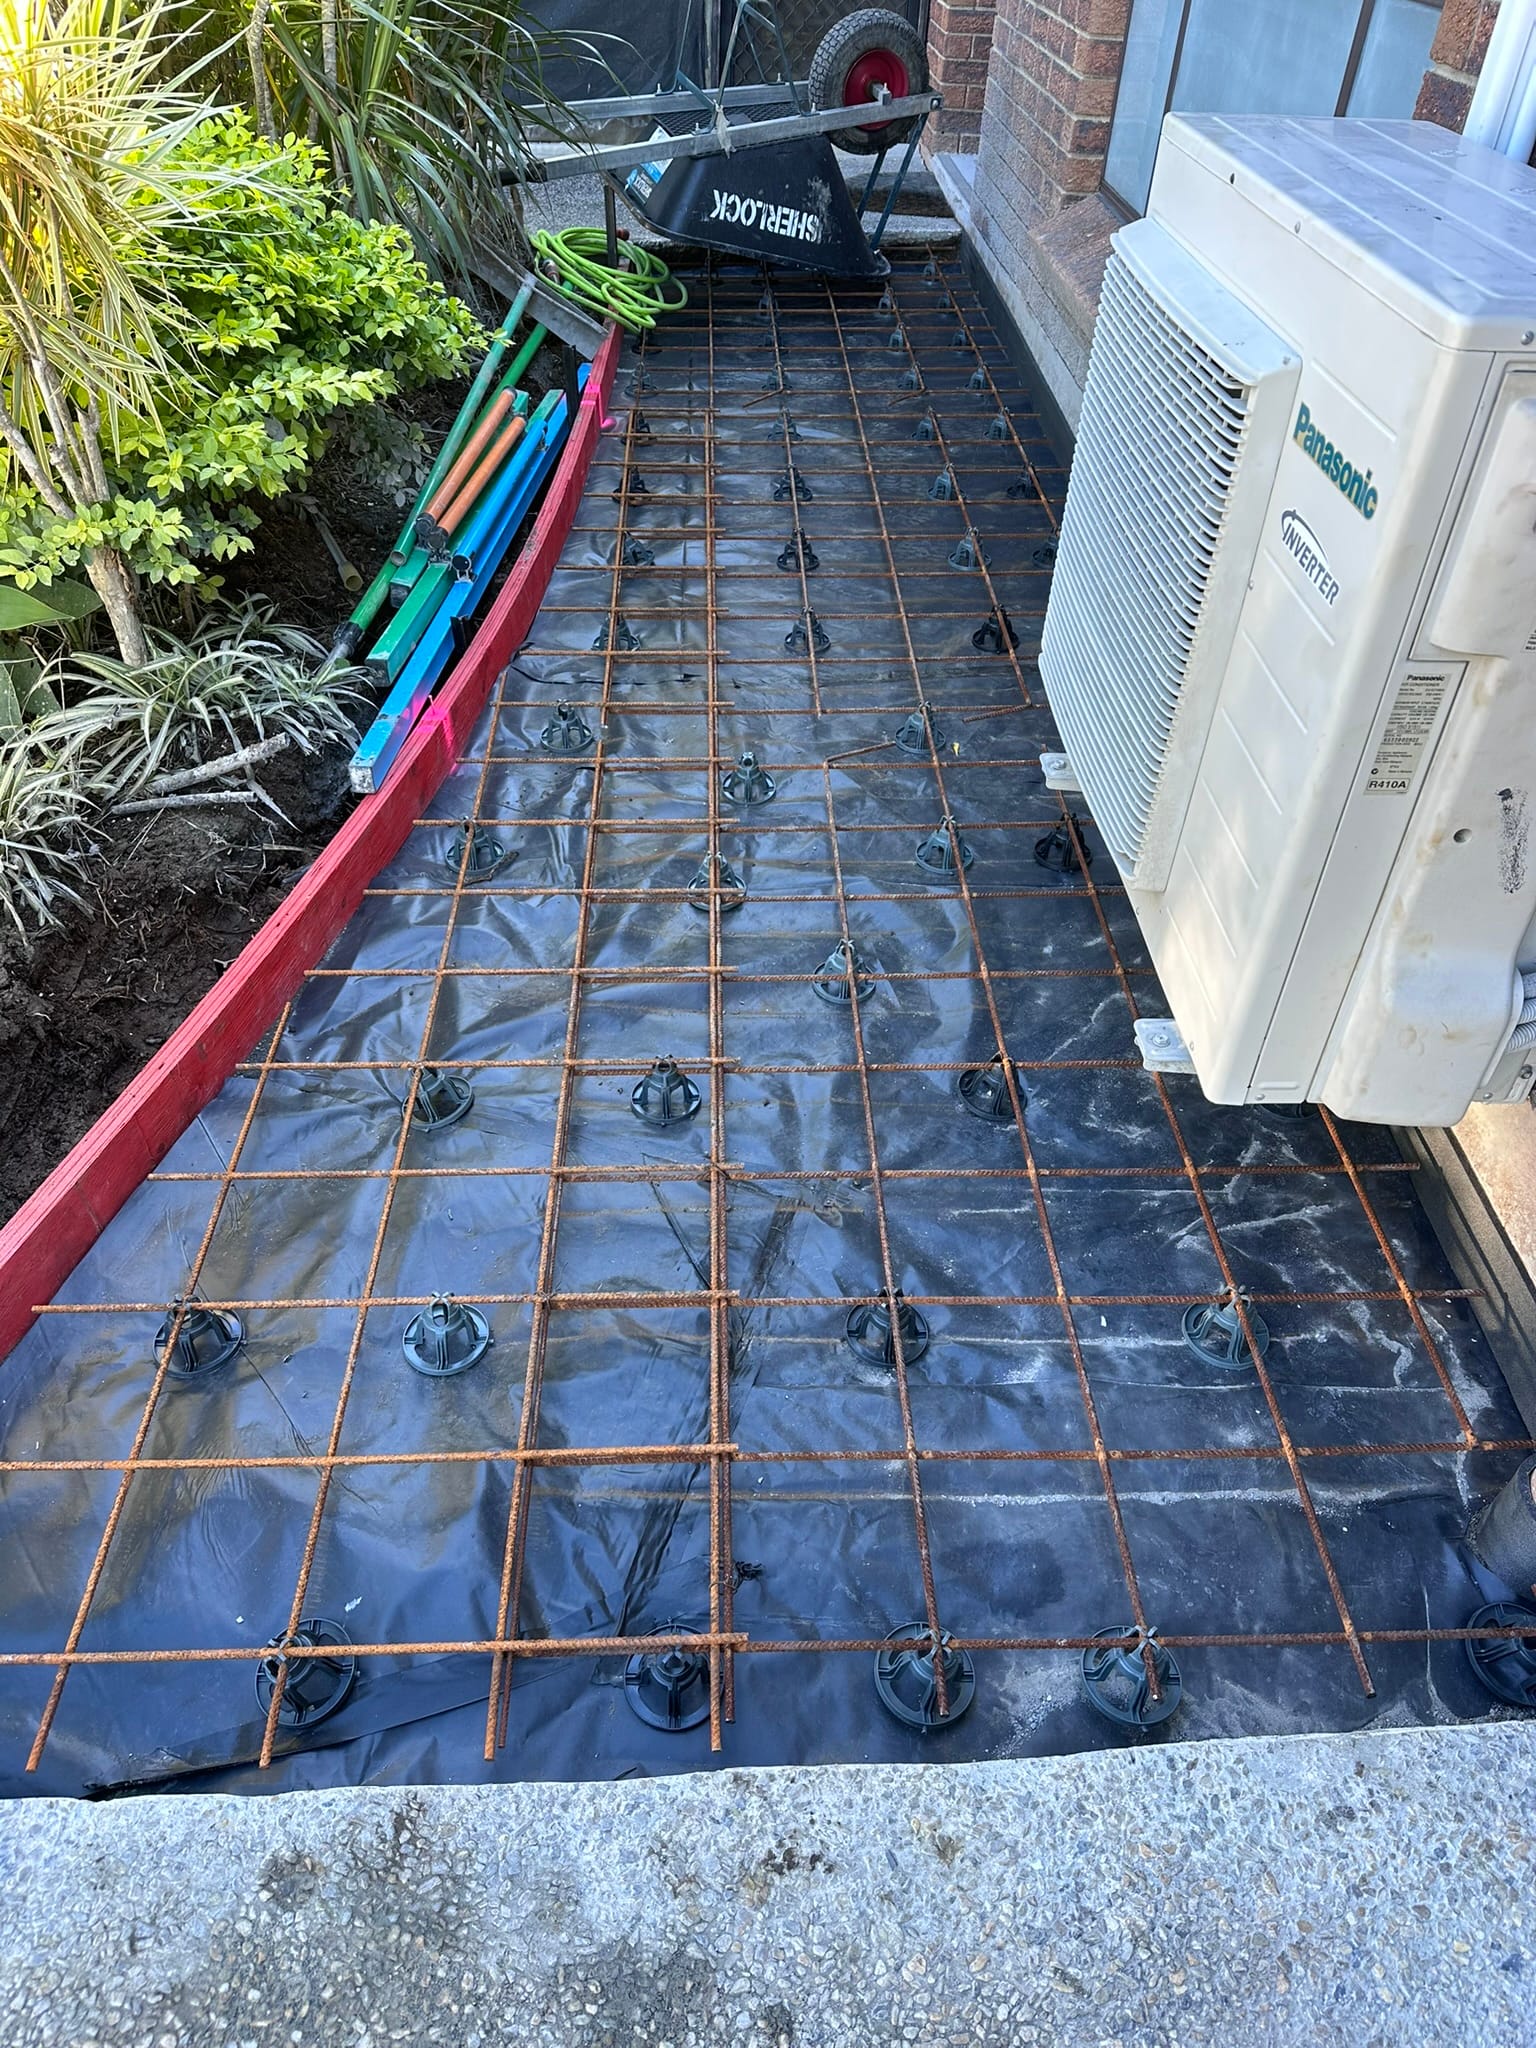
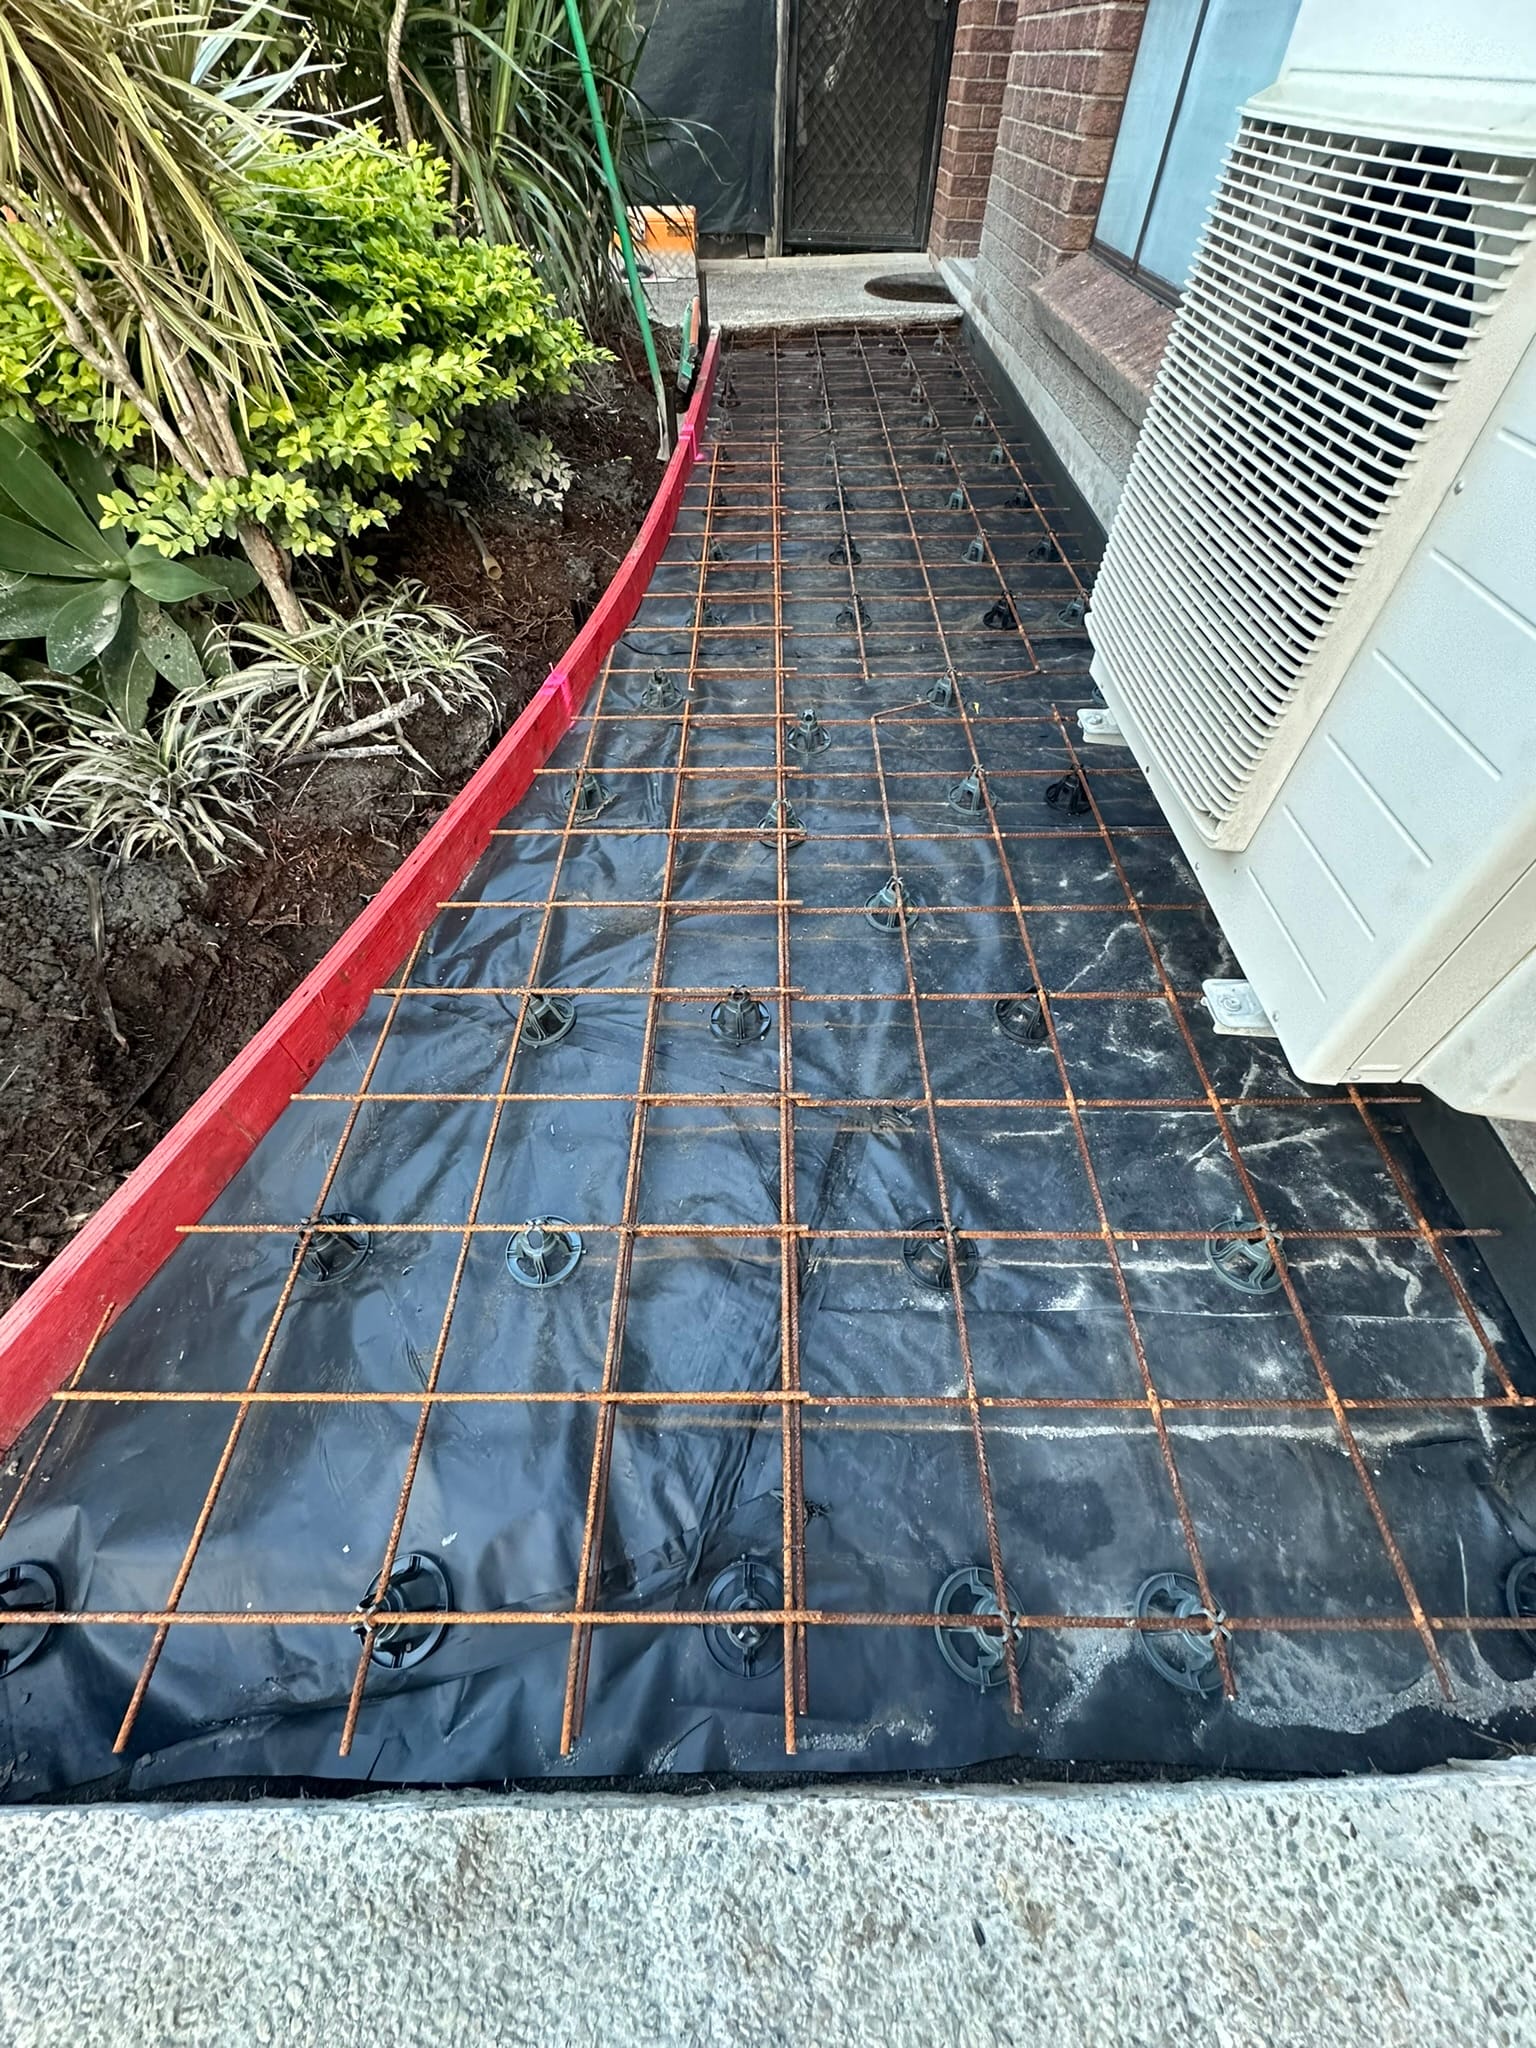
After this we cut and placed the F or SL92 mesh ontop of the plastic ensuring we had 50mm clearance off the edges all round (for reinforcement cover).
Next we tied sheet laps with tie wire. to secure the mesh so it doesn't move from its position during pour and so it maintains its side/edge cover.
After this we installed 50/65 plastic bar chairs. We had the standard bag of 100 bar chairs so we went a bit crazy adding chairs to make it easier during the pour by better supporting the wheel barrows running and placing concrete.
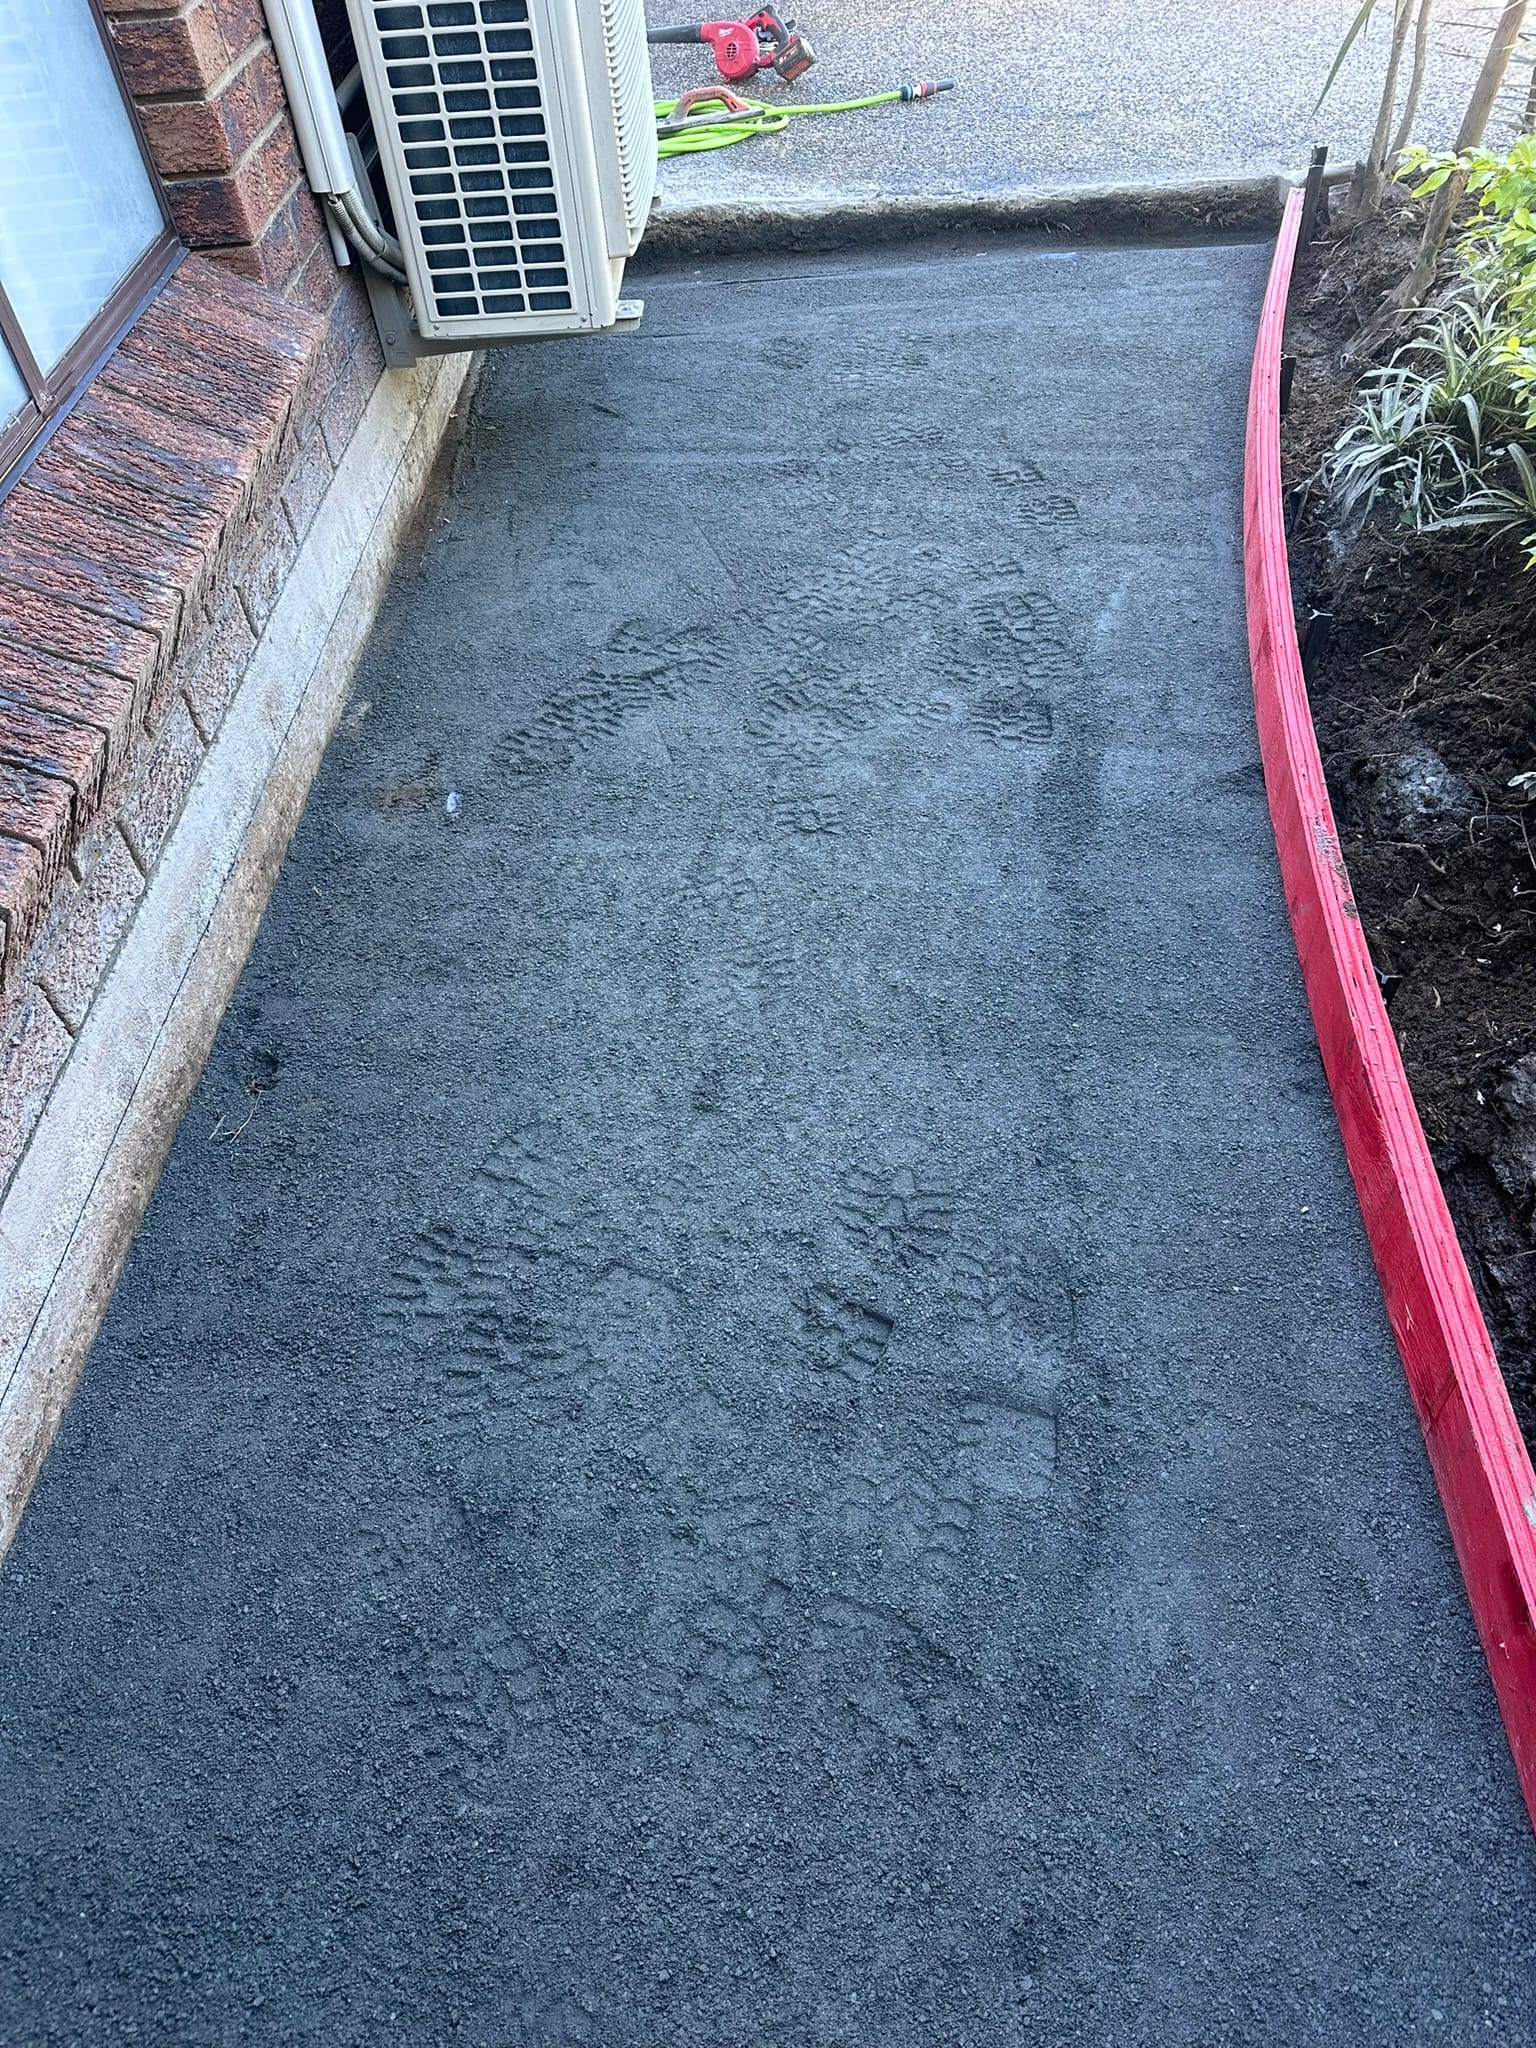
We then marked the edge form every 1.8 - 2m with a nail and spray painted the nail to show where we would form control joints (tooled joints) into the slab post pour prior to surface finishing.
After this we then cut the mesh every 2nd bar where the control joints were located, across the width of the joint. You do this to create a "weak" spot in the concrete to help promote the concrete crack in the preformed joint (under it).
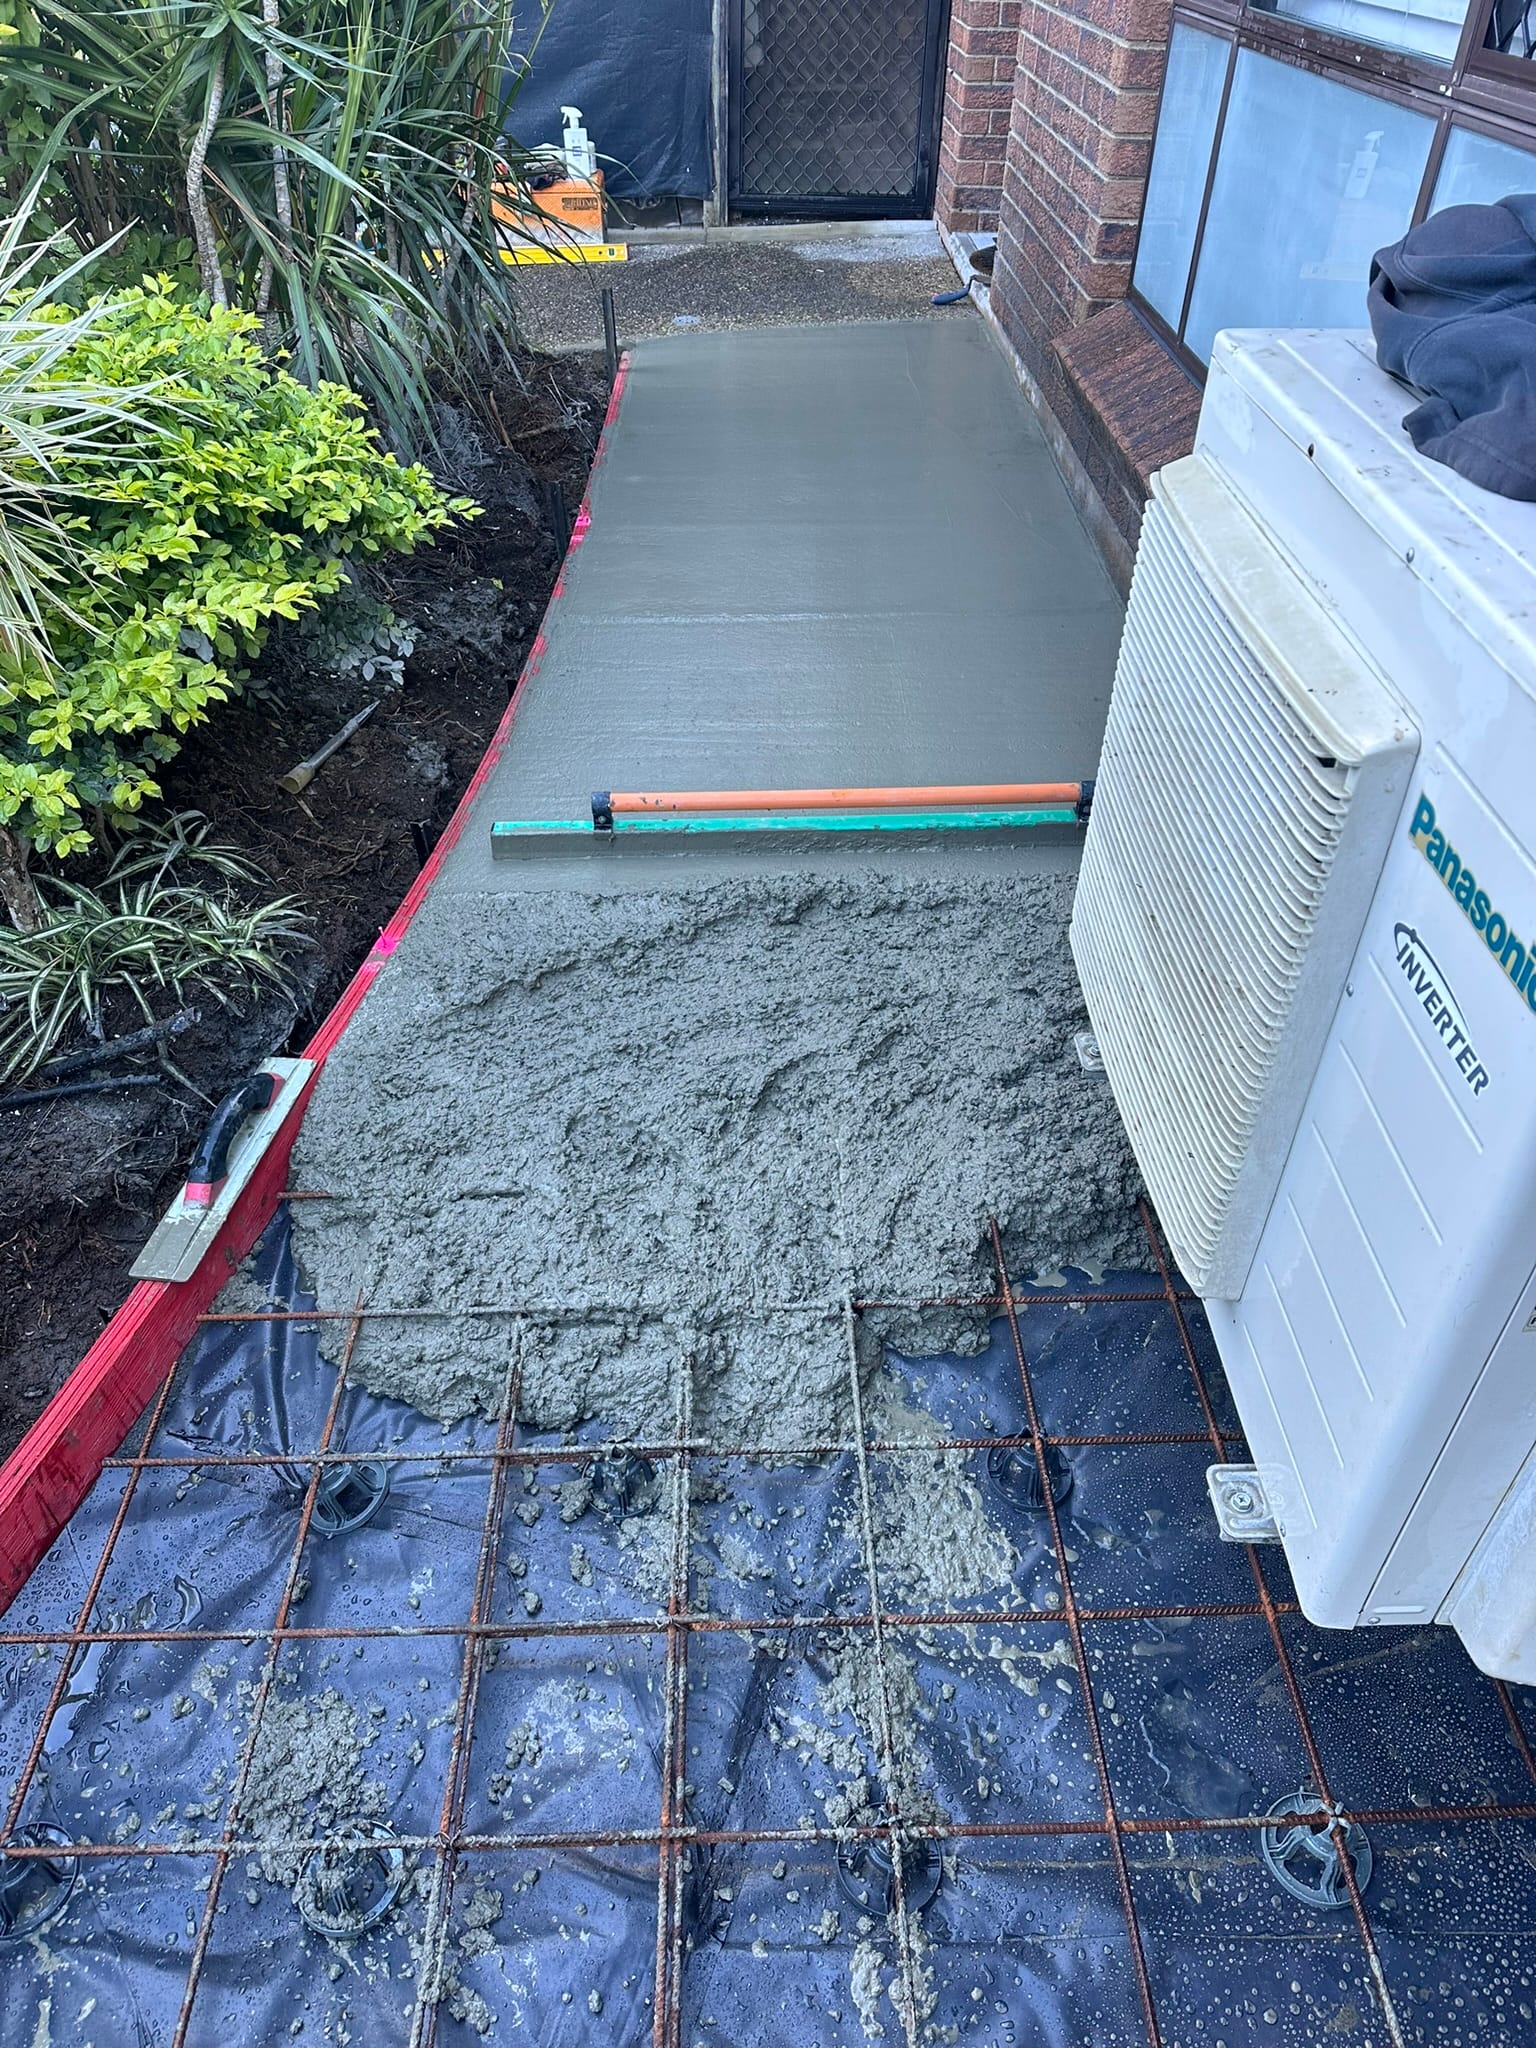
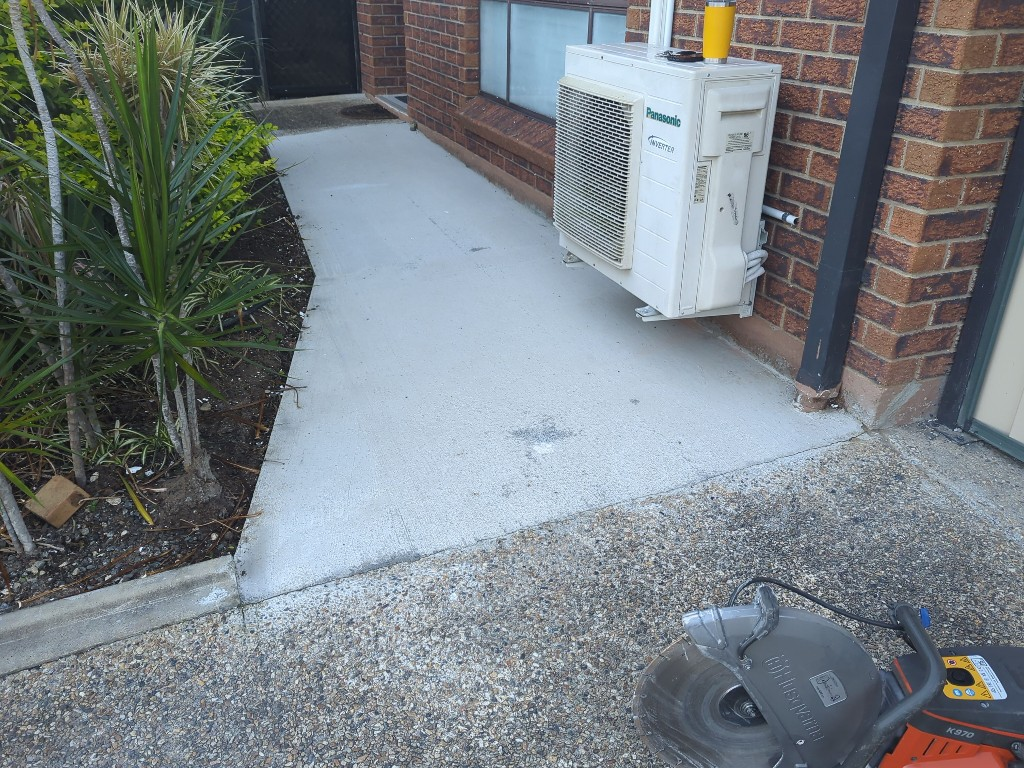
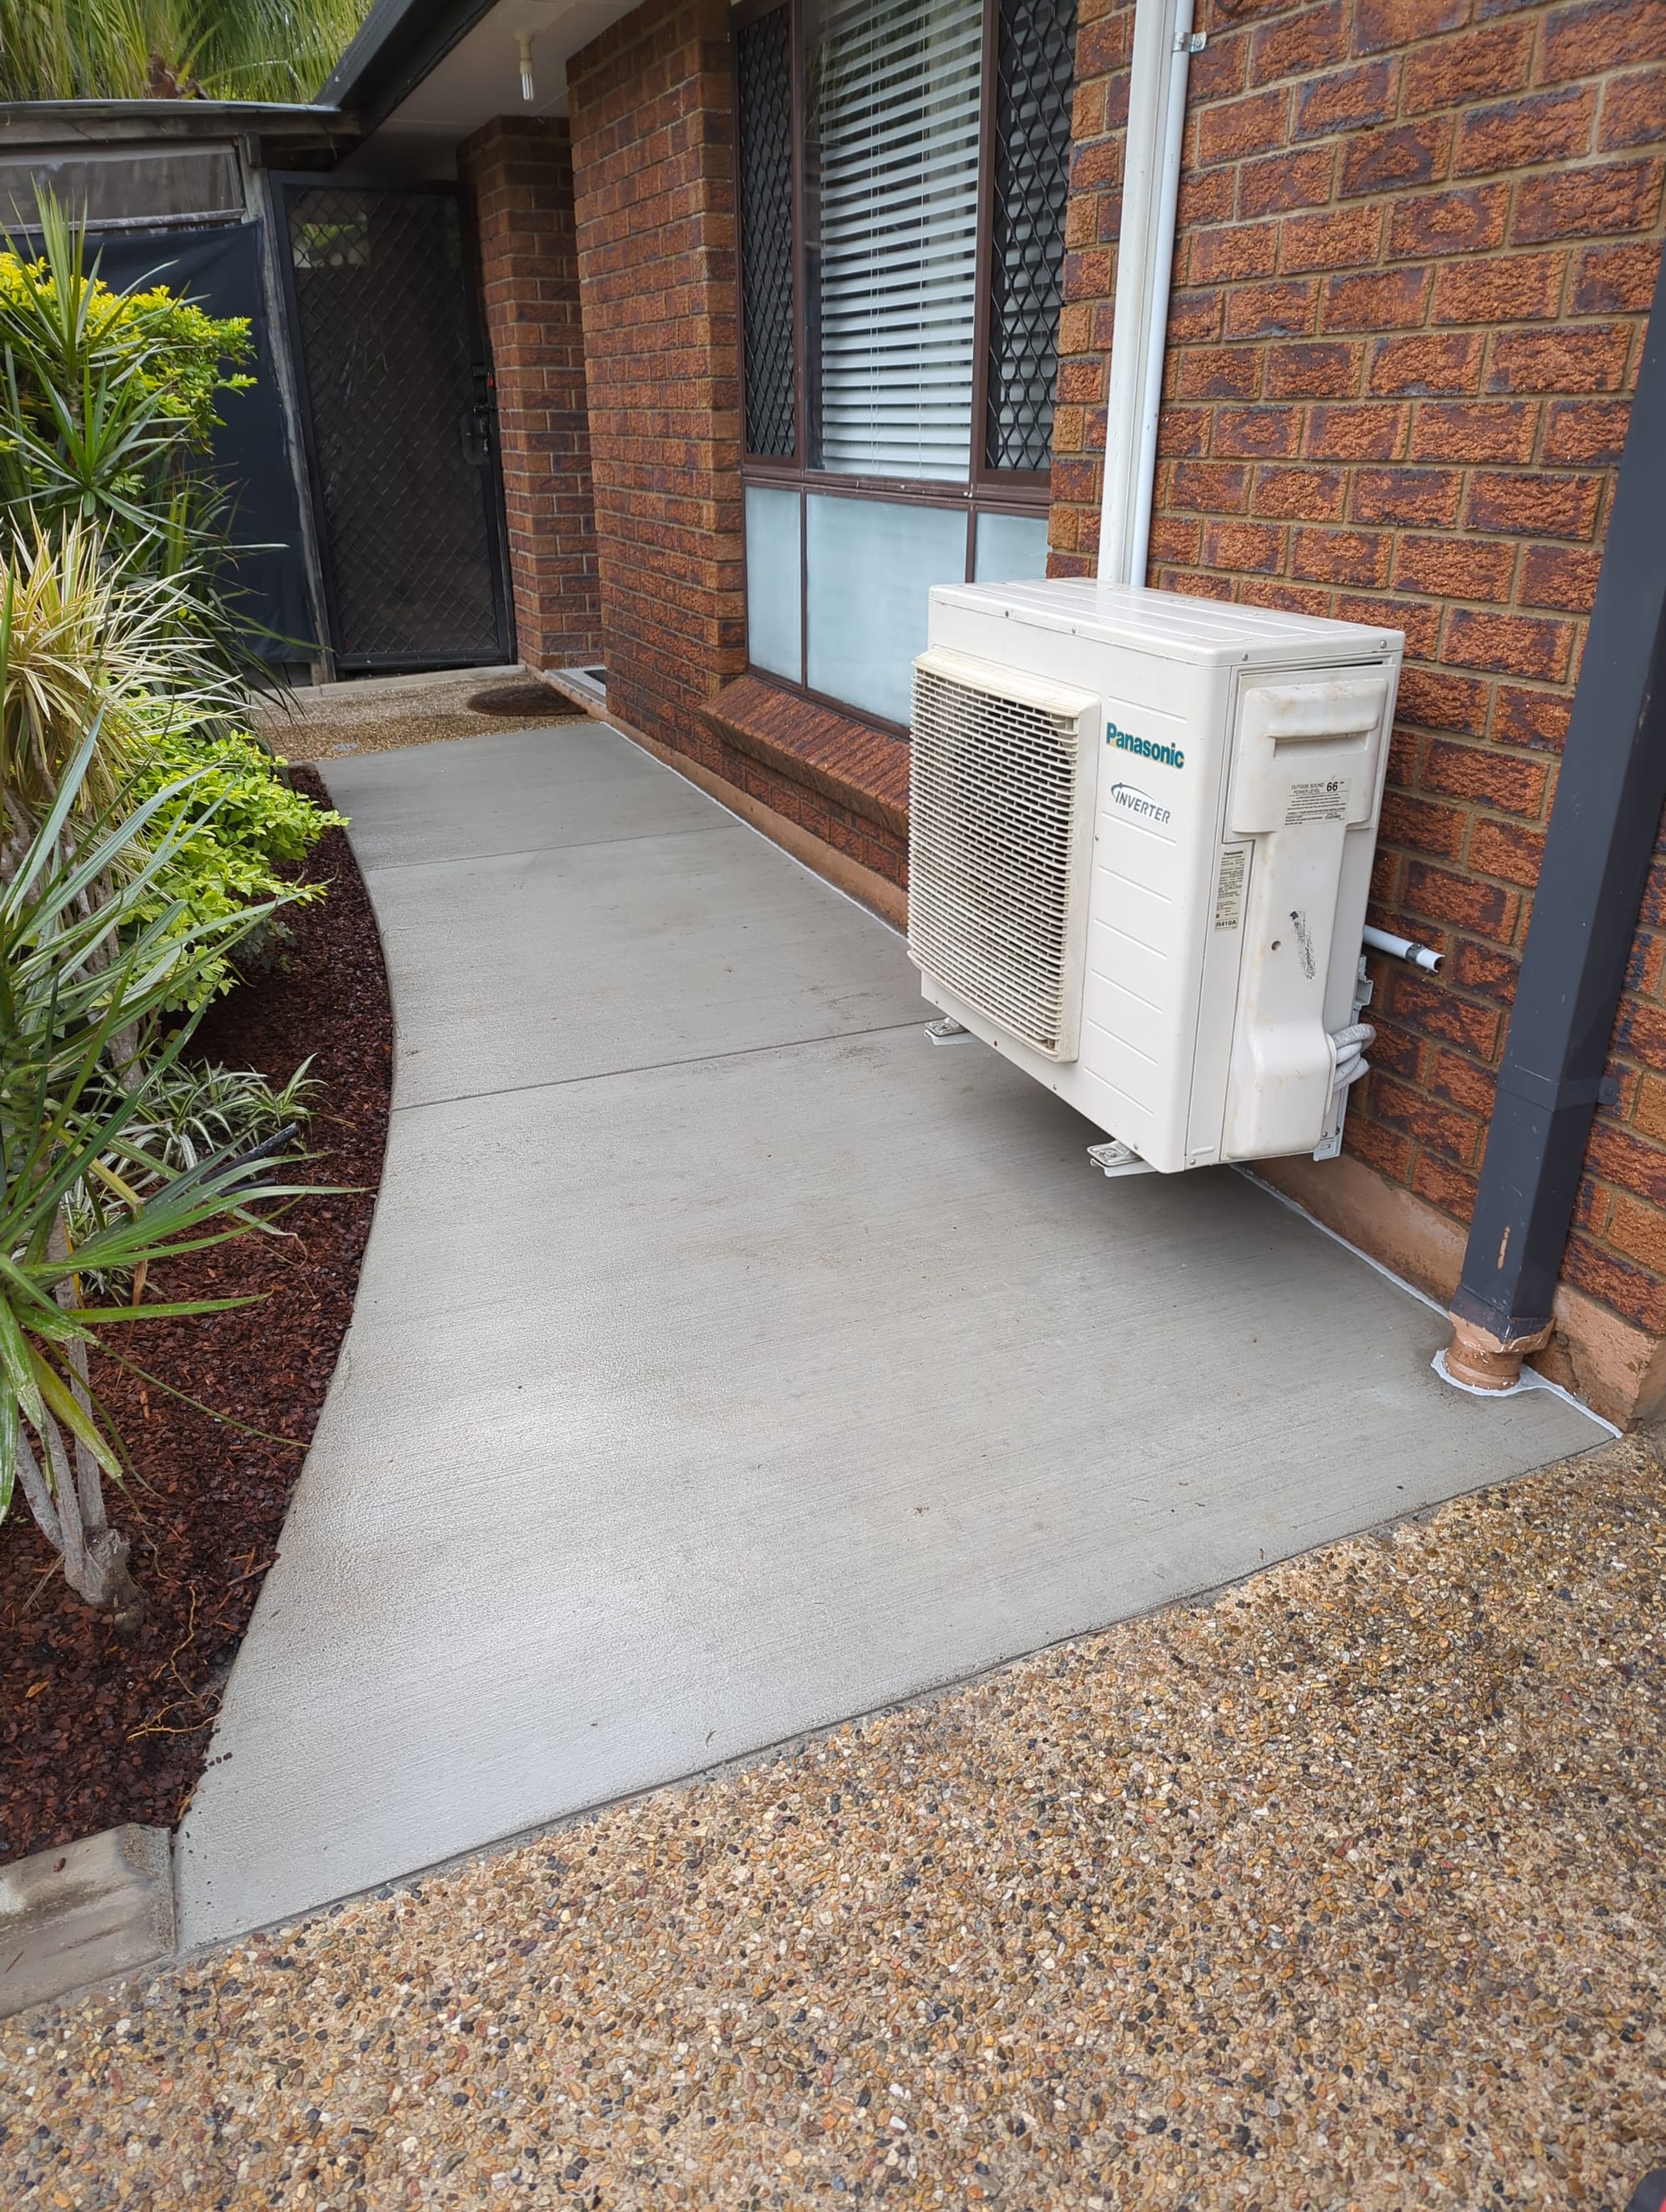
Prior to pour we lightly wet the plastic and the mesh with water was well as sprayed down the house walls and windows. We did not install plastic protection at this job because we had to work around the AC unit so we through it was easier to clean things as we went rather than deal with flappy plastic 😄
Post Pour Photos
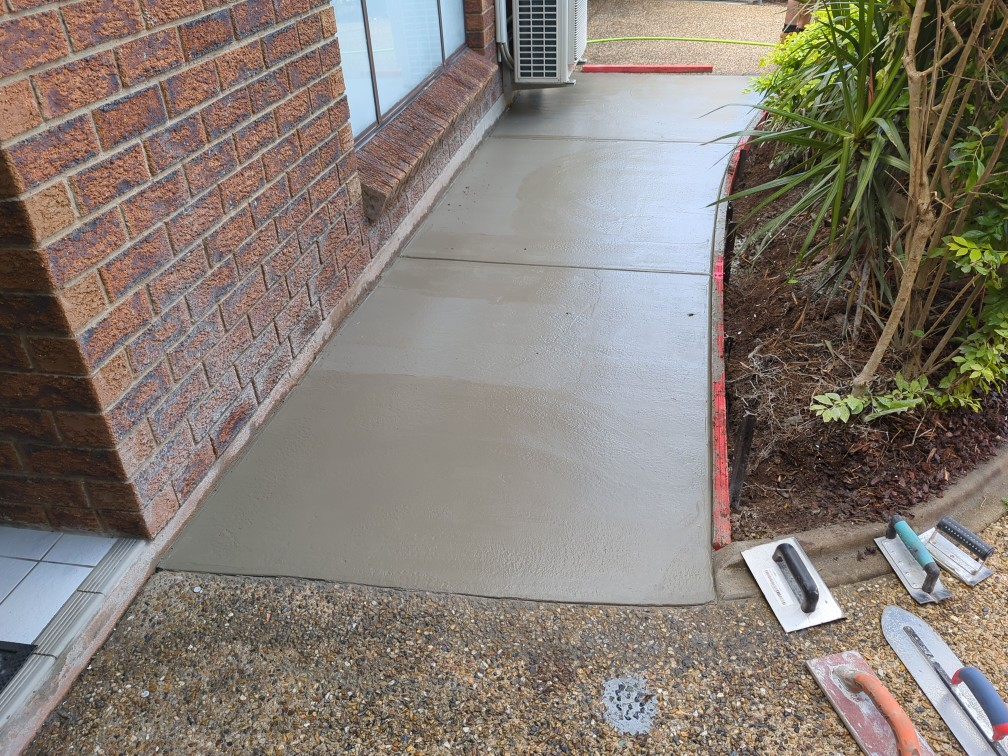
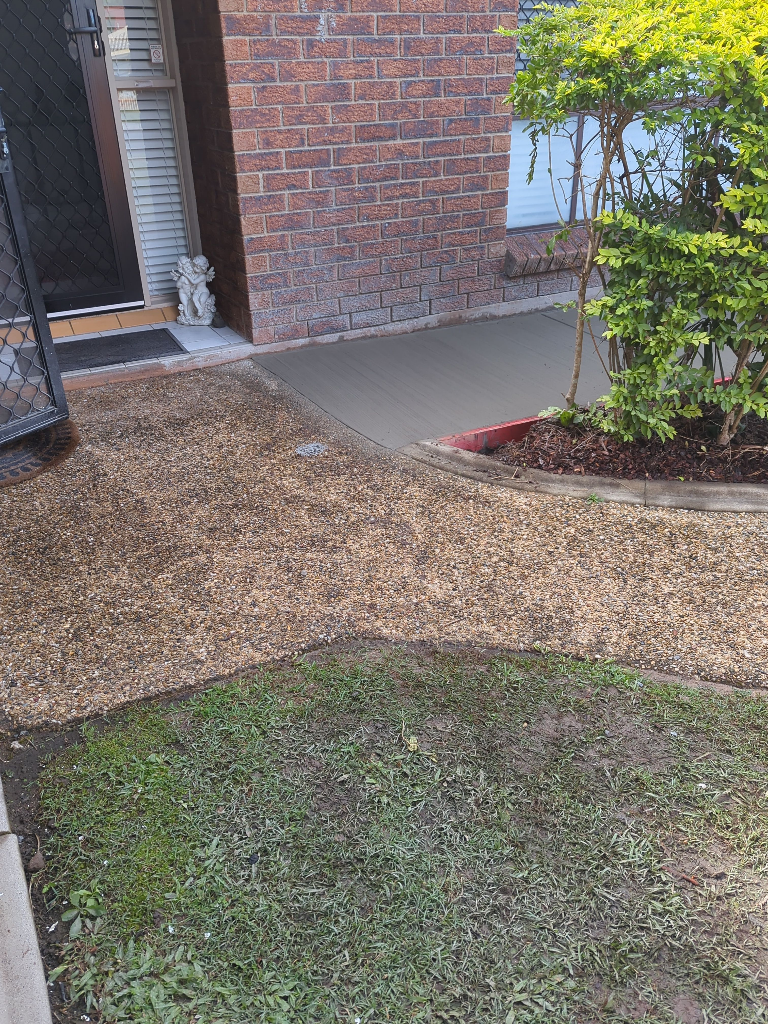

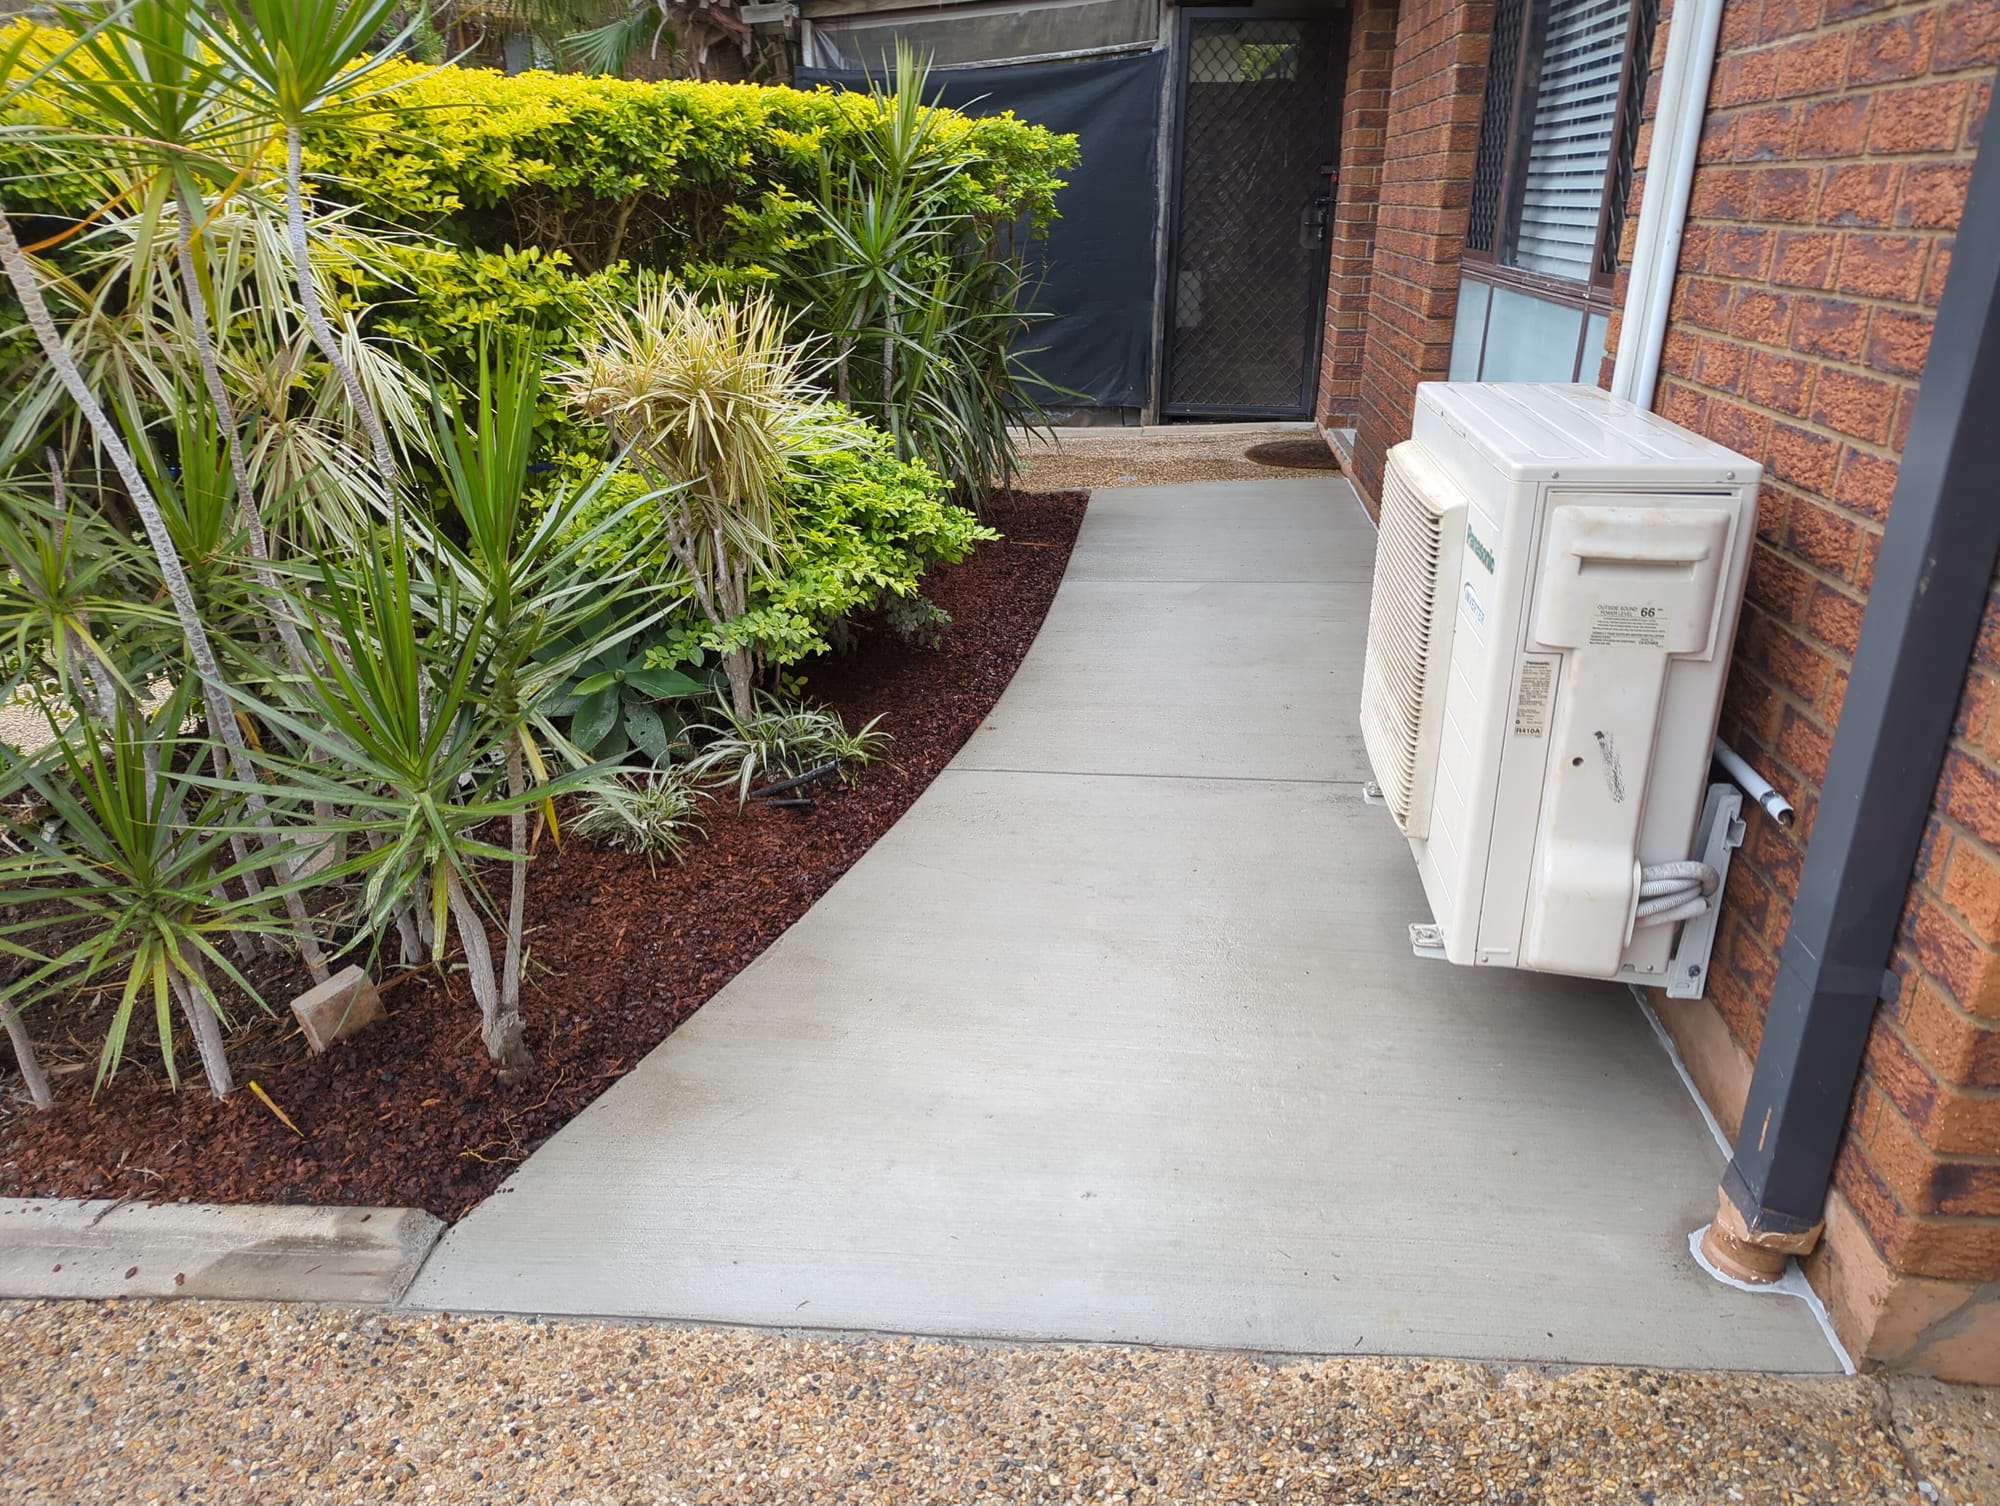
Completion Photos
BEFORE
AFTER

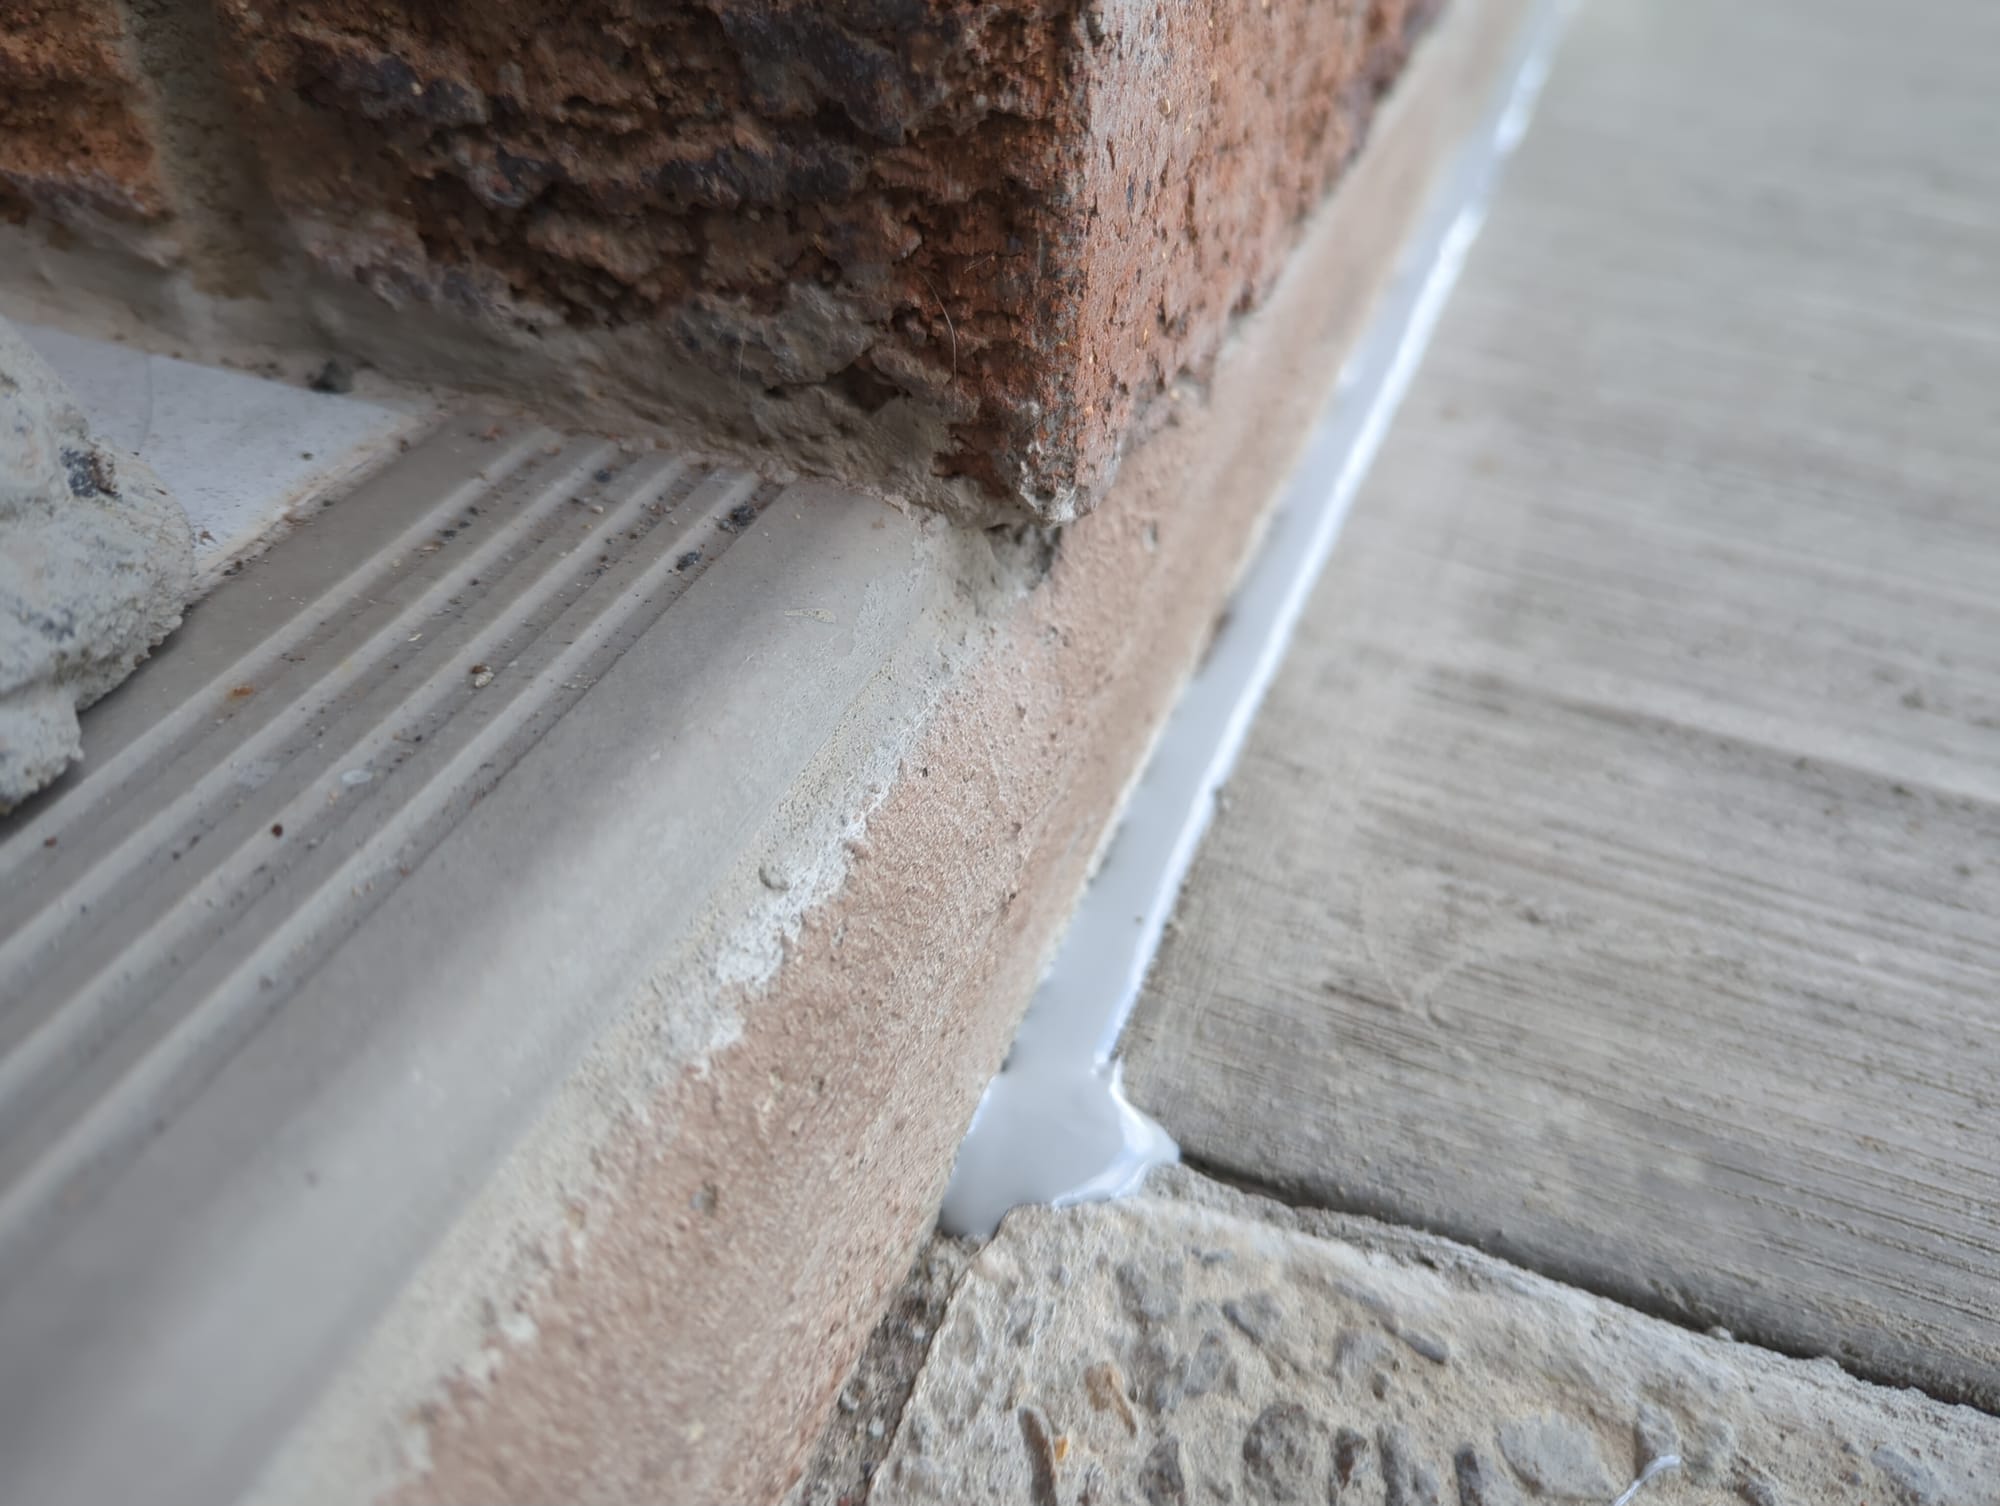
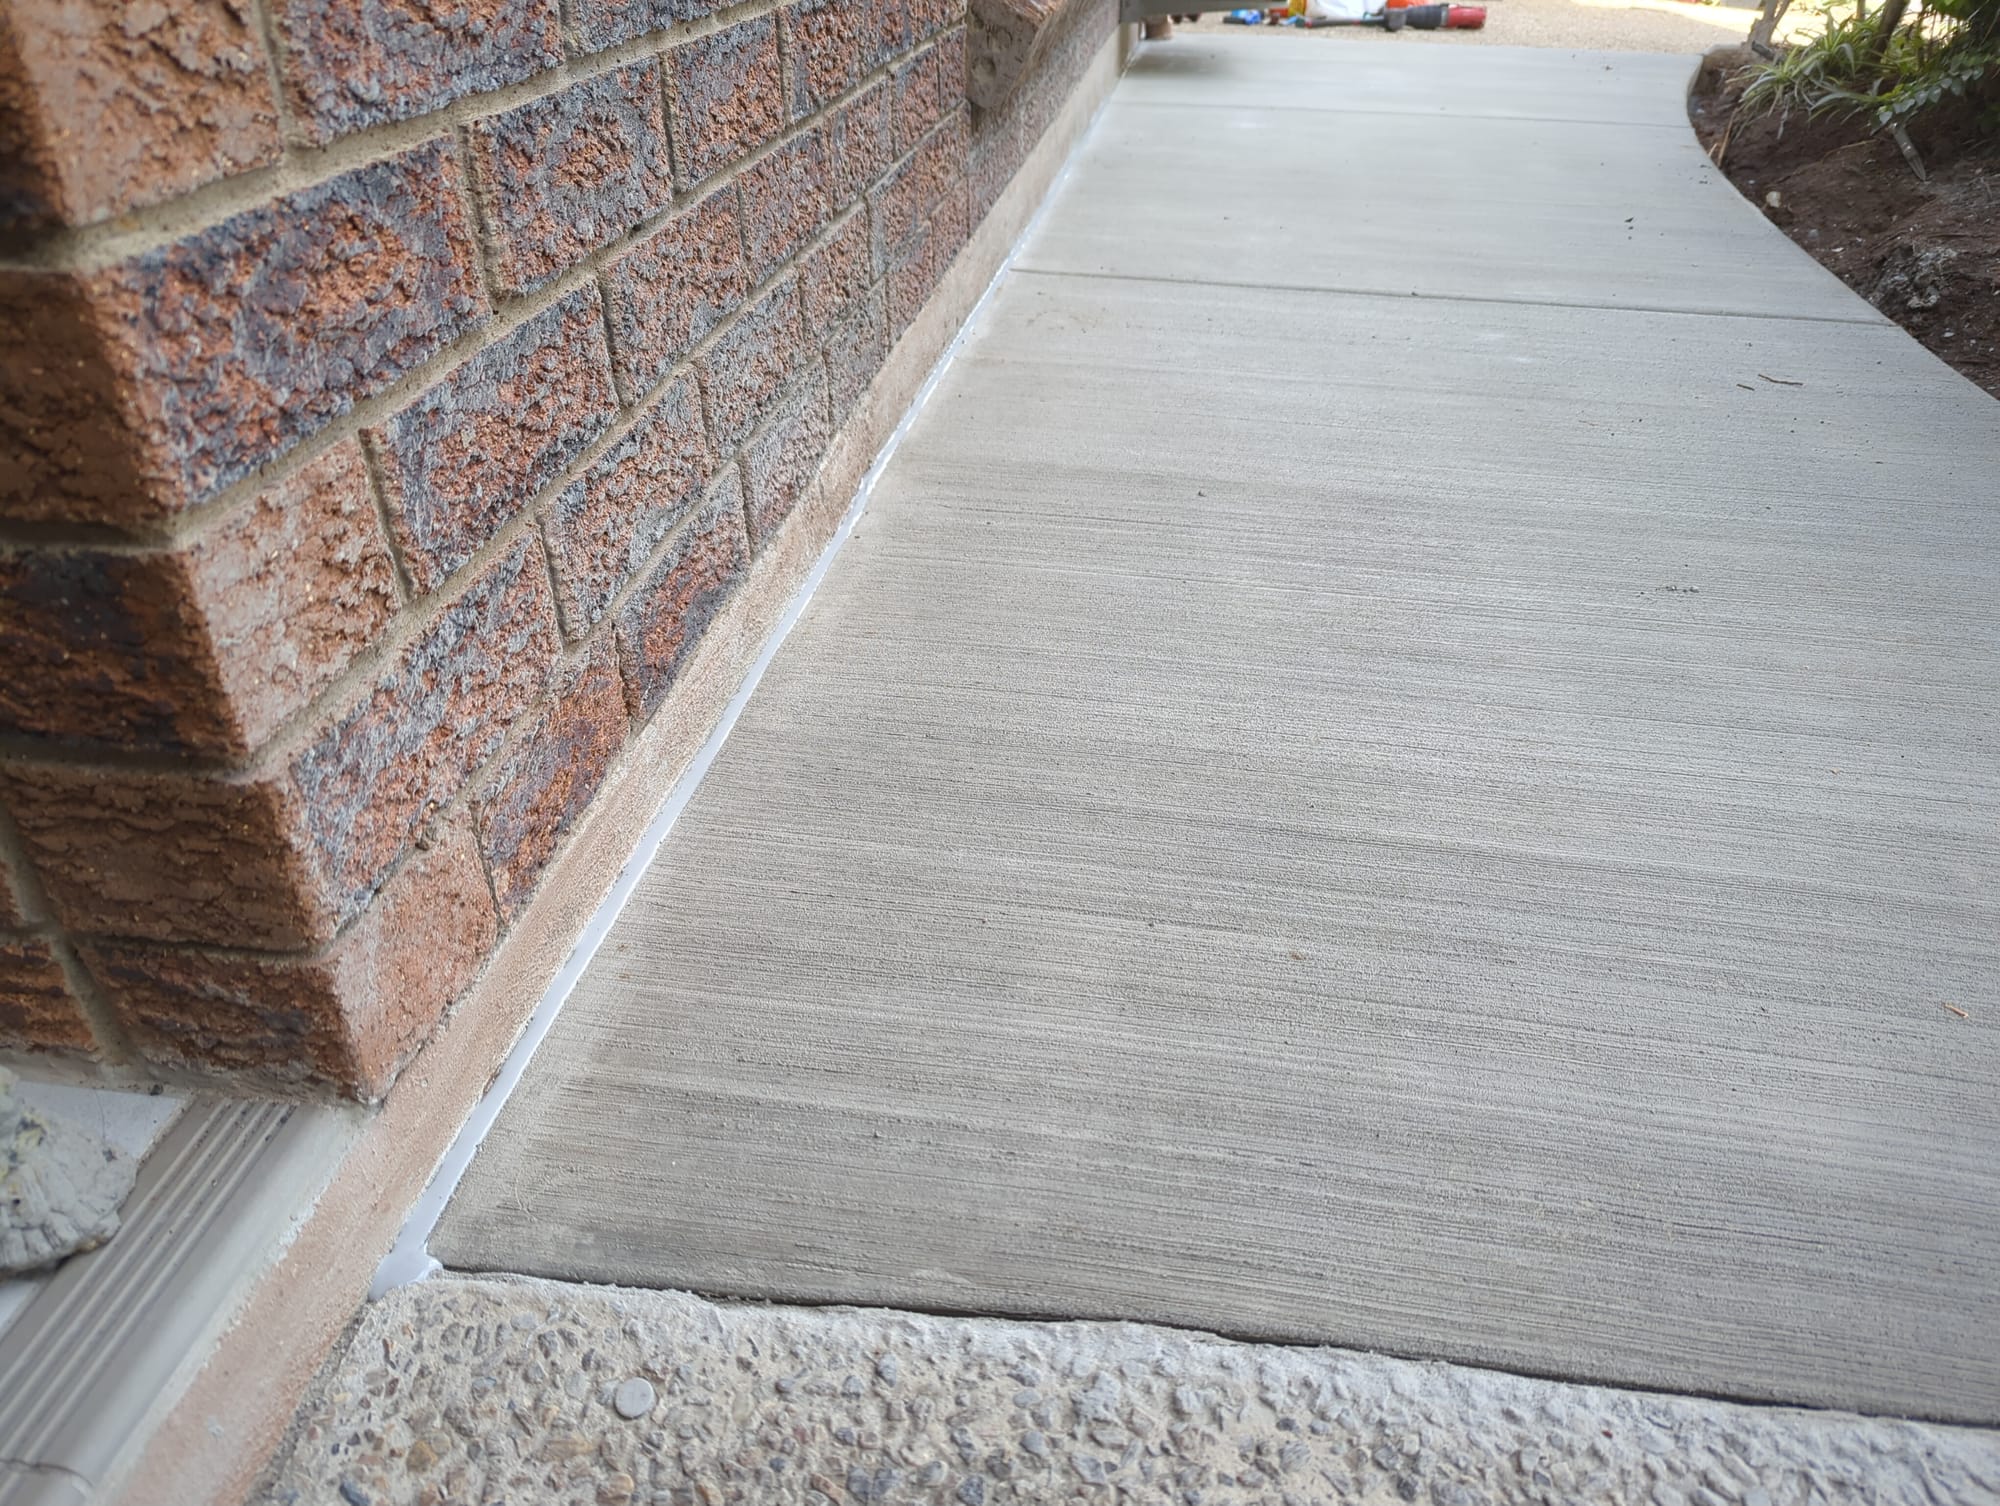
We really like the Soudall 33 SL self levelling polyurethane to seal isolation and expansion joints. You cant buy this from Bunnings but you can get it from trade specific retailers. Te other way to source this product is to call Soudall Customer Support, get in touch with your local rep and ask them who buys frequently from Soudall. Then call this supplier (retailer) and order a box of it. You will have to order a box of 12 when buying from retailers who don't hold the item in stock.
https://soudal.com.au/productlist/soudaflex-33sl/
Why we love this product for the application is you dont need to tape up or tool the joint after application from a sausage gun.
Just fill the joint slowly and to the level you need as you go and once you get to the end your done! No clean up, no sealant all over your hands, shirts and shorts.
I really do not understand why more people are not using this here in AU.
Why you should seal isolation and expansion joints?
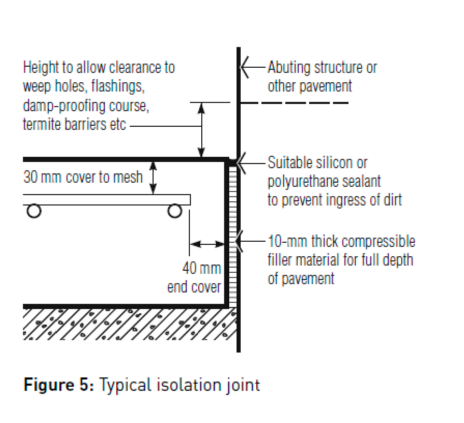
Because the standards say so (Figure 5 above) and because it will save you time and money (and maintenance) on your home. If water is allowed to get between your concrete and a structure it will undermine the subgrade over time. There is a really good video on Youtube explaining this visually, check it out below.
PS: Yes, we polished the air-conditioning unit all round as well.
I hope this was helpful to you in some way. If you like this type of content let me know. We can take pictures when we carry out work or attend sites if you find them helpful.


